I think you should paint it blue . That way you will have a reason for MU and HEP to run with that Ozark boxcab .
What are your plans for bending her legs a bit? Please don’t tell me boiling water as that is more barbaric than just cutting them off!
These figures are actually quite difficult to modify. The vinyl or whatever is soft and always tries to go back to the original shape! Over the years, I’ve tried hot water, applying a soldering iron to the back of the knees, and other tricks, but none were very successful, and some were very smelly.
The only way to modify them that I have found is to cut a V-shape at the back of a joint, bend the limb to where you want it, and fill the area with glue (gorilla seems to work if applied liberally.) You can’t do it if the joint is in the forground - best then to find a figure already in the right position, like my Tinker Bell.
mike dorsch said:
I think you should paint it blue . That way you will have a reason for MU and HEP to run with that Ozark boxcab .
Both these boxcabs are gas-mechanical (or diesel-mechanical depending on which sound profile I choose.) I don’t think they have any ‘power’ to send out on the HEP cables - lucky if there’s enough to charge the starter battery. And I have never heard of MU-ing a mechanical transmission device.
I suppose blue would make it fit with the Ozark, but I’m still thinking orange or dark yellow.
Whatever you decide i’m sure it will be great . What you’ve done so far is top notch . I was thinking this boxcab might have a small gas or diesel generator to power light’s etc. in passenger cars when used in that type of service. I admit I don’t know that much about boxcabs .
in passenger cars when used in that type of service. I admit I don’t know that much about boxcabs .
I’m not sure they were ever used for passenger service - maybe Rooster can prove me wrong! More the backwoods, rundown industrial environment?
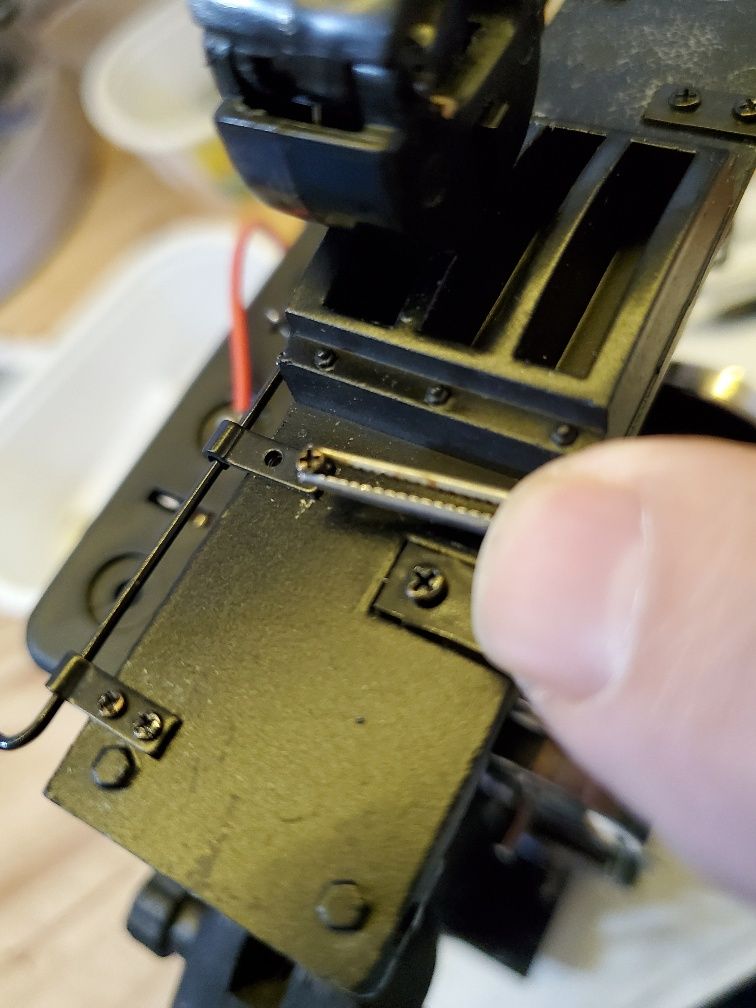
A few days waving the soldering iron got me to the point of a full functional test. Propped the frame off the bench, plugged everything in, and nuthin’. More contact problems with the batteries and the holder. Fixed that and most things started to work. A couple of loose wires had to be reconnected (I find those little screw terminals a pain for thin wires.)
The objective of all these connectors is to be able to remove the electronics when necessary. I even put a plug on the 2 LEDs. The ESC drives the lights and flips from front to rear depending on direction, so there’s a little red LED at the rear.
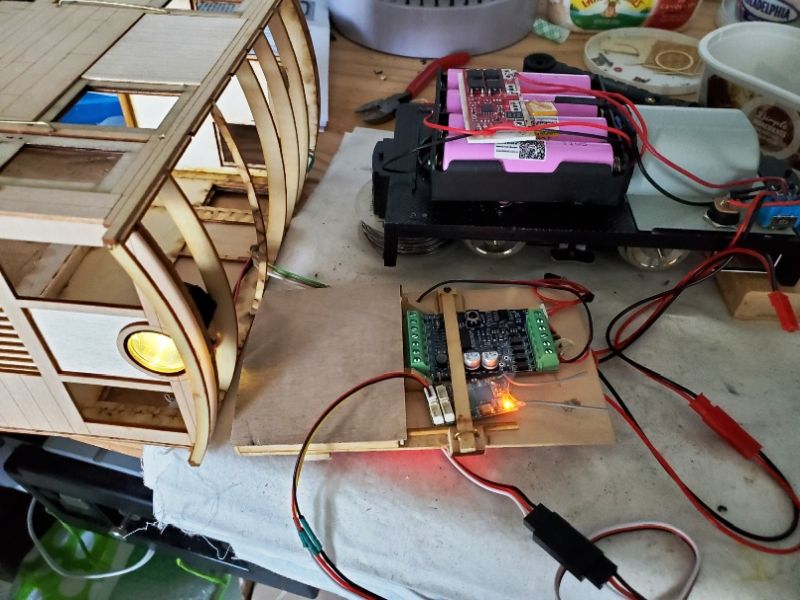
This morning I waved more solder around and tidied up the wires - especially that big servo/receiver lead at the bottom, and the LED feeds which were all different lengths. Then I took it all apart for painting!
There’s one aspect of the construction which I am still thinking about. A bunch of smooth wooden pieces seem to be “metal”; or that’s what the instructions imply. They are indented as if they have bolts or rivets - you can just see them in this side-lit shot on the cover for the wheel area…
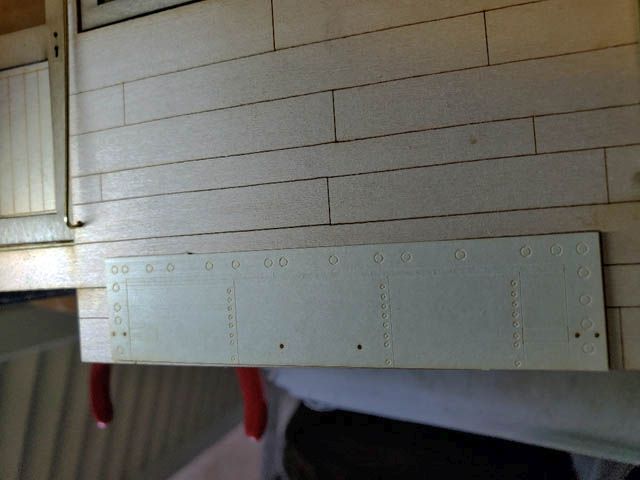
There is a trim ring around the headlight with 8 ‘indent rings’ and I’d like to make them bolt heads but doubt my skill in getting them perfectly positioned. Maybe get the vertical Dremel to drop a spot of glue in the center of each one. These metal covers for the wheel in the pic are crying for me to cut out the strips with ‘indent rings’ and make them into metal straps. Again, small blobs of glue might work.
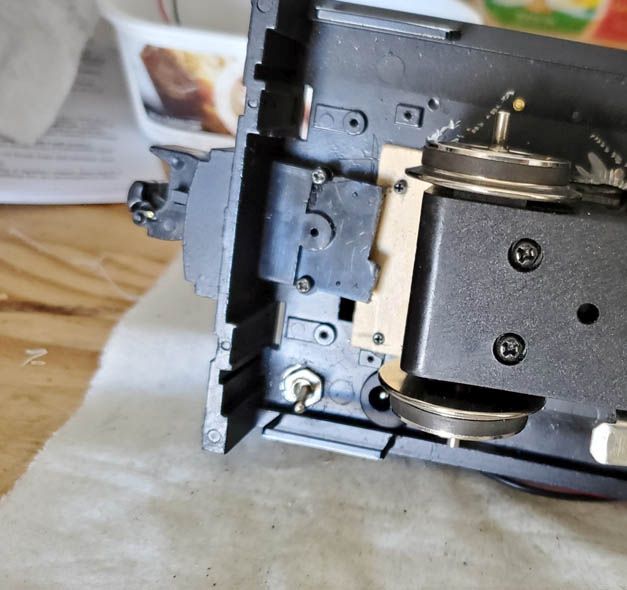
It’s been breezy around here - 20mph winds aren’t good for spraying. So I decided to take a look at the coupler. This second frame had the top of the coupler box, which is a fairly standard type, and I have some Accucraft 1/29th couplers (not sure why) so I dug one out and chopped down the box to fit.
The coupler went through the hole in the end beam, but it is sprung with a little spring that had to be inserted after I put the cover on. I did the Aristo side frame spring trick - tied the spring in thread in the coupler and put it together. Then I poked with a sharp knife until the thread came out.
After all that, it seems a bit high compared with my height gauge. In addition, I put it on the front, not the back - sigh - so it will have to be removed and moved. I may have to switch to a different coupler which will hang lower. Or just drill out the end beam and use a link-and-pin.
At some point I will have to glue on a roof, so I masked the beams to give it some bare wood to attach to instead of paint.
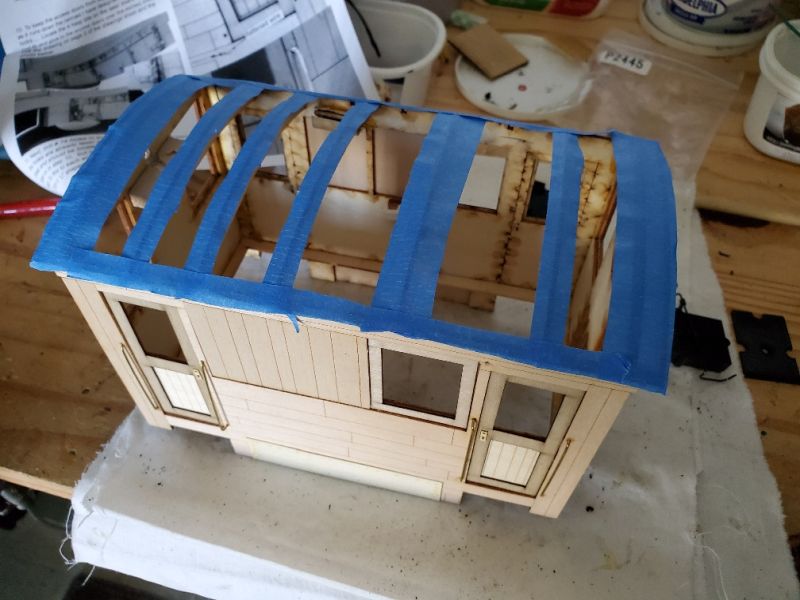
Calm today and cooler with less humidity - time to paint! A coat of grey primer went on fine, but showed up the fuzziness of the wooden body. Not a problem for the interior, but I’d like to give the outside a sand down before the final coat.
What do you think of my ‘vintage teal’ interior?
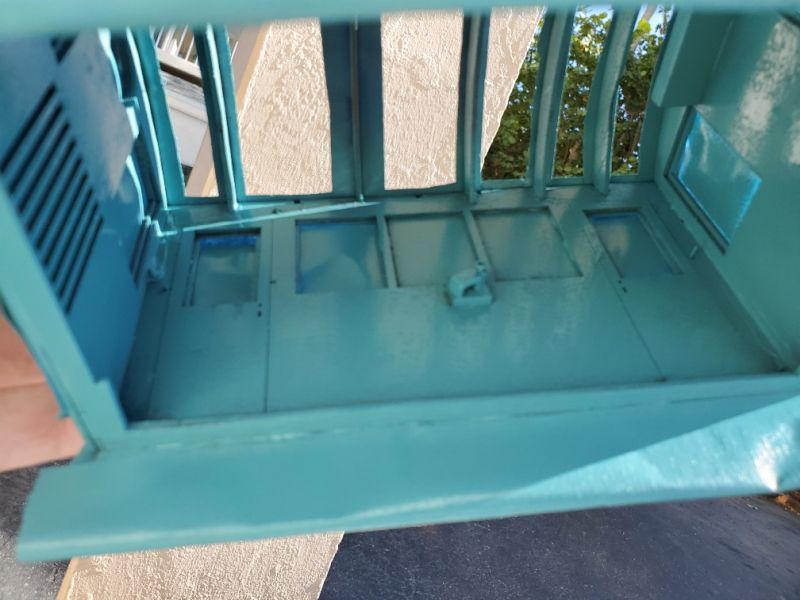
I, for one, like “vintage teal!”
I like the “sun roof”…(https://www.largescalecentral.com/externals/tinymce/plugins/emoticons/img/smiley-wink.gif)(https://www.largescalecentral.com/externals/tinymce/plugins/emoticons/img/smiley-cool.gif)
Ken Brunt said:
I like the “sun roof”…(https://www.largescalecentral.com/externals/tinymce/plugins/emoticons/img/smiley-wink.gif)(https://www.largescalecentral.com/externals/tinymce/plugins/emoticons/img/smiley-cool.gif)
Yeah, well, the last part to be fixed is the roof. It won’t be removable then!
Pete Thornton said:
[SNIP] I find those little screw terminals a pain for thin wires.
Sometimes I’ll strip the really thin ones quite long, then fold it back on itself a few times before tinning. This can create a weak point where the wire goes back to regular size, but if handled carefully does help the screw terminals to retain the wire. Alternately you could add a very short length of solid wire to the end of the thin stuff.
I usually have the opposite problem. I’m using heavier wire for better current handling capacity and the tinned end is too fat for the terminal. In this case I do the opposite, cut away half the strands before tinning the stripped end…
mike dorsch said:
I think you should paint it blue . That way you will have a reason for MU and HEP to run with that Ozark boxcab .
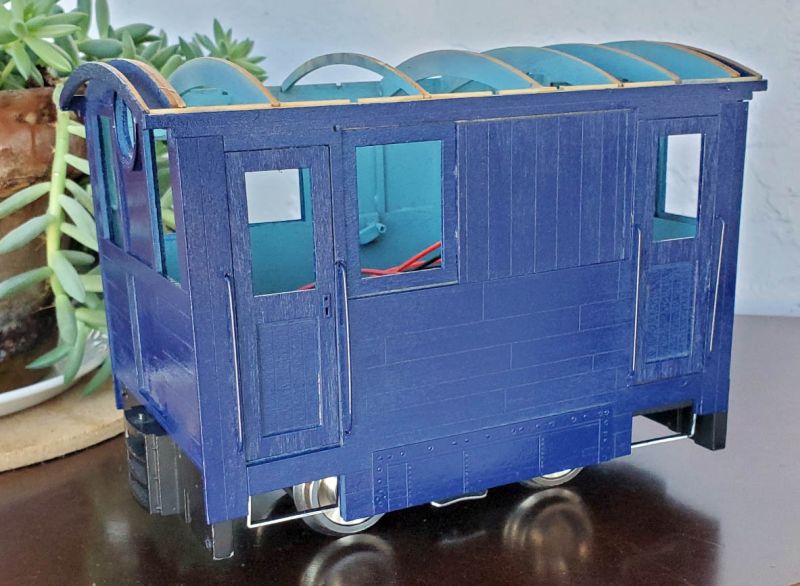
Gloss Navy Blue. Looks very sharp. I picked out the indented rivets with a blob of wood glue, and they do show up. I bet a little wash of flat black would make them pop even more.

Pete Thornton said:
What do you think of my ‘vintage teal’ interior?
I like the hue.
Nice!
If you have a Davenport gas-mechanical, or this kit, do not remove the cut levers from either end. I took them off thinking they would get damaged when I started cutting metal. That part is easy, but replacing 8 tiny (1mm?) bolts on each end - without losing any - was a serious hassle.
God knows how many screws I lost in the process. I decided the other end is not getting a cut lever.
Looks good!
Nice work, those are screws not bolts and a screw starter makes starting them quite easy and tightening them with a jeweler’s screw driver then works a treat (https://www.largescalecentral.com/externals/tinymce/plugins/emoticons/img/smiley-wink.gif)
Gary Buchanan, FOG said:
Nice work, those are screws not bolts and a screw starter makes starting them quite easy and tightening them with a jeweler’s screw driver then works a treat (https://www.largescalecentral.com/externals/tinymce/plugins/emoticons/img/smiley-wink.gif)
Gary, what’s the difference between a screw and a bolt in this instance? Both screw in to the threaded hole in the chassis. Not sure what kind of ‘screw starter’ you are referring to for a tiny bolt/screw like this. I have a small grabber which will handle 2mm screws/bolts, but these just got sucked inside it! That’s why I had to use the tweezers. I have plenty of jewelers screwdrivers - in fact my Wiha goes down to Philips 000.
Edit: A quick google produced this, which is now on my birthday present list for my kids to buy.
https://www.micromark.com/Micro-Screw-Starter-for-Phillips-Screws
I like that color. And a real sparing wash of black would make the details pop.