Large Scale Central

Rehab of the West Escap`e Bridge

Jon Radder said:
Camping trips are a great chance to get caught up on modeling projects.
I build models on my picnic table in the back yard all the time. I was at a campground this weekend too. But never thought to bring a modeling project with me. I will next time. Great idea. Why didn't I think of it ;)

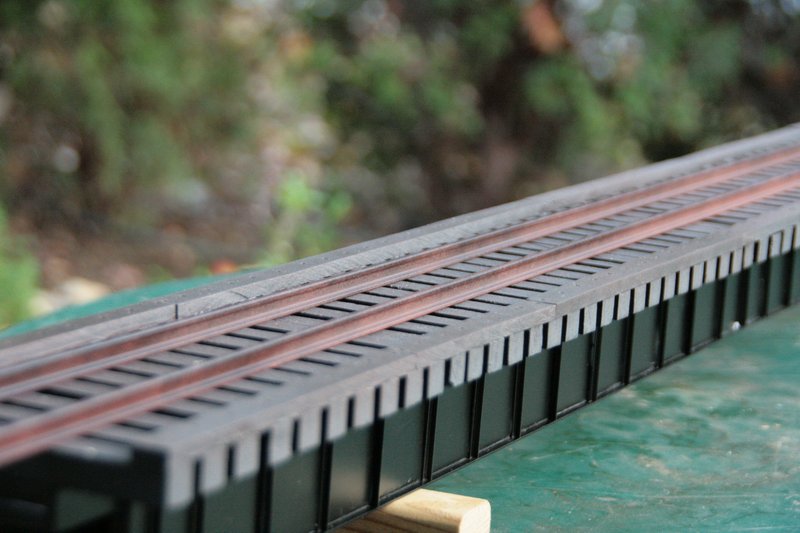
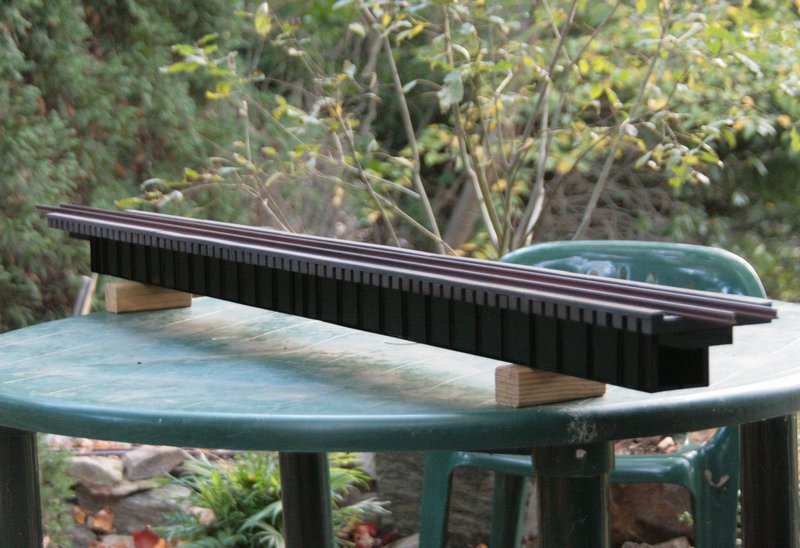
The bridge looks great.
Ralph

That is a nice bridge forming up. I cannot wait to see how you do the guardrails.

Next time you go camping you should bring a loop of track and run some trains.

Jon, that is really looking great!

John Miller wrote: “I cannot wait to see how you do the guard rails”.
Bet our resident Friar can’t wait as well. :slight_smile:

John Miller said:
That is a nice bridge forming up. I cannot wait to see how you do the guardrails.

Jon Radder in Calling all bridge inspectors said:
I’m not planning on guard rails. Several of the prototypes that I looked at don’t have them, and because this is a lift-out they would add more complexity to that function.

Pressure from Fr. Fred aside, there will be no guard rails. I know him well and he doesn’t scare me :slight_smile:

(http://i45.photobucket.com/albums/f72/Shortybear/The%20Railroad/July2007008.jpg)

(http://i45.photobucket.com/albums/f72/Shortybear/The%20Railroad/July2007002.jpg)

(http://i45.photobucket.com/albums/f72/Shortybear/The%20Railroad/July2007004.jpg)

(http://i45.photobucket.com/albums/f72/Shortybear/march2010001.jpg)

NS has run stack trains too Hagerstown MD from Rutherford Yard PA over fully welded rail and NO GUARDRAILS for years before installing them on one bridge the other still has none. :wink:

Not much progress this week. The price of camping with young kids is the cold you catch from them. Didn’t feel like doing much more than sleeping for most of the week, but I did get the entire project painted. The “wood” deck is completely painted and weathered, the “girder” has it’s base color but needs a little dirt and rust; rail is painted and weathered ready for spiking.

I need to put in an hour or two at work today. If there is light when I get home I’ll take some pictures.

Pictures finally. L to R: New Girder, Old Bridge & Track, New Deck, New Track…

Simulated assembly…

Comparing Old in foreground to New in background…

This is a lift-out and is made from one 5 foot section of track. Where the track transitions to the existing roadbed standard Aristo ties will be used.

I was going to start spiking track but it was just too nice an evening not to just to sit back and enjoy a fire…

Left to do Spike rail to the deck, Letter the girder; Weather the girder; Attach the deck to the girder; Clean the rail tops.

Thats gonna look real nice once its done, Jon

Rail spiking pictures…

I don’t have a fancy spiking tool and gauges. I made my gauges from threaded aluminum rod and nuts that I had on-hand. The spiking pliers were made years ago by grinding out some old needle nose pliers with a Dremel. The nail set and hammer drive the spikes home after being pushed in with the pliers. I decided to spike every other tie alternating rails with only two spikes per tie. There are a coupe of spots that this pattern is broken, just to make it interesting. At each end the first tie of the deck has both rails spiked with 3 spikes each. I start the skip pattern after the second tie. The deck section was hard to handle before the rail was added because it was so flexible. The rail has stiffened it up nicely.

Neat idea with the gauges. Never thought of making them that way. But I already bought 8 plastic ones and another 8 aluminum ones.

(http://www.largescalecentral.com/chat/emoticons/good.gif)

That looks great Jon. I like the track gauge idea. Ill have to use that trick when I start spiking my track. What size spikes did you use? You should put that in the tips section of genereal dis.

Thanks guys. Shawn, I believe the spikes are 1/2". I bought them years ago from C.O.C.Ry. who has gone out of business.

I’m not sure how I came up with the gauge idea. After looking at a few ways of doing it it looked like the threaded rod would give me the best accuracy with the tools I had to work with. I might try making a 3-point from PVC some time too.

Looks good Jon. Neat idea on the guages

Excellent! …(rubbing hands together)
:slight_smile:

Temporarily placed the bridge and took some pictures of the test train. Why the bridge is named West Es-Cap-E…

From the outside…

Having this bridge as another photo spot is going to force me to clean-up the wires and junk in this area (Marilyn’s ulterior motive to supporting my work on this project)…

I’m thinking some Larry Mosher style PVC abutments would look good too.

yea, abutments would dress it up

Why isn’t the HOSE on the HOSE reel?

Lettering layout test…

I spent the last day or so deciding on fonts, size and working out the layout. This design won and was printed full size for test fit. Good thing I did 'cause the first time around I had the orientation of the rectangles wrong. Tomorrow I’ll give a cut file to the Art Director at work and see if he can cut me a set in white vinyl.

David Russell said:
Why isn't the HOSE on the HOSE reel?
'Cause the HOSEr who lives here never put it back last time he used it !