(deleted, post showed up on wrong thread)
Greg Elmassian said:
The new management is interested in the number of members for advertising income, not other things, like losing half of the members pictures… started last year. Also, some people don’t like the moderation there.
Those are the reasons expressed to me.
The live steam people are real active though.
There’s just fewer and fewer people in the hobby, and without new stuff coming out as often, not as much to talk about I guess.
How can new management have anything to do with Mr Bussings turntable that he is planning?
Staying on topic after re-reading it twice ?
Page 3?..dang
" Rooster " said:
**…**How can new management have anything to do with Mr Bussings turntable…
Thanks, David. Personally, I’m interested in turntables.
Glitch in the system, was replying to your post roos about fewer people on MLS…
I’ve had this happen once before, post on one thread shows up somewhere else…
Just delete it please (the quote of my post)
Greg
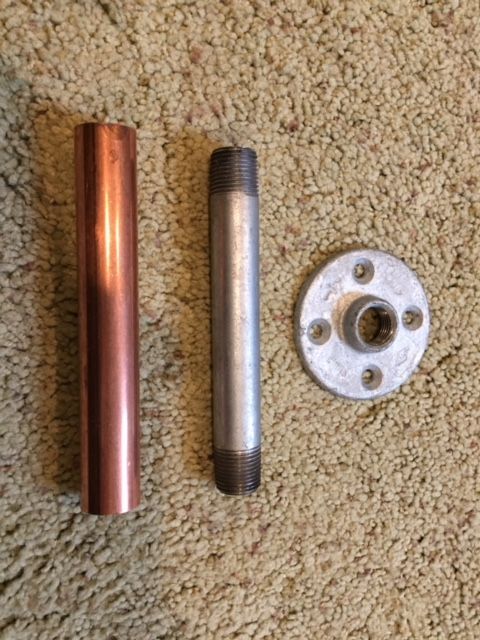
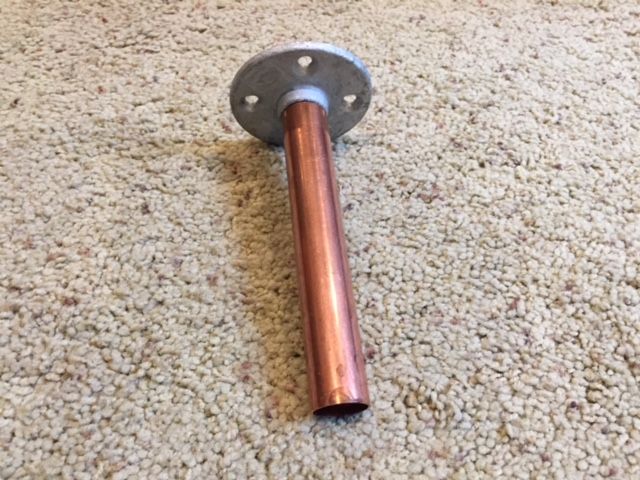
Okay, back to turntables. I did some snooping around Lowe’s today and pieced together this assembly for the pivot. It’s a galvanized 1/2" floor flange, a 6" x 1/2" galvanized pipe with threaded ends, and a 6" x 3/4" copper tube. The fit seems adequately tight and I think I can fashion a removable deck with these.
(http://largescalecentral.com/FileSharing/user_2932/Big%20Joe’s%20Pics/IMG_1353.JPG)
(http://largescalecentral.com/FileSharing/user_2932/Big%20Joe’s%20Pics/IMG_1354.JPG)
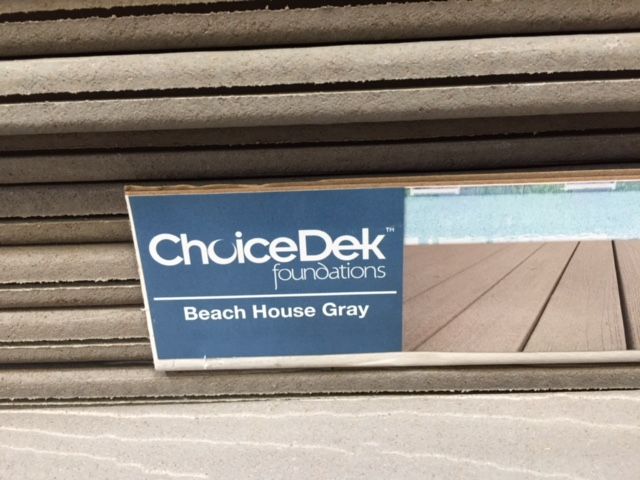
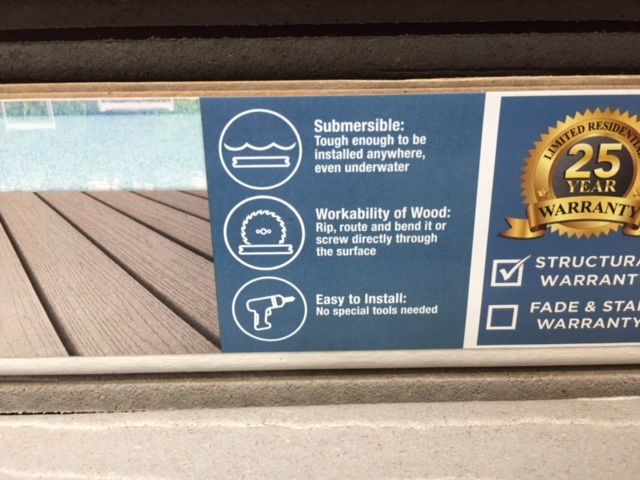
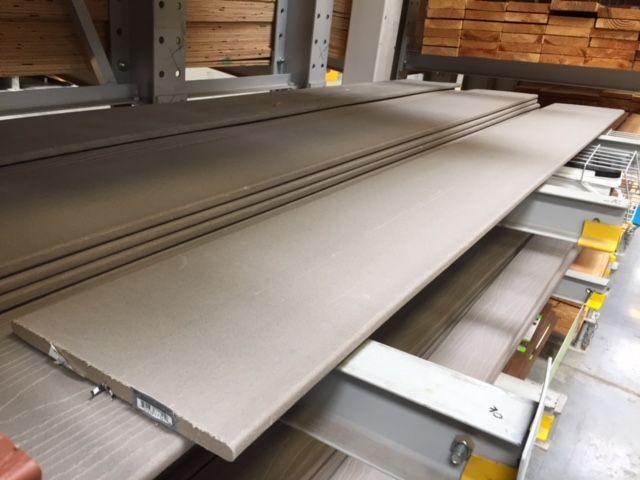
I also found this decking material for the pit. I haven’t purchased it yet, but it looks like a contender. I can get various sizes, the widest is 12" x 8’. Waterproof!
(http://largescalecentral.com/FileSharing/user_2932/Big%20Joe’s%20Pics/IMG_1349.JPG)
(http://largescalecentral.com/FileSharing/user_2932/Big%20Joe’s%20Pics/IMG_1350.JPG)
(http://largescalecentral.com/FileSharing/user_2932/Big%20Joe’s%20Pics/IMG_1351.JPG)
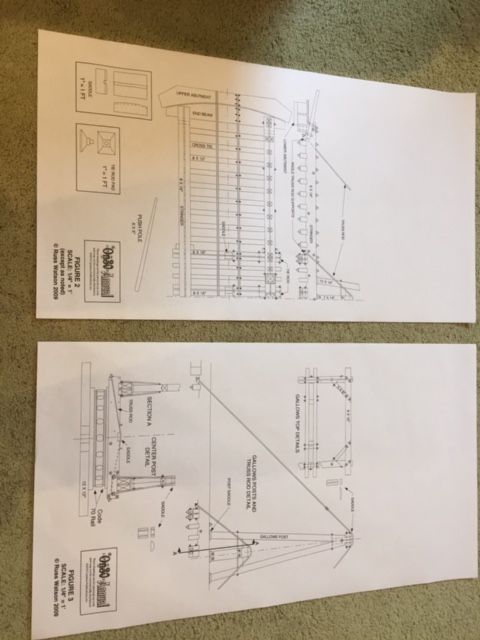
I’ve got to figure out what type of turntable deck to build. Since my clearance over the retaining wall is so tight, I am limited to the type of deck that Todd built with the trusses rising above the deck (super clean design), or a gallows turntable. I think the truss deck is a more straightforward build, but the gallows deck has a lot of character. I pulled some O gauge gallows plans off of another thread (I forget who posted them, thank you!) and enlarged them 236% to 1:20.3. After measuring my largest locomotives, I would need to enlarge the length by approx. 4" and width of the deck by 3/4" to accommodate them.
Here’s the link to the plans: http://on30annual.com/scratchbuild-a-gallows-turntable/
(http://largescalecentral.com/FileSharing/user_2932/Big%20Joe’s%20Pics/IMG_1352.JPG)
Lots left to decide.
Thanks for the links. I am planning an HO gallows turntable for my new HO module pair. Its nice when someone else does my homework for me. (https://largescalecentral.com/externals/tinymce/plugins/emoticons/img/smiley-sealed.gif)
I don’t want to hijack this thread, so these pictures are just in case they are useful to you as you build your turntable.
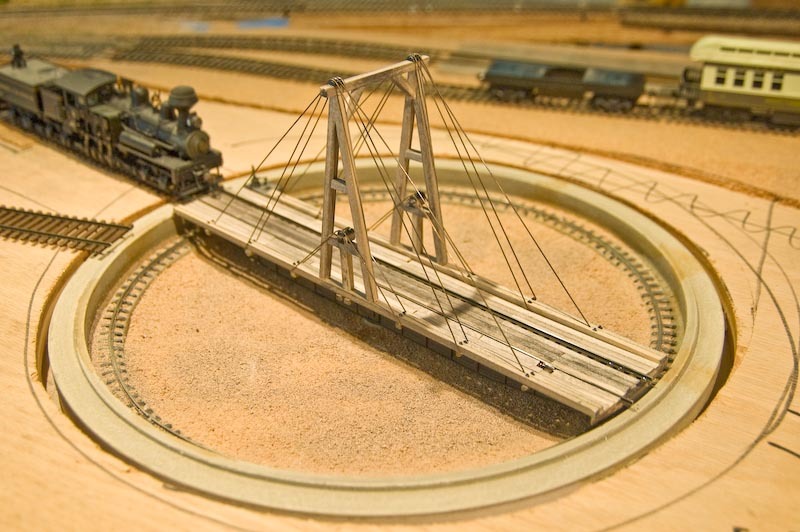
Here are some pix of an HO gallows turntable I built for my now torn apart pike:

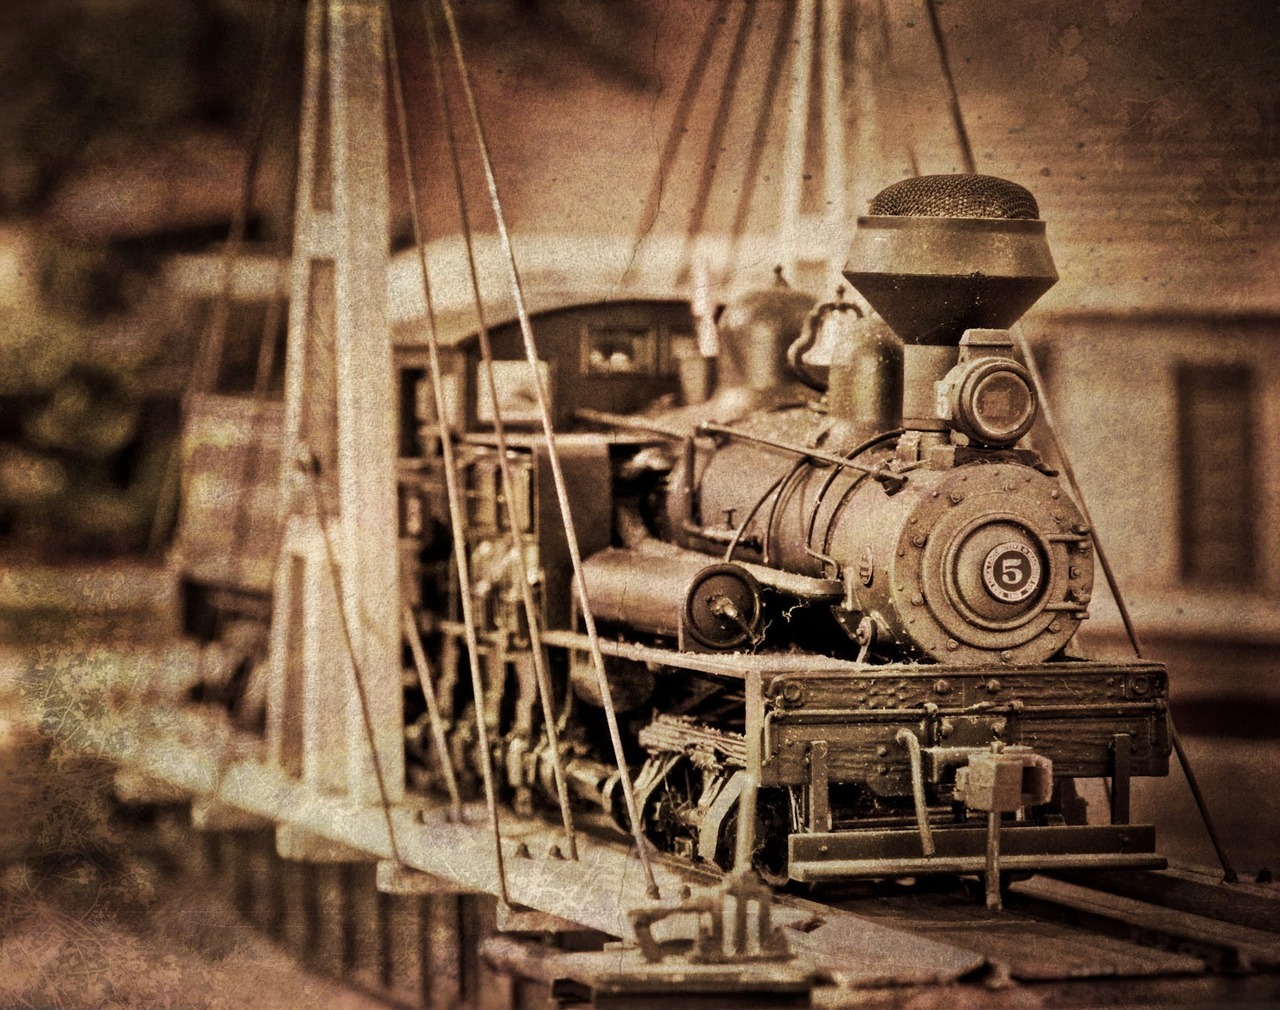
And an artsy, B&W closeup:
In my case, I had a turntable kit that included that pit and a metal turntable base. I built the wood gallows on top of it. Not exactly prototypical.
A fun project! Sadly I don’t have room in my 1:20 scale layout, though I do have a Y…
Cheers!
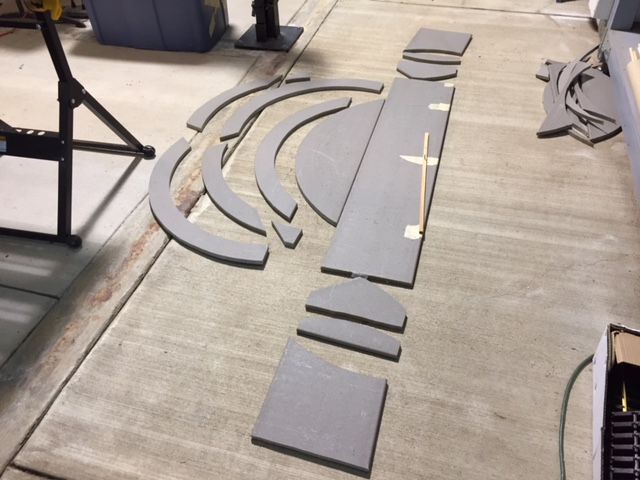
I decided to go ahead with the ChoiceDek product and construct the pit. I broke out the hand-held skill saw and went to town. The material reminds me a lot of MDF (medium density fiberboard).
Here are the cut pieces.
(http://largescalecentral.com/FileSharing/user_2932/Big%20Joe’s%20Pics/IMG_2181.JPG)
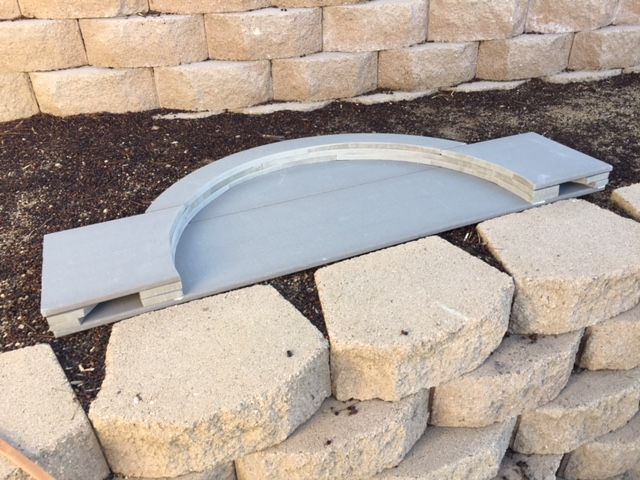
I used countersunk deck screws as recommended by the manufacturer. I did some sanding, but not a lot. Here’s the assembly sitting temporarily on a retaining wall.
(http://largescalecentral.com/FileSharing/user_2932/Big%20Joe’s%20Pics/IMG_2183.JPG)
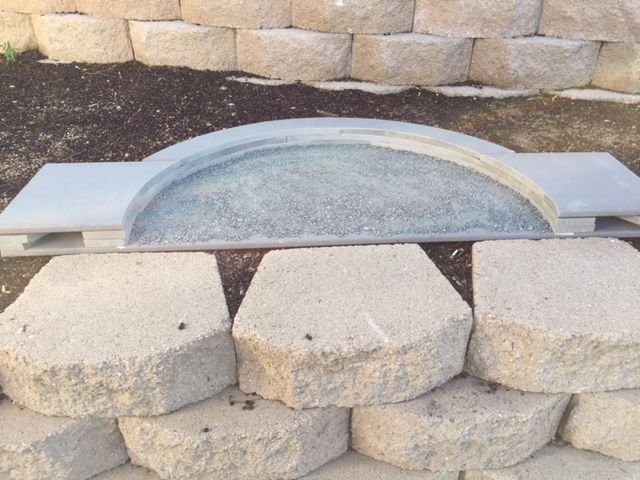
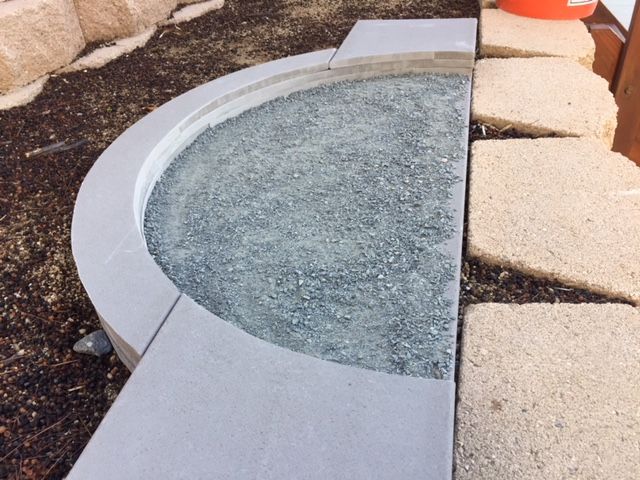
I threw some grey DG in it to hide the seam. I think it matches exceedingly well. Kinda looks like the pit was constructed from a series of concrete poors.
(http://largescalecentral.com/FileSharing/user_2932/Big%20Joe’s%20Pics/IMG_2186.JPG)
(http://largescalecentral.com/FileSharing/user_2932/Big%20Joe’s%20Pics/IMG_2189.JPG)
Next up will be the pivot and a basic deck to check functionality.
Nice start Joe. Will be watching your progress closely.
I’ve been plugging away at the build, spending a lot of time thinking and “fiddling” with the design as I go. Here are some pics.
This is the casing I made out of PVC board to hold the 6" pipe that comprises the pivot. I’ll be adding a bit more bracing.
(http://largescalecentral.com/FileSharing/user_2932/Big%20Joe’s%20Pics/IMG_0226.JPG)
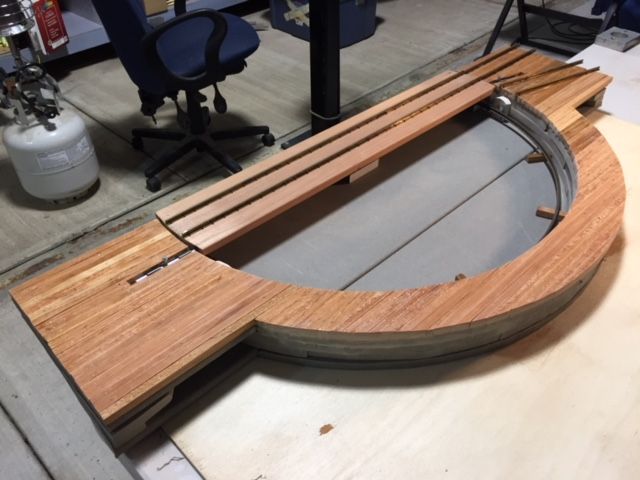
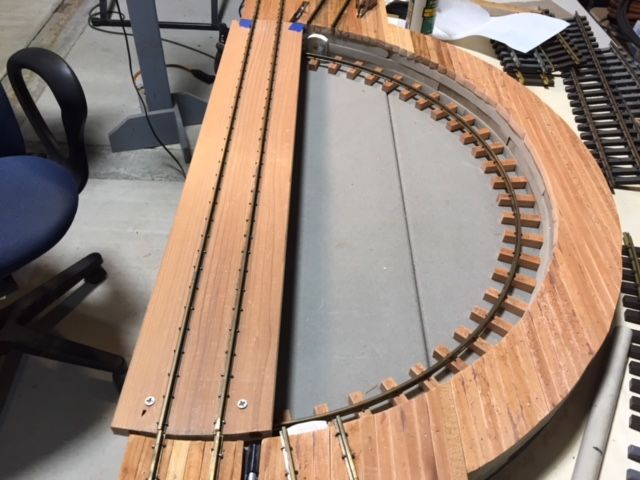
Here is the pit. The pit rail is temporarily mounted and I’ve got more hand laying of track to complete.
(http://largescalecentral.com/FileSharing/user_2932/Big%20Joe’s%20Pics/IMG_1407.JPG)
(http://largescalecentral.com/FileSharing/user_2932/Big%20Joe’s%20Pics/IMG_1408.JPG)
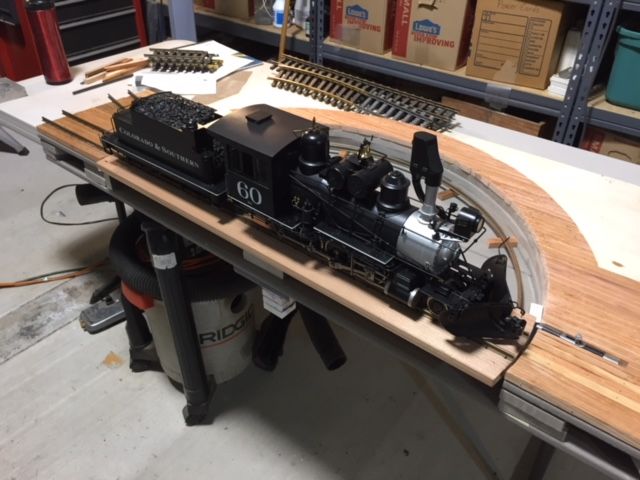
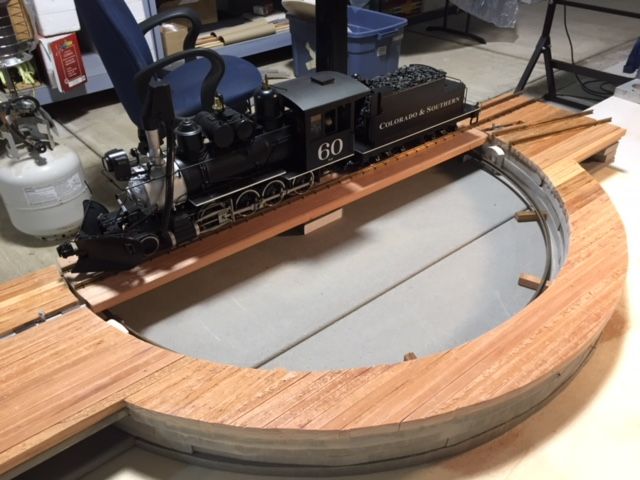
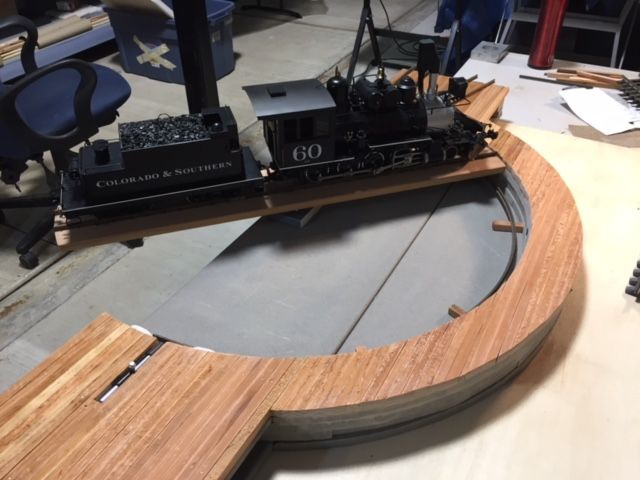
Here are some pics with my heaviest locomotive on it, an Accucraft C&S #60. You can see how the tender must swing out into thin air in order to make the turn. I think I can limit all turns so that the engine will be over the pit.
(http://largescalecentral.com/FileSharing/user_2932/Big%20Joe’s%20Pics/IMG_1409.JPG)
(http://largescalecentral.com/FileSharing/user_2932/Big%20Joe’s%20Pics/IMG_1410.JPG)
(http://largescalecentral.com/FileSharing/user_2932/Big%20Joe’s%20Pics/IMG_1411.JPG)
Since the section that swings into the air will have a very tight tolerance over the retaining wall, it will not have wheels to glide along the pit rail when it is swung over the pit. This means I have to provide “guides” so that it will seat properly and maintain the proper height when it must marry up to the access/egress rails (I hope that makes sense). If I had a full 180 degree pit, then both ends of the deck would have wheels and I could rely on the pit rail for proper height in all situations.
Next up is the installation of the pit rail and the wheels that ride on it. I’m still thinking about how to dress up the deck.
The turntable is looking good Joe. I have had the idea of building a raised railroad with a similar turntable for years but never tried to work out the mechanics of it so I am following along closely.
Steve
I like the way the locking things (am embarrasingly forgetting what such a common hardware item is named) are recessed in to the deck.
Hey Joe,
That is looking great. Like the way you used the barrel bolt as a locking guide, clever.
Is your prototype an “Armstrong” or a powered turntable? If the former maybe a hand rail around the walking deck.
Good job
Rick
Your turntable is looking really good Joe. I like how you stacked the sides. On mine I found a piece of plastic weather stripping for a garage door. One side had a bit of texture to it. I cut the rubber off and bent it around using wood blocks behind it to secure it. Yours is a better idea.
Here is a picture of the turntable that once stood in a town near me that I was trying to replicate. I liked how the table had the steel carrying beams flipped up so the pit didn’t need to be as deep. The hoop in the center has a power line running to it. I haven’t built that part yet.

Will you be building a gallows style? Your decking looks so good and using that slide bolt to lock it in place is clever.
I really like the “flipped up” carrying beams. It will provide me with needed clearance and I can use the deck I’ve already built. I love gallows turntables, but that may have to be a later project. I’ll have to decide about the small operator’s shed which is attached to the swiveling deck. I can probably do it if it doesn’t stick out too much. We’ll see.
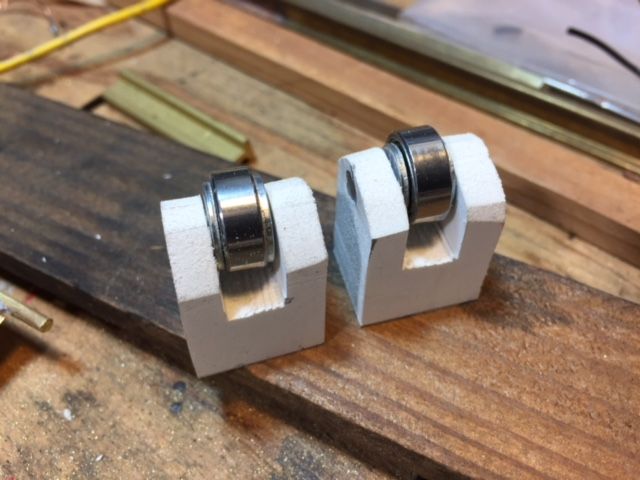
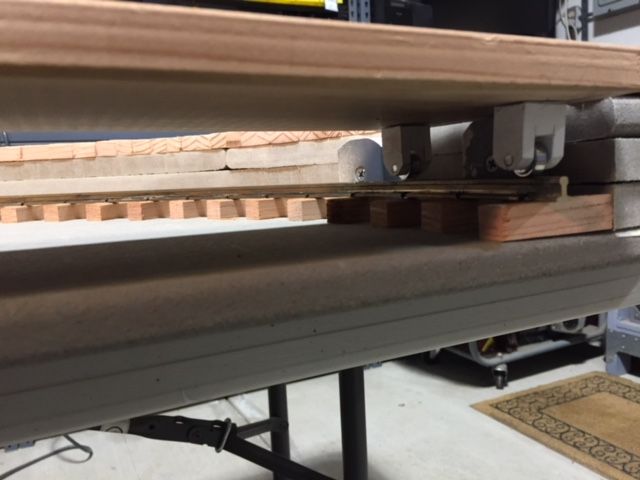
Here’s an update on the build. After measuring about a thousand times, I decided on the roller bearing size (4x13x5mm) for my deck rollers and ordered them. I got ten of them for $17. Unfortunately USPS lost them for about four days but they eventually arrived. I took some PVC trim and fashioned hangers (not sure that’s the right term) for them. They really don’t support much weight so I am not worried about the PVC. They are also hidden under the deck. Here’s a pic.
(http://largescalecentral.com/FileSharing/user_2932/Big%20Joe’s%20Pics/IMG_1416.JPG)
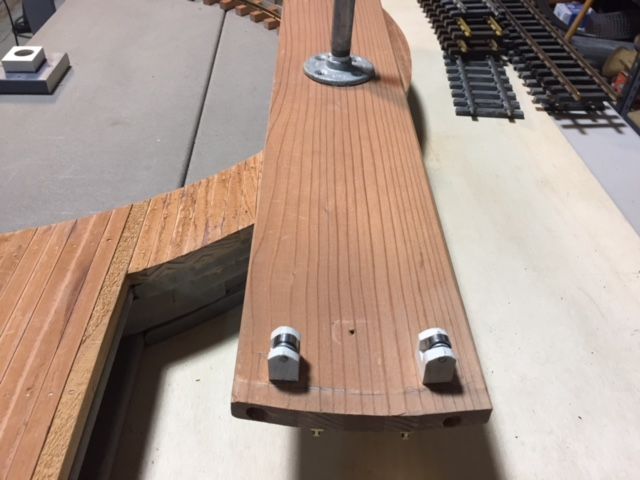
I mounted them under the deck making sure they were the same distance from the center and sides. I used deck screws from the top, down into the hangers. They can be swiveled to match the radius of the pit rail.
(http://largescalecentral.com/FileSharing/user_2932/Big%20Joe’s%20Pics/IMG_1425.JPG)
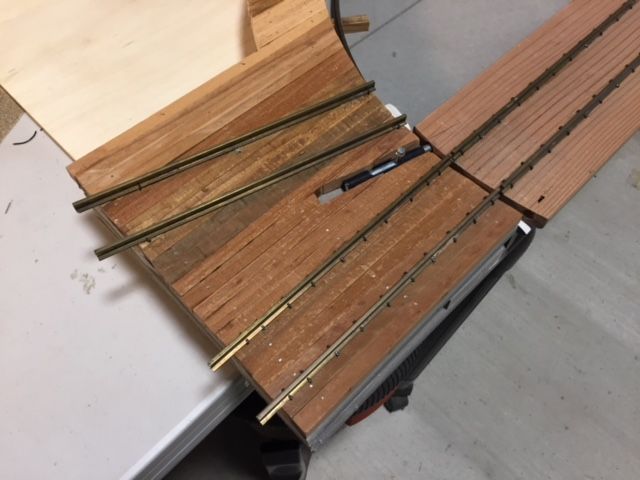
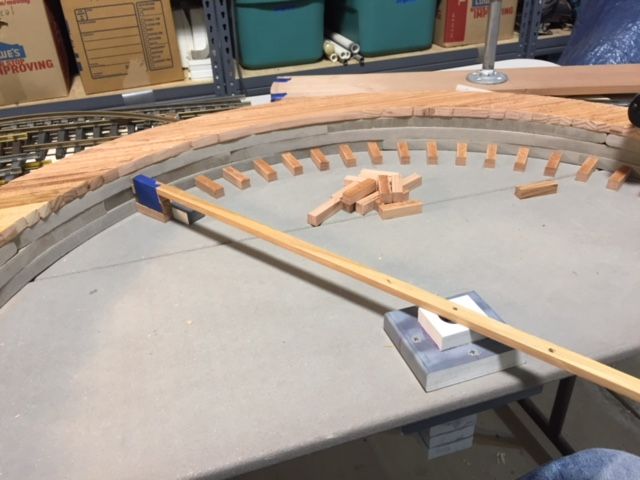
Once the rollers were mounted, I could measure their distance from the pit walls (1.25" OC). I settled on 2" ties for the pit rail. I fashioned a crude device to help me set the angle of the ties and I worked around the pit. I used a 1" space between ties. I ran a test of Tite Bond III and E6000 mating wood to the decking material and Tite Bond III was the strongest.
(http://largescalecentral.com/FileSharing/user_2932/Big%20Joe’s%20Pics/IMG_1418.JPG)
(http://largescalecentral.com/FileSharing/user_2932/Big%20Joe’s%20Pics/IMG_1420.JPG)
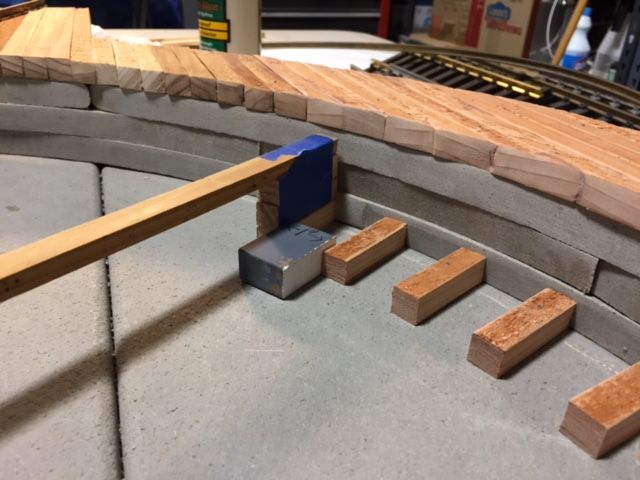
At the point where I had the ties installed and the rollers mounted, it was time to mark the ties for the pit rail. I took a scrap piece of rail and moved the deck and rollers from tie to tie, placing the rail between the roller and each tie. Then I marked the tie. Bending the pit rail was surprisingly easy. I had purchased some used rails at the Big Train Show over a decade ago and finally put some of it to use. I flipped my dual-bender upside down and hand fed the rail through it until it got it close. I loosely spiked it in place and made sure the rollers tracked correctly. Then I hand-spiked it down.
Here are the rollers on the rail.
(http://largescalecentral.com/FileSharing/user_2932/Big%20Joe’s%20Pics/IMG_1422.JPG)
You can see the two deck screws that hold the rollers on the lower end of the deck. They’ll be hidden when the deck is finished.
(http://largescalecentral.com/FileSharing/user_2932/Big%20Joe’s%20Pics/IMG_1423.JPG)
At this point, the basic mechanics are finished except for some tweaking. It time to commit to a deck style (gallows or carrying beam) and get started.
Nice work Joe (https://www.largescalecentral.com/externals/tinymce/plugins/emoticons/img/smiley-cool.gif)
that is the bit I didnt get to on mine…PVC good idea, I was thinking concrete but worried about how to do it…hmm PVC…hmm(http://www.largescalecentral.com/externals/tinymce/plugins/emoticons/img/smiley-surprised.gif)
Joe, you are making this look so easy, even a caveman (me) could do it!
Nice work, Joe. That’s going to be a nice looking TT and appears it will function well, too. Should be easy to turn for the RR crew.