That’s a lot of styrene to cut, Mike, but it sure looks good. And as Sean pointed out, you make it look easy. Kind of like the professor doing differential equations on the board when I was in college, looked easy when he was doing it, not so when I got home and tried it on my own. Thanks for sharing your progress. Look forward to seeing the completed car.
WOW Mike, this is looking great!
Gotta ask, how do you know the measurements for all the parts of the car? I’ve seen websites that have scale dimensions, so figure that’s a start. Do you use an HO scale car as a template from there?
Thanks guys for the comments . I get alot of enjoyment building these freight cars . I found styrene easy to work with and the availability of all the different shapes very helpful . I want to eventually have a 30 or more car train of unique rolling stock rollin around my yard someday . When i’m done with these two i’ll be at 13 cars. The only thing I use to build my cars are pictures and info such as length ,width and height that I get from a website called Railroad Pictures Archive . net . I’ll sit in front of my laptop studying every angle and predominant features of the car for hours and then start cutting . If I see something that I did that looks off to me i’ll redo whatever it is. Thanks again for following my projects with the hope someone finds some of this useful .
Mike these are incredibly helpful, I would love to do some things like this , so your build logs are sort of like a blueprint and color instructions all in one, and special thanks for giving the part numbers on the styrene shapes you use, even if I don’t make a full car I can probably adapt to bashing cars I have!
Heres a couple more pictures of my progress on these cars . On one of the cars I finished the bulkheads . I installed the ladders and added the rivets made from JB weld (original not the fast set). Next to the couplers on each side I epoxied a piece of Evergreen #278 “I” beam plastic. I think i’ll get the end platforms done on this car next and the brake parts too. I finished the bottom of the other car and will get the bulkheads started next. 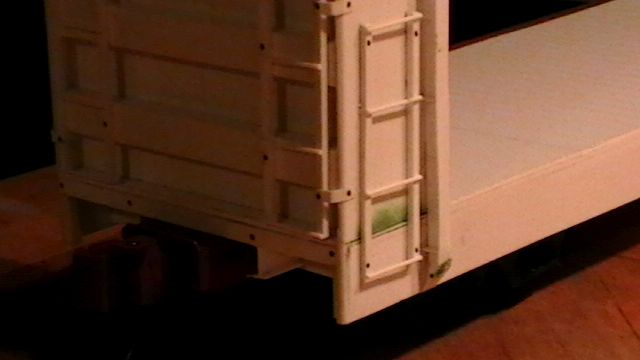
Looking good Mike. Are you going to run them empty, or with loads?
Shane
can’t wait to see these in a video once the RR thaws out
Thanks Shane and John . They will be in some video’s for sure this year . I am looking into some sort of load for these cars. I’m gonna try making tree trunks out of Styrofoam tubes and covering them with this stuff called paper clay . I found a recipe for it on you tube . It looks promising . I’m hoping to make the load realistic and light weight . If it works great , if not , try something else. The car is heavy enough on its own with all the weight in the center sill so I don’t know if real tree branches will make it too heavy.
Boy … I would love to see a train made up of Shane’s and Mike builds…
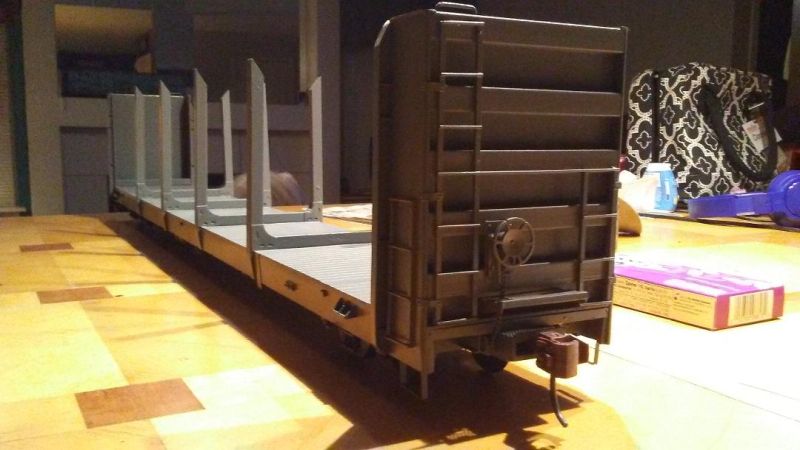
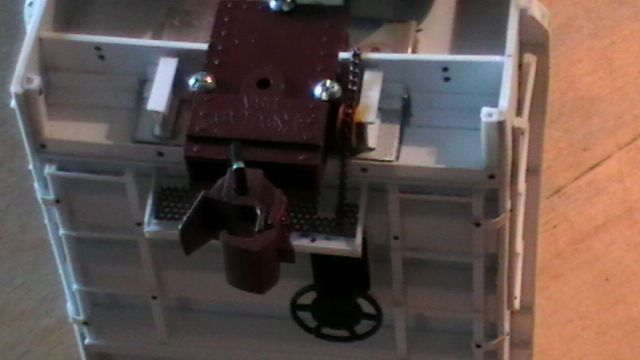
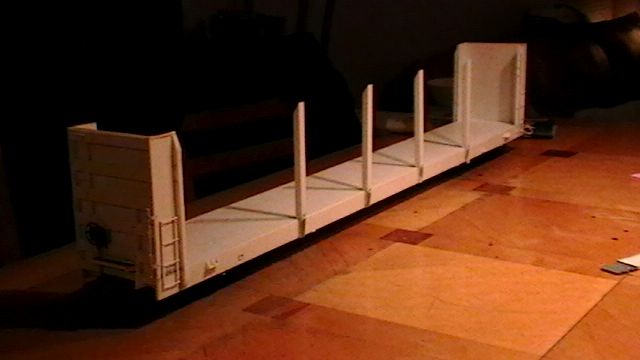
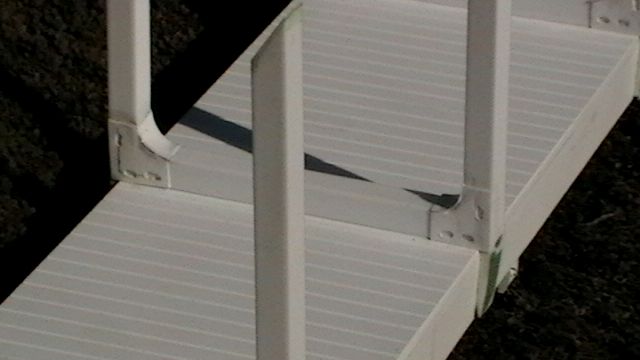
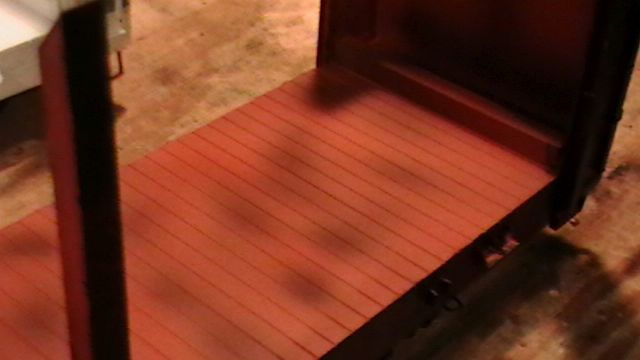
Got a little more done on car #1 . I did some basic underbody brake details using some silicone molds I have from past projects . The parts are made from Alumalite white casting resin . I finished the end platforms made from material I scavenged from a USA stack car and some Evergreen plastic angle. The brake wheel and mount are USA trains also . The 4 large vertical posts are made from 5/8th inch Evergreen square and beveled at the top and notched and beveled at the bottom to fit snug to the deck. I am almost completely done with one side of this car . Here’s some more pictures . 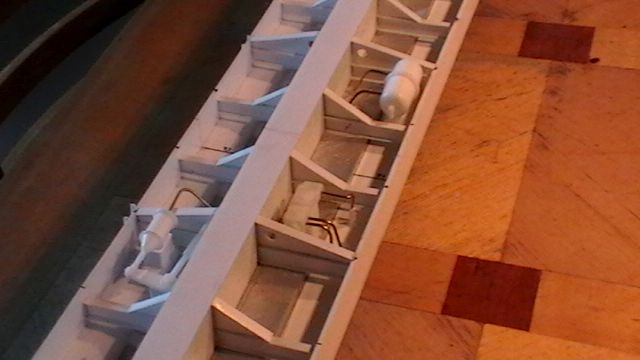
Nice brake details, Mike. Not sure i would consider it basic, but after watching you put this car together, it probably is basic to you (https://www.largescalecentral.com/externals/tinymce/plugins/emoticons/img/smiley-laughing.gif). I would hate to see what you considered complicated (https://www.largescalecentral.com/externals/tinymce/plugins/emoticons/img/smiley-wink.gif). Thanks for sharing.
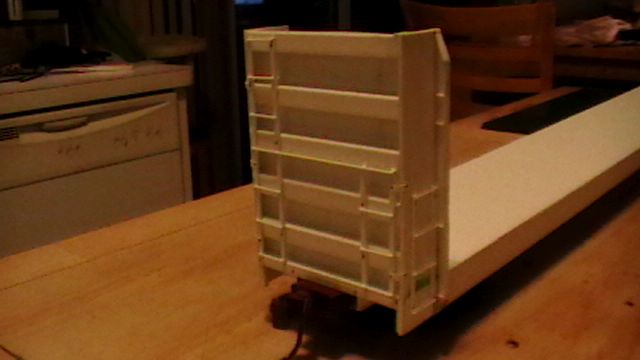
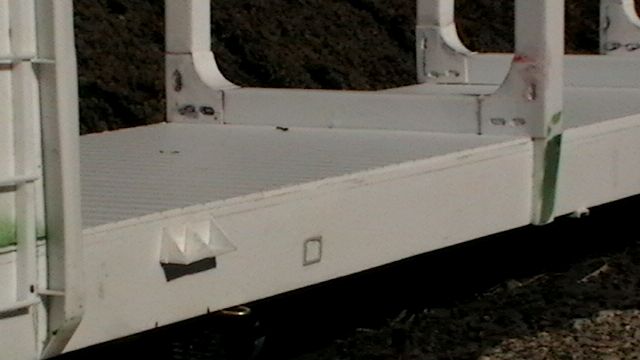
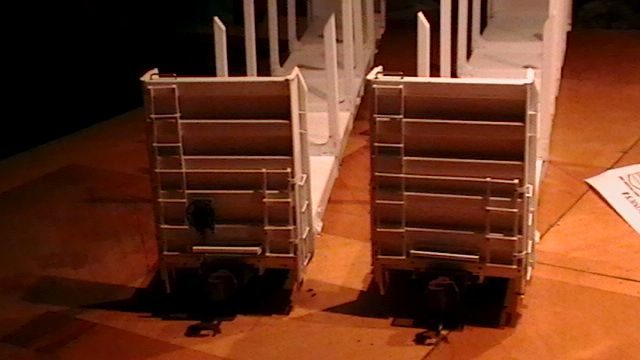
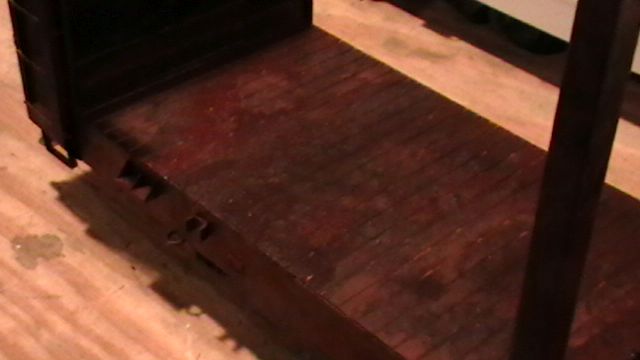
I got one of the two cars completely assembled today. After car number two is done it will be off to the paint shop. Since my last post I added a few more small details and built the log bunkers . They started as Evergreen 5/8 " square tubing . The gusset reinforcement plates are made from .015 plastic sheet . I made small oval holes in them as per photo’s and mounted them with MEK. Alot of filling and sanding and shaping and cussing sometimes and bingo ! Done ! The four lift pads (the triangular thing on the side) are made from .030 plastic a scale 15 inches long by 6 inches wide . A piece of brass wire makes the pulling ring on the side. The small beige square is plastic tube that’s been filed down real thin. It appears on the prototype photo and appears to be some weld marks for something. I still have 3 winches to make but I’ll wait on them till the car is done cuz i’m not sure if i’ll do a removable load .Thanks for looking , here’s some pictures. 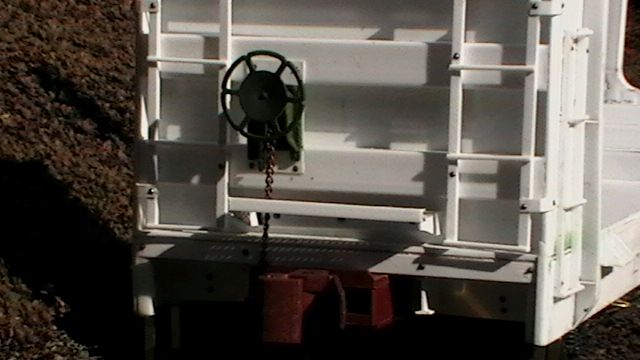
mike dorsch said:
I got one of the two cars completely assembled today. After car number two is done it will be off to the paint shop. Since my last post I added a few more small details and built the log bunkers . They started as Evergreen 5/8 " square tubing . The gusset reinforcement plates are made from .015 plastic sheet . I made small oval holes in them as per photo’s and mounted them with MEK. Alot of filling and sanding and shaping and cussing sometimes and bingo ! Done !
AMEN !
This should be an interesting weathering job … I’m looking forward to see how each one looks …
Its been a while since my last update . I wanted to finish car #2 before moving on . Now its on to the paint shop . First thing is to get all the rust colors and textures applied . Then i’ll clearcoat it and after the clearcoat dries airbrush some hairspray over that . Final top color will be grey. I’ll use dry transfers for the lettering .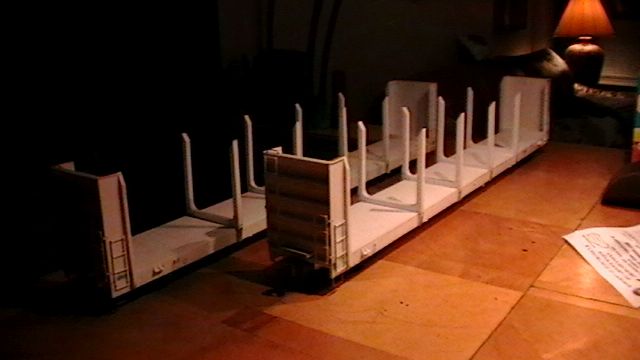
Excited to see the upcoming paint job Mike!

Those are sweeeet!
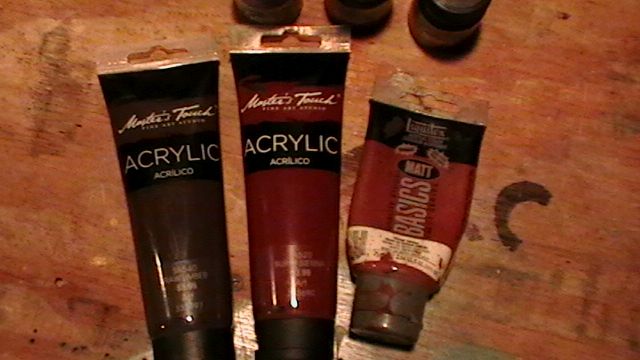
I thought i’d share how i’m painting this car. On the last cars I did I tried the hairspray weathering technique and was very happy how they turned out. On those cars I applied the rust colors using mostly the airbrush . I’m gonna try and add some texture to the rust colors before I seal it under the clearcoat . After I washed and dried the car I airbrushed Badger Model Flex #16-172 rust over the whole car . This gave me a good base for the acrylic paints I dabbed over the entire car. The colors are the cheap artist paints from Hobby Lobby. I used raw umber and burnt sienna as the colors . The small brush gets in the corners and is used to add the color and the 1" brush controls the texture of the desired finish . On these two cars I want it to look real crusty where the rust gets exposed . 

Got the car painted now. Next step is to chip it up ! This picture is uploaded from my phone and is kinda a test to see if I can do it. Lets see…
Here we go …