Large Scale Central

Rehab of the West Escap`e Bridge

Partially inspired by Bob’s bridge building and by my score of some 2x2 Architectural Aluminum tube from work; I’ve begun the re-hab of the West Esca’pe lift-out bridge. First, a little history… The name Esca’pe was chosen by my son Matthew inspired by Dory’s pronunciation of Escape in Finding Nemo. There are two lift-out sections where the main line leaves (or escapes) the house. Indoors is East Esca’pe and outdoors is West Esca’pe. They were originally built about 7 years ago from CD plywood and 1x2 furring strips. The indoor bridge was changed to a folding lift-up bridge about 4 years ago. My design for the outdoor lift-out was very functional, but lacked structural integrity. It has sagged a lot over the years. Last year I attempted to remove the sag and tighten it up, but was only slightly successful. The outdoor bridge has been on the “to be fixed” list for a while. Original bridges before paint… East Esca’pe Indoor bridge…

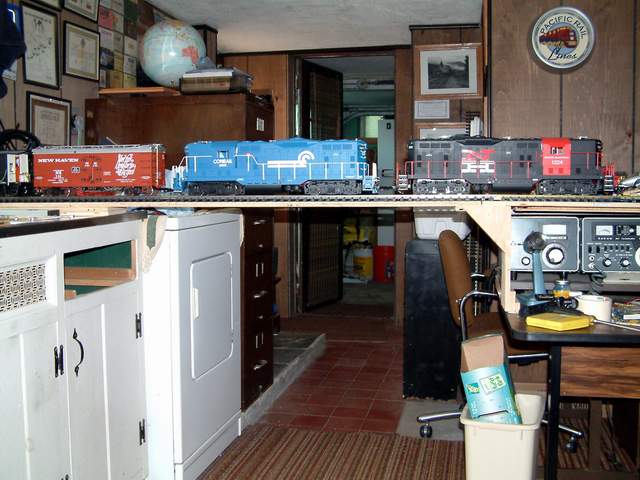
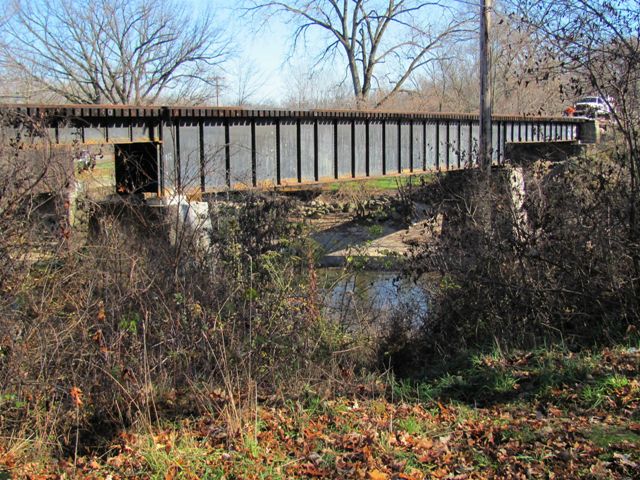
West Esca’pe Outdoor bridge…

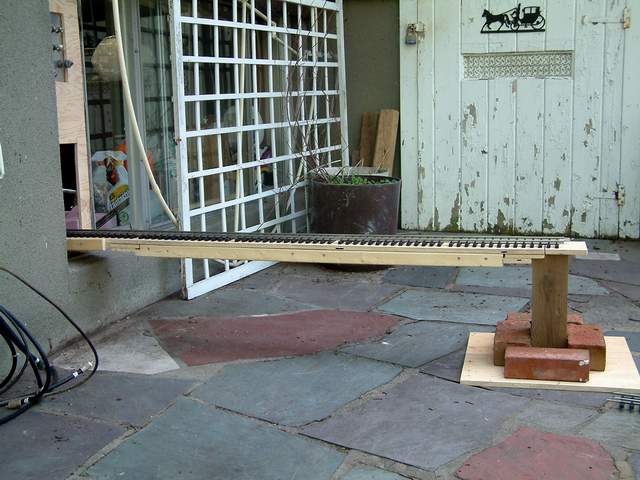
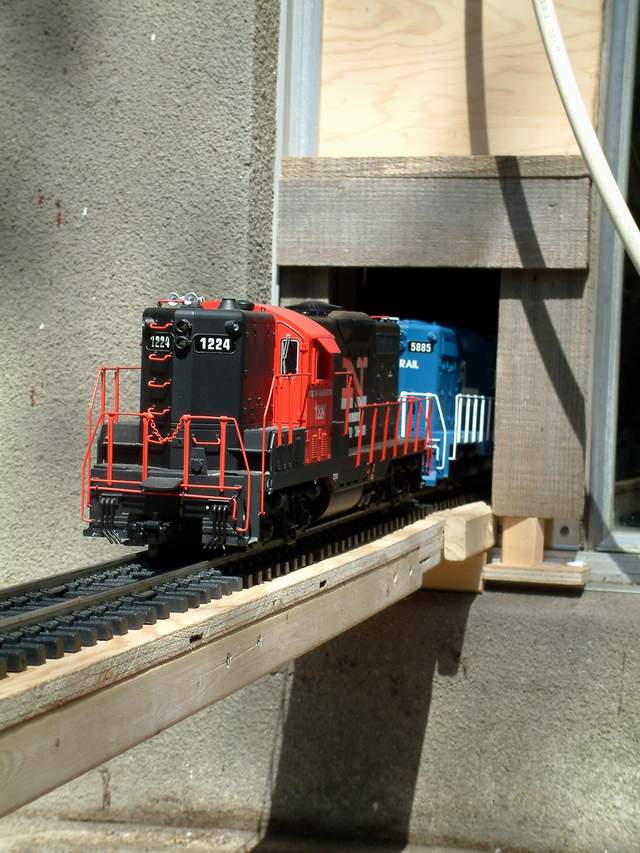
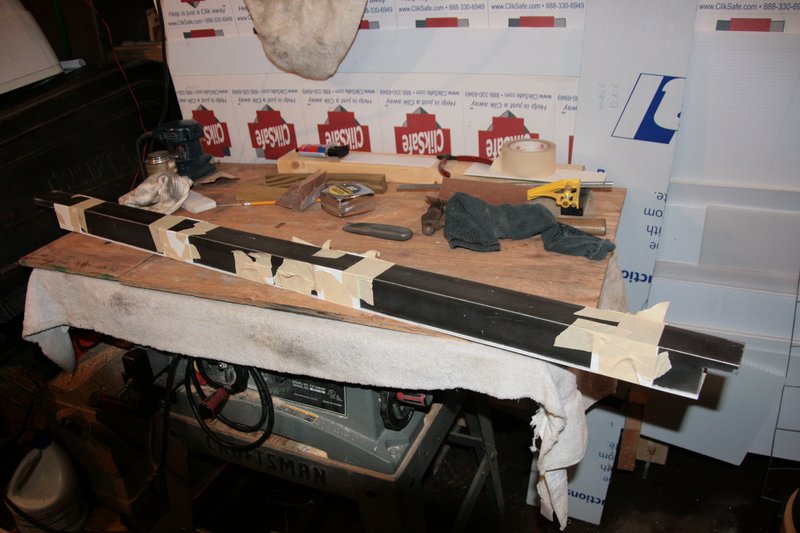
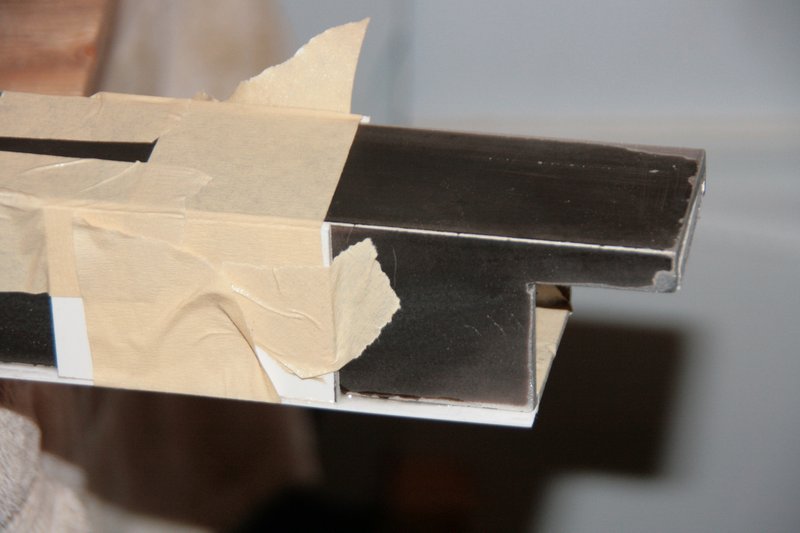
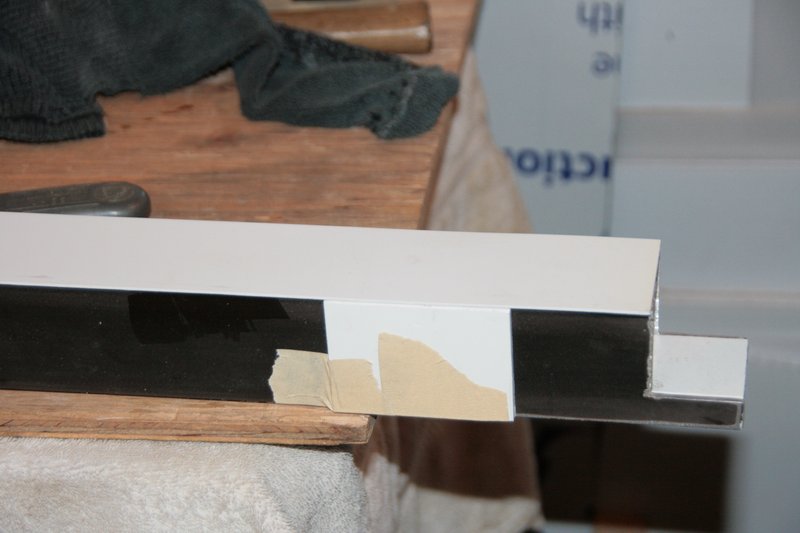
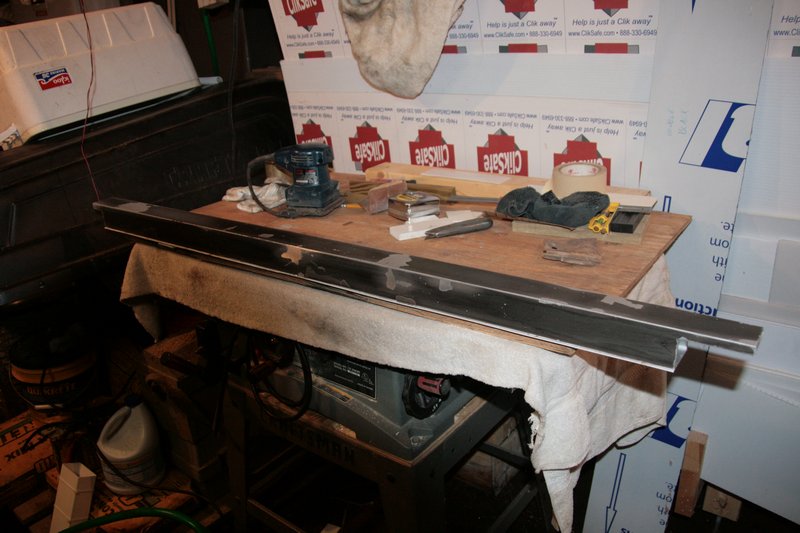
This weekend I took a close look at that piece of Aluminum I brought home from the scrap pile. It was long enough, and with a few passes over the table saw I was able to simulate plywood extensions that drop into the abutments at each end. Pictures of the existing bridge and progress on the new bridge will follow soon. In the mean-time, here’s the Over Engineering department’s drawing of the new bridge. I’m not aiming for a scale model, but rather something that looks a little more like a railroad bridge than the thing it’s replacing. There will be no rivets and probably no guard rails. Bridge ties and walkways are being considered…

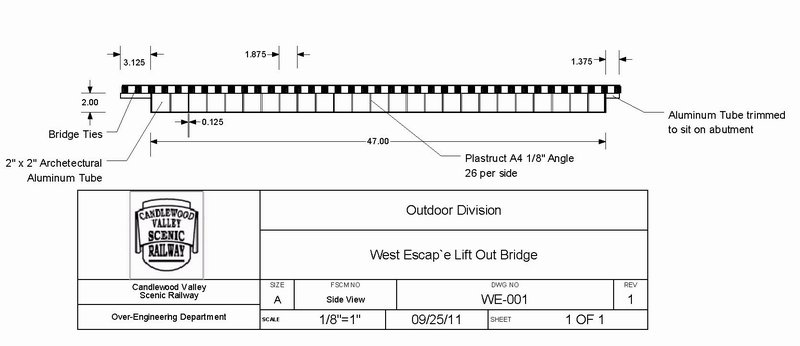
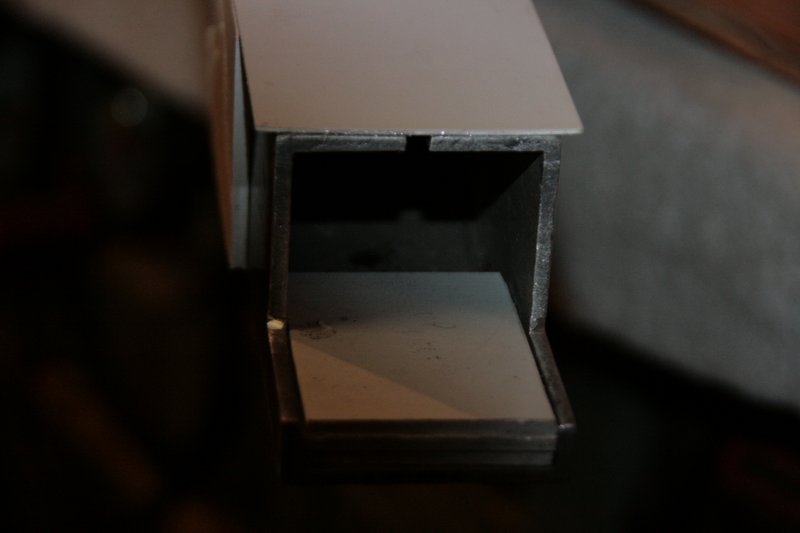
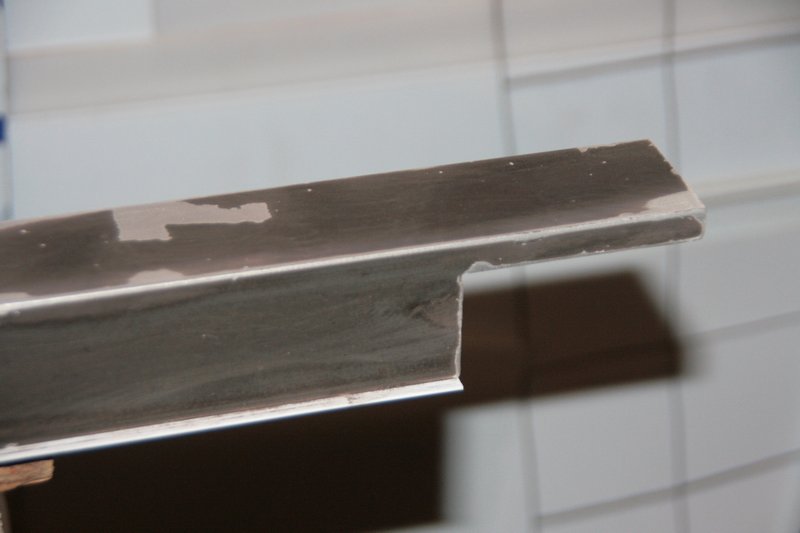
I bought all of the Plastruct 1/8" angle the LHS had, but it’s not enough to finish the plates. I decided to use some .040 styrene from the work scraps to coat the bottom edge to simulate the bottom angle. I applied this today with 2-part epoxy. I also filled in the tube at the end where it was cut. I found that by laminating 3 sheets of 3mm PVC together and epoxying them inside the tube, I could get almost exactly the same thickness as the 1/2" ply of the original bridge. I’ll get some pictures to try and explain this better.

Jon, tell me that is not sitting on the dryer

Nope, not on the dryer, on the counter next to it :slight_smile:

Went down to the garage to check on the glue and take some progress pictures. Here is the span sitting as it will when installed. The tape is holding 3mm PVC alignment blocks and the styrene bottom in place…

Close up of one end with alignment block still in place…

And flipped over…

End view showing the 3mm PVC filler…

Alignment blocks and tape removed and a little more sanding done…

Close up of end…

Next I need to cut the angles and start gluing them in place to simulate the plates. I’m short about 3 15 inch strips.

More bad ideas. I was checking out Rays website to see the details of his build…

Nice detail Ray :smiley:

Based on the overwhelming response to this post, I must not have been clear. The photos in the original post are of the original temporary bridges, NOT what I am building today. Beginning with the 4th post is the actual build of the new bridge which will look something like this…

Sorry for the confusion :slight_smile:

Looks good. I’ll watch for more.
But is is “Esca’pe” or is it “Escap’e?” I see both in your post.
Steve

Jon,
That’s going to be a definite improvement both for looks and for strength I would think.

Jon Radder said:
Based on the overwhelming response to this post, I must not have been clear.

Sorry for the confusion :slight_smile:


Heck, I’m just wondering how to pronounce the bridge name. :wink:

It should look good. BTW, Hobbylinc carries the 1/8" angle.

Essss cop aaaaaaaaaaaaa

1 Like

Good start Jon. That will look much better.

Steve Seitel said:
Looks good. I'll watch for more. But is is "Esca'pe" or is it "Escap'e?" I see both in your post. Steve
It was too late for me to edit the title, and I lost my sticky note of the spelling taken the subtitles of Finding Nemo. I have it both ways in my records. On my track schematics it's Escap'e - In my TrainOps database it's Esca'pe. Dory says it with a French accent something like ESS-COP-EH. I'm taking my 2nd grade niece camping on Columbus Day weekend. We'll get a chance to watch Nemo and I'll write it down again and report back her :D

Spelling suggestions are welcome (Fred ?)

Bart Salmons said:
Essss cop aaaaaaaaaaaaa
Sounds good to me :D

I wasted an hour on this project looking at Micheal’s and driving 8 miles out of my way to a hobby store that closes at 4:30 daily. Micheal’s was a bust (they didn’t even have the black Krylon - rack was empty) and the stupid train only hobby store is now open only 6 hours a day / 5 days a week. I won’t ever be going back there. They used to be close to me and stayed open until 6:30. Bought lots of stuff from him when I was getting started and kept going back for supply items. Too bad for him.

Bruce - I hate to wait, so I buy parts like this local. I should have learned by now that the LHS never has enough in stock to do a complete project. I guess web ordering is in my future. I can also get the 1/8" brass strip that derailed my log car project. Just need some $$.

I’ve decided that I need that edge on the top too, so tonight I’ll repeat the styrene coating process on the other side.

Got another strip of styrene laminated on last night. I just need to get a little more ABS angle and I can finish it up.

Thinking of using the foamed PVC for bridge ties. I scored two 1’ x 8’ pieces of 19mm the other day to add to my collection of scraps. I wonder how it will hold spikes. Need to experiment!

What is “architectural” aluminum tube?
Steve

Steve Seitel said:
What is “architectural” aluminum tube? Steve

From the sign trade, Architectural Signs. Made with a thick wall formed aluminum tube (not sure if they cast them or draw them like pipe) with heavy walls. In this case the 2" x 2" tube is slotted and drilled to work as legs and accept a panel inserted from the top and blind mounted with angle inside the tube. That’s what the slot is in this photo…

These came from a sign that was hit by a vehicle and the legs bent beyond repair. I asked the boss If I could have the parts weeks ago and he said no, he was going to re-use it. Then last week he told one of the guys in the shop to put it in the dumpster. So, I dissembled the sign, cut the bent legs on the chop saw and threw the scrap in the dumpster and the salvage tube in my car :slight_smile: We also use a lot of very light thin wall aluminum tubing to make pan face signs, but it is much too weak to use for much.

The other main difference between structural tube and architectural tube is structural tube has rounded corners as opposed to the sharp corners of architectural tubing. All aluminum shapes are extruded through dies under high pressure, and then pulled (drawn) straight, which also provided some of the tempering of the material.

Bob C.

“…structural tube has rounded corners as opposed to the sharp corners of architectural tubing.”

Ah, I see. Thank you.

Thanks Bob!

I was looking for some reference photos and found this one that almost looks exactly like what I’m building with the two different girder size sections joining it…

Mine will be hung by the roadbed on either end and not have functional piers. I may add decorative ones made from foam someday to give the bridge a bit more realism. We had a few days of good weather so I got out to run trains instead of working on the bridge. Yesterday and toady we had rain so work is progressing slowly. Putting on the angle pieces now. I’ll post progress pictures later.