Large Scale Central

J&B RR Construction Log

I won’t say I told y’all so cos I didn’t.

But, it is nice to see the voice of reason at last getting heard.

Then once it is down solidly and you want to use track power, you have to electrically bond each joint loosely so that it can expand contract. Otherwise the track takes a beating with temperaturte change and you are back to a pretzel.

That is a real pain, so guess what?
When you get to that stage I will say I told you so.:smiley:

Although in my part of the country I haven’t had the volume of the problems y’all have mentioned with floating track, I do have two sections laid on PT and will admit to spending 0 hours maintaining the roadbed on those sections.

My West Es-cape-e Canyon bridge leads to a curved elevated section built on PT lumber supported by concrete post bases and 4x4 post stubs. This leads to a 20 ft straight PT section elevated on short blocks. This section is a bit droopy in spots, but tolerable. My board joints should have had longer plates per Fr. Fred’s suggestions.

The last 10 feet of the Wye tail in Deep Cut is on PT because I couldn’t physically reach down into the cut to level and ballast road bed. I also wanted an easy way to pull the track for maintenance if needed. This section of track has been completely buried in mud several times over the last few years. All I do is shovel off the mud, sweep around the track and clean off the rail tops with a cloth.

When I built the Wye last summer I placed the switches on large concrete pours, but floated the track in between. I had planned on coming back later and filling in the roadbed between pads with concrete. One tail is already completely laid on concrete. I’m beginning to see the advantage of using PT instead. This section is not elevated. The PT will be buried in ballast and be moist or frozen most of the year. How many years can I expect to get out of PT in these conditions? Would Trex Decking make more sense (about $6.50 a bd. Ft in my area) in the long run?

I understand that using concrete commits one to a route that might change in the future as wants and needs change. I also know from experience that building an even grade in concrete ain’t easy. I also know from experience that cutting for curves in PT can be a challenge too, so I’m still not sure which way I want to go. I’m sure Fred will do his best to help me see the light this weekend.

JR

Jon,
I had the same concerns about concrete or PT, which is why I went with the ladder method and these plastic trim pieces. It’s more expensive than PT, but at least I can carry it in my car. :wink: It has already paid off - I had a curve in front of the flower bed and when I was measuring grades I found it would have to be too high above the flowers. I undid all the screws on one side and recurved it behind the bed. Just that easy. It also allows for consistant grades as it doesn’t seem to sag very much. More than PT, of course - but then it also makes it easier to create smooth grades with gentle vertical curves.

When I first got back into this “scale”, my intentions were to use track power. I’d read a post about someone never having any problems, and yet in another post the same person is asking how to best clean track. Every layout I visited had track power - and EVERY one of them had some sort of problem while I was there. No exceptions. And most of those were not “operating” layouts, just running trains. Or trying to. It didn’t take me too long to settle on battery power as the way to go.

But, which ever power source you use, your train still needs to stay on track. If floating track was such a great idea, I think we’d see it in the smaller scales as well. :wink: Maybe it’s OK for the next larger scale? I can already see much less track maintenance in my future, and much more operating.

Tony,

No arguments on the battery RC issue with me. I admit to having about every power option available except nuclear! Track power, battery RC and live steam. I kept the track power for visiting railroaders.

The indoor overhead line is track power, a switchable choice between TMCC and regular DC. The mainling of the benchtop layout will have track power available also. The yards are strictly the domain of battery RC!!

Andre’

I’m convinced that PT lumber prefers being wet and out of the sun. It is only when it drys out and is constantly exposed to UV from the sun that it starts warping, cracking, spliting and generally becoming a pain. I have pulled up PT fence posts that had been in the ground for over 10 years. The above ground part looked like hell but from the soil level on down it could have just come off the rack at Lowes. Take a look at a PT deck that was put down with no coating and has had no maintenance done on it and you’ll see what constant exposure to the sun does to it. Buried under ballast it will stay good longer than you’ll likely need it.

Bruce & Gary -

Thanks for your comments. My PT roadbed has only been down for 2 years and a few months. The most of the elevated section sees lots of water since it was built right under the drip edge of the my house roof. The only portion that sits in a “dry” area was additionally treated with ‘special sauce’ made from vinegar & steel wool. It looks nice and rusty when dry and quite dark when wet. Neither of these areas have warped or split so far.

The biggest problem I see with PT is cutting curves. I’m not good with angles :slight_smile: The ladder method certainly solves that problem, especially in easement and compound curves. For straight runs (which I have many) PT is a lot simpler. Perhaps the best solution is a combination of methods depending on the location.

BTW - One of the biggest promoters of concrete roadbed has switched to using steel in an assembly similar to the ladder method. Concrete is cool in an area that is level and will never change, but floating in ballast over a concrete base will eventually suffer the same issues as the track continually lifts above the ballast. I think one of the reasons for the problems with floating track is the hollow ties on most sectional track.

Anyway - Bruce your layout is looking good. Time will tell if the material you chose ends up with the twisting problems that Kirk Fleming had with ladder roadbed. Hopefully it won’t.

JR

Yea, I just tore down a PT deck that was < 10 years old. All the exposed wood was cracked and nasty.

At our last club meeting one fellow was using a ladder method like Bruce but using ripped strips of PT for the long pieces. He said he had no problems with it cracking during bending as long as you choose water logged stock to work with. That’s usually not a problem in these parts as most yards store their PT out of doors and it’s really tough to find a piece that is even a little dry !

OK.

I give up.

What is PT?

Pressure Treated

Later,

K

Not only was the curve ending up in the wrong place, but the grade was too steep at this curve, so a bit of leveling is in order.

I already have permission to trim those grasses. It’s quite a long curve, and I was originally going to fill it in and create a raised planting area. But, that sounded too much like work, as it goes on for another ten feet or so.

So, a trestle and bridge comination is in order. I’ve completed about 6 feet so far and today was the day to seal it. It’s hot outside, but it was so much easier applying it there than down in my work room. Of course now I have some sealed mulch as well. :wink:

Hidden by the trestle is my Garden Metals Model bridge.

Duplicate…somehow

Bruce,

Nice work. Your weather must be better than ours. Everybody is in hiding around here.

Ric Golding said:
Bruce,

Nice work. Your weather must be better than ours. Everybody is in hiding around here.


Here, too. Haven’t gotten much done on the RR due to the heat and some family functions…

I’ve been ripping strips from PT 3/4 plywood as a base. We’ll see how this method holds up…

It’s not too bad if you sit in the shade and don’t move.

…but it’s supposed to be 95 today, so I don’t think I’ll get all that much done.

Well, I got a bit done before the heat did me in. I graded the side next to the house and put down a bit of ladder.

Then, the AMS Flextrack on top, along with a few switches. I’m really pleased with how nice the flex track bends. No rail bender here.

Meanwhile, work continues on the other 2/3 of the trestle.

The basement is cool, so I was also able to put the rail on the first part of the trestle…only 250 spikes…not my favorite activity. :wink:

Progress!

I think that climate has a lot to do with how you lay your track. Mine is fully floating on gravel because here on the High Desert in California the ladder would probably be a challenge with with the wood. I’ve had my track down for three years and did a little maintenance this year for the first time. I also went with battery power because I really didn’t want the track cleaning and running wires. Also, I have poor eyesight and find it a lot better to follow my trains for operations. I am getting ready to install RCS in a rail bus that I have.

Well…12 feet of bridge and trestle are complete. I now greatly and officially admire anyone that has done more than 4 feet of trestle.

There’s still some landscaping to be done, but at least I’m done with this part. The original plan called for another two feet, but I ran out of energy, and this SEEMS to fit. Now I have a few bents left over. :wink:

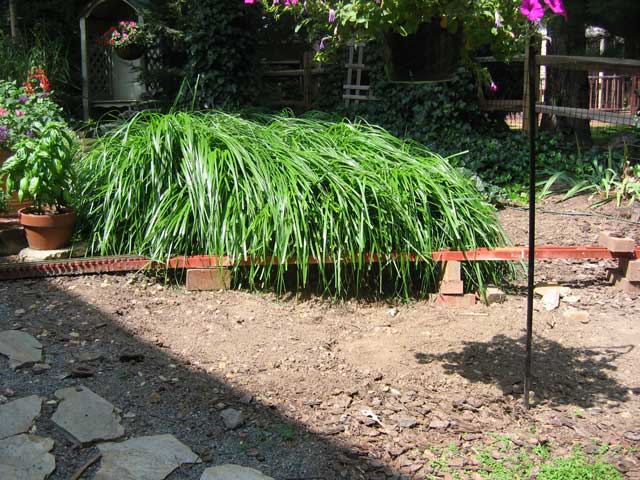
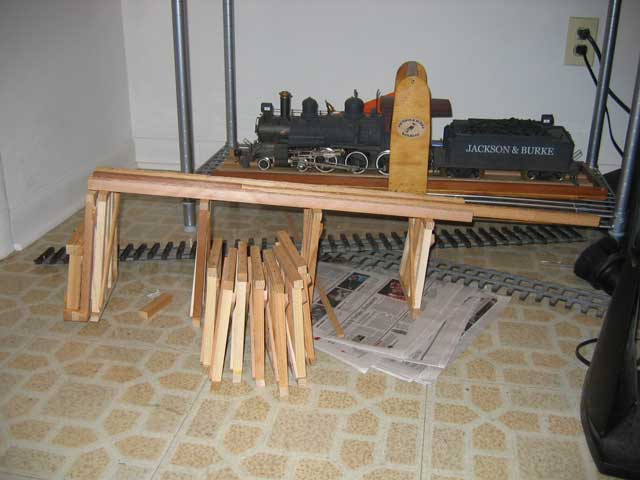
My 103F day working on track I agree that free floating track has problems. I am gradually changing all my road bed to either anchored-supported, ladder [on next expansion], or concreted ballast. I also converted to battery power after one season of fighting track maintenance. Now I run year round. Newest Project: Along the front of my layout, I have a 4.5% grade I wanted to reduce. In my infinite wisdom, I chose a 103f day to make the change. Before.

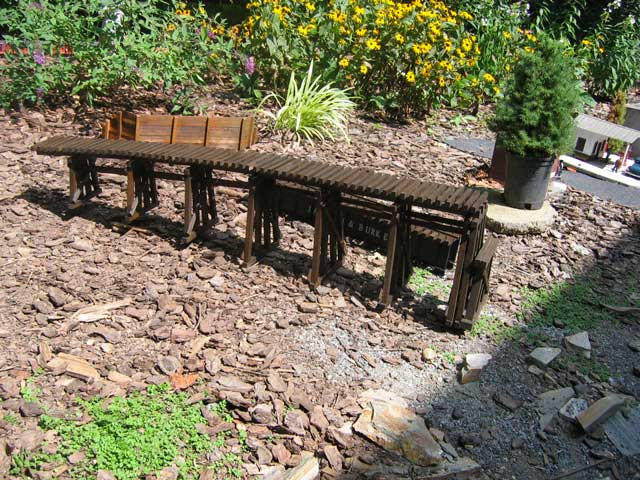
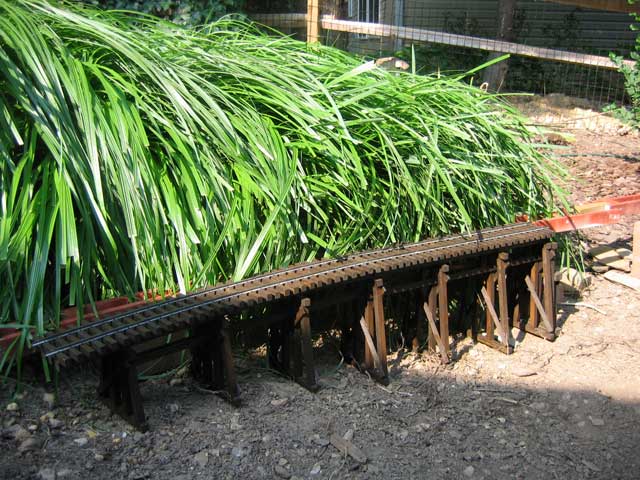
Notice the track bed was raised to even with the train platform. Plastic wood was the chosen product since I had some left over from building my deck. This is an all plastic recycled product that is also used for the boardwalks in Yellowstone Park.

A plank of the material was also placed under the switch control and first two feet of the siding [picture not available:(]. Boards were cut to follow the contour of the track.

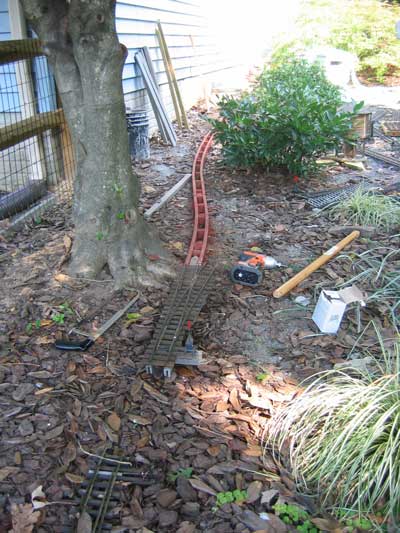
The bridge was raised to the same elevation and the downhill grade was reduced as I ballasted the track back up the hill. The WD-40 was used in an emergency to exterminate a nest of ants I unfortunately dug up.

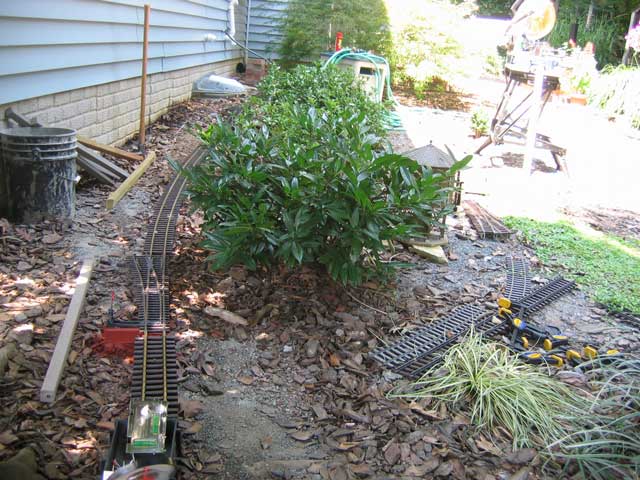
The highway also had to be raised at the rail crossing.

The Highway crossing was raised, and ballast was added. I finally finished the pavement across the rails after two years.

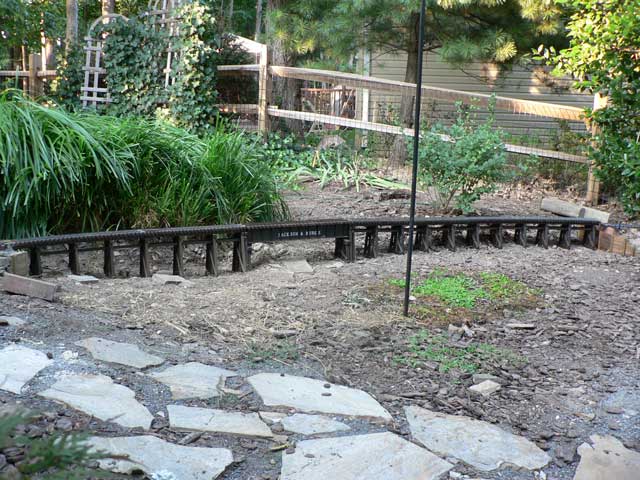
Now the grade is about 2%. There is one more phase to this project. There will be a concrete retaining wall along the edge of the highway [going towards the top of the above picture]. Retaining forms were put at the edge of the highway next to the raised rail. Ballast was filled to the top of the forms. Mortor was dry spread over the gravel, and watered into the ballast. This process will take several days and three applications before the forms are removed. Pictures of the retaining wall will be posted when completed. Looking in retrospect, this project might have been easier if I had built a ladder rather than using solid stock. JimC.