Large Scale Central

Challenge Accepted - Large Scale Fantasy Locomotive

“Rooster,”

Copy all. I tried to run down the prototype for the model to see if it still exists. The tour line to which it retired does, but not the loco, from what I gathered…I am thinking powering this is going to drive the direction of the project, so that was my focus today. It is about an even price split between a used PLAYMOBIL motor block and using the robot motors.

John,

That idea has real merit. Let me do some photo snooping. The center drive drain would be “implied,” but I am OK with that.

Thanks. Back to the books…

Eric

Perhaps you’d like to show off the whirring bits …

Kid-zilla may need steel finger guards!

We can go in the other direction and …

A note to Pete Thornton, a square timber plank road.

The above is more likely to be a Rooster build, in my mind.

Don’t blow my dress up John as it’s way to complex for me…HOWEVER I (personally) think you are coming up with some “fantastic” ideas for Eric to eliminate the side rods etc. but we still need the crossheads in one way or another I think? ( I hate steam)

Wait …does that pig ride on coil springs ??? NO WAY

Gents,

OK, geared it is. I just compared this guy to my Stainz-es, and the wheels are much closer together, so trying to fit Stainz bits on this won’t work. A friend who has used a PLAYMOBIL motor block said it is too wide, so that means battery powered and new motors will be the direction here. That is fine, as we have desired a “ready engine” for days we want to show off the Triple O but lack the time (will) to get it all wired up. I found this picture of a Dutch steam tram to serve as a strategic guide for OPERATION HIDE UNDERCARRIAGE:

While not at all like the photo in “Next Stop Honolulu” of the 0-4-2 tram that ran on the Pearl City Peninsula, Kauai had a German built tram, so a European pattern is not without precedent. It is also consistent with the LGB “Fiery Elias” (Eliaki Ahi in 'olelo Hawai’i) I own, and it will hide the seem that allows the loco to come apart, a seam I will probably have to preserve with the new motor option, assuming I can fit one of those geared designs with a shaft coming from each side. Following John’s suggestion, a gear could go on the fore and after drivers, with chains running up to a hidden idler to imply the drive gear.

OK, my homework for the weekend, as I see it, is to select the motor(s), battery, charger and on/off/reverse switch or rheostat. That will drive whether or not adding boiler back head details are possible or if I should just be glad for the extra space. I’ll post my homework here before applying dollars to the website.

Have a great weekend!

Eric

P.S. Kid-zilla would be all to excited to poke at the “whirring bits.” Though kids get older, they don’t necessarily get more careful, either! More reason to imply them, probably…

" Rooster " said:

Wait …does that pig ride on coil springs ??? NO WAY

I love the cast yoke above the springs, this pig has lipstick!

The New York Central covered conventional locos for street running. Known as Steam Dummies, they were an effort to prevent horses from being startled. The RR could be liable for lost wagons and loads …

John,

I’d seen photos of U.S. steam dummies; I never came across one from a major RR, though! WOW! I like the hinged skirt. That is something I could pull off, and it was a detail - how to attach the thing - I’d been studying. I had been reticent to show something bolted to the side tanks, but last night’s scrutiny of saddle tankers on Kaua’i, anyway, showed that bolting things to water tanks happened.

The other issue last night’s photo study posed, though, was those wooden end beams. It looks like they were bolted to the frame then reinforced with bars running at an angle to a hard point on the boiler. Again, in my case, these would run to the side tanks. The rear coupler long ago sheared off, and I had thought to mount LGB style hook-and-loops (Thanks to Fred Mills for his extras!) by screwing them into the wooden beams.

OK, lunch, tunnel project, date night, and motor research. Lot to do today, all of it fun, some of it RR related.

Eric

Now you really got his head spinning John! Why not add this fuel to the fire since we are talking Trams …http://www.midcontinent.org/rollingstock/CandS/dsp-passenger/nyelrail2.htm

(I keep telling myself one of these days I’m gonna make some fishbellys …the “back in the day superliner look” (in the hood)

However if that is the direction he wants to go then why work off the unit he has and not just start from scratch? I personally like your idea of the geared locos which eliminates the side rods but he still will need some type of crosshead?

Good stuff.

OK,

My head hurts, but from the electronics (I barely passed electrical engineering back in the day). The first thing I really had to do was figure out how we planned to use this - however it turns out - to see if the suggested motors would work.

After reviewing Johan’s websites, I focused in the https://www.pololu.com, as it was the most user friendly.

My kids have a new LGB 2075 (Christened Christmas Thomas) powered by 3x “C” batteries wired in series, which is 4.5V. It happily pulls 3-4 “minis” for about 30 minutes, then I need to start pulling cars. By ~2 hours it won’t pull anything around R1 curves. Over the course of a year, it probably gets ~1 hour on the rails per month, time being limited by the cost of C batteries and the fact the IR controller is not LGB worthy…

Using John’s suggested motor, the TAMIYA 70103, and cross-referencing that to the Polulu website’s performance data (https://www.pololu.com/docs/0J11/5), I should get about 16 hours of life at that voltage. I can live with that, but it means designing motor replacement into this project. To boot, with information forwarded courtesy of Bill from another forum, a gentlemen there posted that he used two motors, one fore, one aft, and got about the pulling power I am after, albeit with a 9V battery.

Using all of the above, to include motor specs, I am assuming a 4.8V, 2200mAH battery pack is the right choice. I will take on the cost of the charger as an investment in the hobby, as I can see it having other applications down the road. Battery power will also dictate the shell come up easily from the frame.

On/Off switches were incidental costs. I did not see anything that screamed “reverse / speed control.” I would like to be able to put this thing in reverse. Speed control is nice, but not required.

So, as I see it, I am in for 1x (or 2x ?) 4.8 V, 2200 mAh battery cells connecting to two motors wired in parallel with an on / off / reverse switch in there somewhere and a charger. What am I missing in my least favorite subject matter?

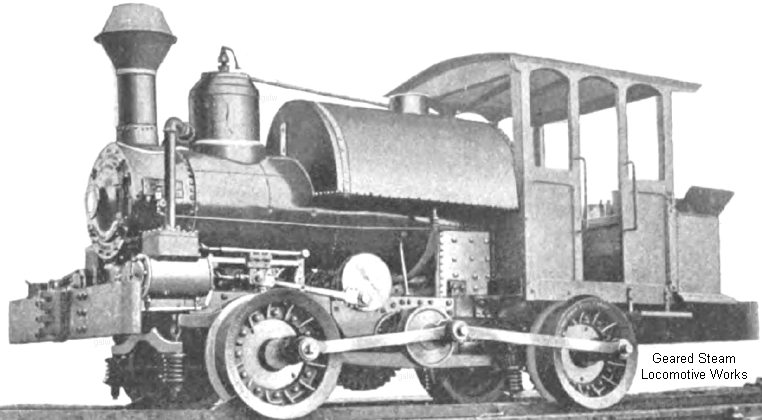
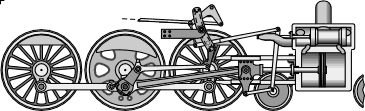
As for what this will power, there is physical space to make this look like a gear driven loco. The cylinders slide in and out of the lower part of the chassis, so they can move up. It would require more cutting and filling, and it might force me to dicker with what looks like the downcomer to make it look right. Regardless of where the cylinders go, the fact remains I have to figure out a way to drive the cog that will look like it is the thing powering the drive wheels via a chain linkage. From John’s diagram, this looks like it could be a fairly simple contraption, and the R/C airplane store may have something that would normally be used in that application.

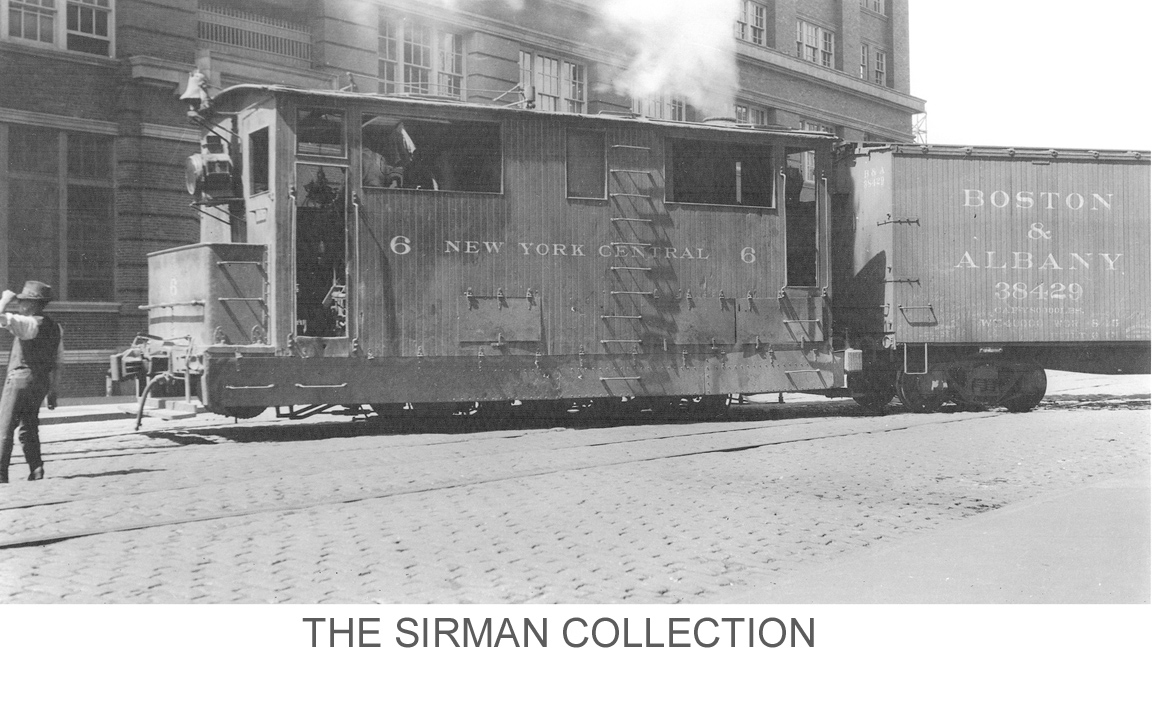
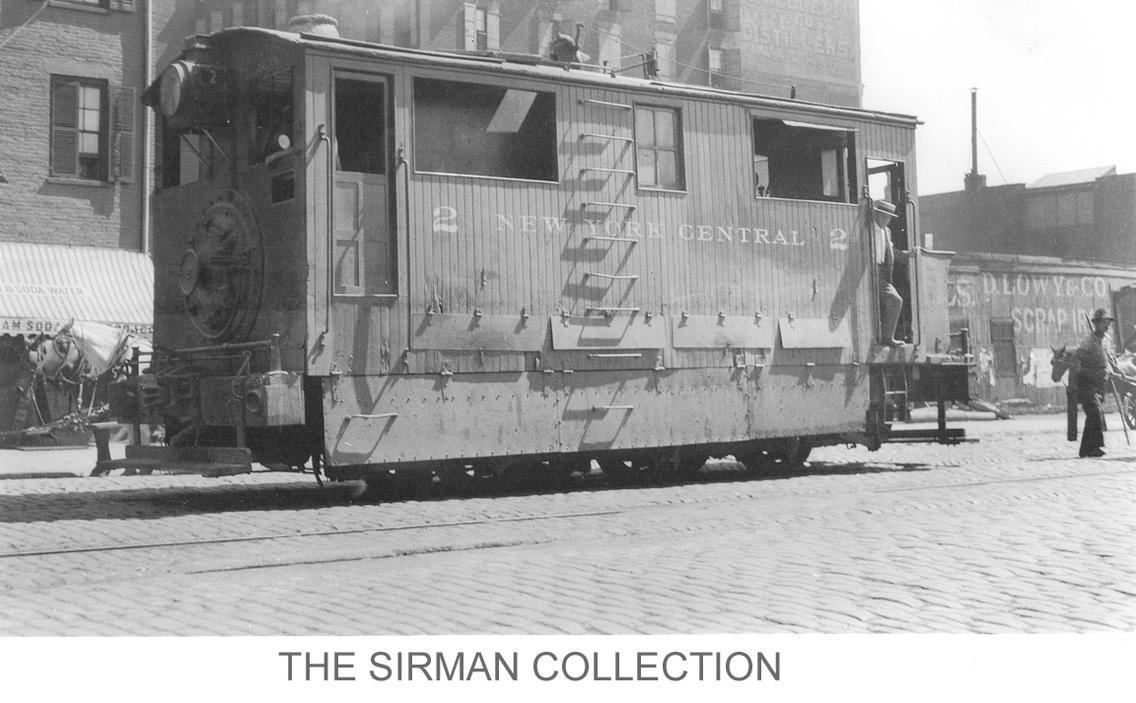
If we go with a tram / steam dummy option, I tend to agree with Rooster the full tram like the NYC ones is better for a “from scratch” or radically different starting point. My skills are not there yet, and, as mentioned, I’d like to see this old thing get rolling again.

Now my head is well and truly blow. If the powerplant looks like a 75% solution, I’ll double check with the supplier and get those parts flowing by the end of this week.

Have a great week, and thanks for sticking with me!

Eric

Good your head is properly full…

You can make a simple reversing switch with a DPDT switch. Look for center off and then you can eliminate the on/off switch.

Is it done yet?

John,

Got it. It might be available at the local hardware / big box store. Let the part accumulation process…BEGIN!!!

Eric

Rooster disclaimer: I take NO responsibility for my postings on this thread or any others for that matter.

Good stuff guys !!!

All,

Time and tide will let me get to a local electronics store this Friday. I am going to check out what they have first, then order what I need. I like to support the locals when I can!

Eric

All:

Money is now where the mouth is. Battery and charger are on hand. Motors and DPTDT switch are on order (3-6 weeks delivery). That gives us time to work on the upper shell and prep the lower hull. I have to get some photos up, and I may make a cardstock mock-up again.

As for direction, he hobby store has gears a plenty for R/C cars and belts to connect those gears. Nothing will work to make the piston. I am leaning towards the “Dutch Tram” photo as a guide, as I think getting a working piston may be beyond the local market and my creativity / tools set. I have 3-6 weeks to think about that…

More thoughts to come, but I wanted to show monetary commitment to moving forward.

Now to prep for Veterans Day commemorations, so let me close by thanking all those who chose to wear their Country’s cloth!

Aloha,

Eric

Eric Mueller said:

I am leaning towards the “Dutch Tram” photo as a guide, as I think getting a working piston may be beyond the local market and my creativity / tools set. I have 3-6 weeks to think about that…

Dutch Tram is not a Hawaiian cane field locomotive unless you can prove us wrong? I have cross heads as well and they don’t need to work because the kids won’t know either way.

Sounds like you are on a positive track putting the unit under it’s own power!

“Rooster,”

No, “Dutch Tram” is not Hawaiian. The OR&L tram looked like a mini version of the NYC steam dummies John shared. I am not aware of any surviving photos of the German built 1880-s vintage steam dummy that ran on Kaua’i. If you’ve got the cross, heads, that’ll work, and we will orient the project in that direction. We can work on that after the motors arrive and I get this all wired and working. For that matter, I have to decide if I want to put the battery inside the loco or in a HLW mini gondola.

Shifting focus to what we can get working, the obvious is to remove visible flash, presumably with fine sand paper, patch any holes, and give the old fellow a good coat of flat black paint.

The biggest hole is in right above the starboard cylinder:

You can see what should be there by using our functioning M2075 (Cleverly named Big Thomas.). It is the vertical item behind the engineer’s blue hat:

Based on the tech manual, the real engine could power air brakes, so I am assuming this may be the compressor. I had thought it might be a generator, but the real thing was a switcher. Is this something that the rebuild should have, either here or elsewhere?

You can see where this thing piped into the boiler based upon the hole. The shot also shows the results of many dives off its 4x8 home back in the '70-s. Should I remove the stack and try to straighten it or simply patch it in place, leaving the rake as “character?”

The last what-is-it-and-should-I-keep-it-and-if-so-should-I-move-it question deals with the thing that looks for all the world like a Civil War era naval “torpedo.” Based upon the cast-on piping, I am assuming it is part of the steam system. It is all the way forward and has a random silver square on it in the picture below:

That’s it! Thanks for your patience, but the path forward is now open!

Aloha,

Eric