Large Scale Central

WSRR Shay Redo

I started converting WSRR’s 3 truck shay to battery/RC last week. Well, as luck would have it, I had to order some additional components. While waiting, I decided to go ahead and get started on the other changes that I wanted to make to it. Primarily replace the plastic decking, buffer beams and cab with real wood. Making said changes required taking the engine completely apart.

So begins my first engine bash. Wish me luck, I’m going to need it.

Here is the shay before I started. Yes, yes, I know I have posted this picture in other topics but here it is again for those who may have not seen the other posts.

After a couple evenings, I have been able to reduce it to this.

Throughout the disassembly process, I took photos and kept all the little parts and pieces separated in segmented storage cases. I am hoping that these steps along with the exploded views provided by the manufacturer and my somewhat questionable memory I can get it back together.

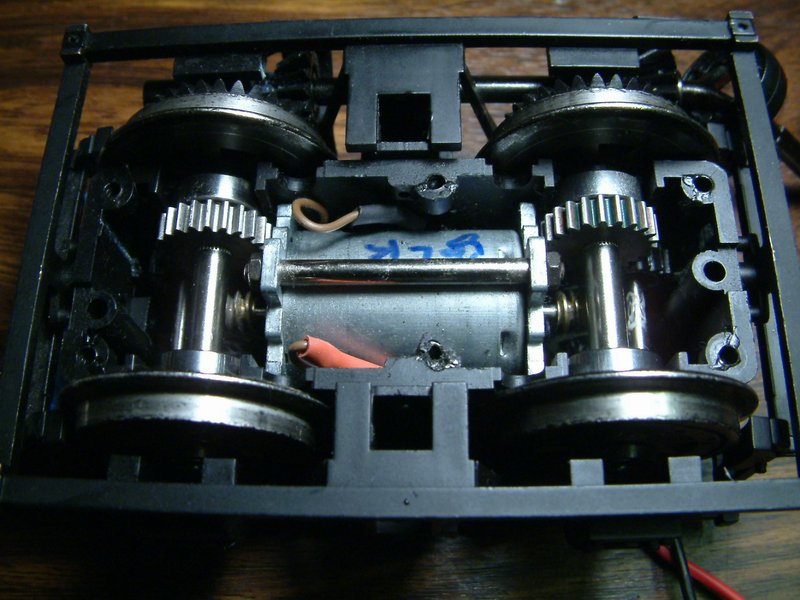
Tonight I started the rebuild. The first step was figuring out how to replace the front and rear buffer beam assemblies on the engine itself. If you’ve never taken one apart, these two beams are what tie the frame together.

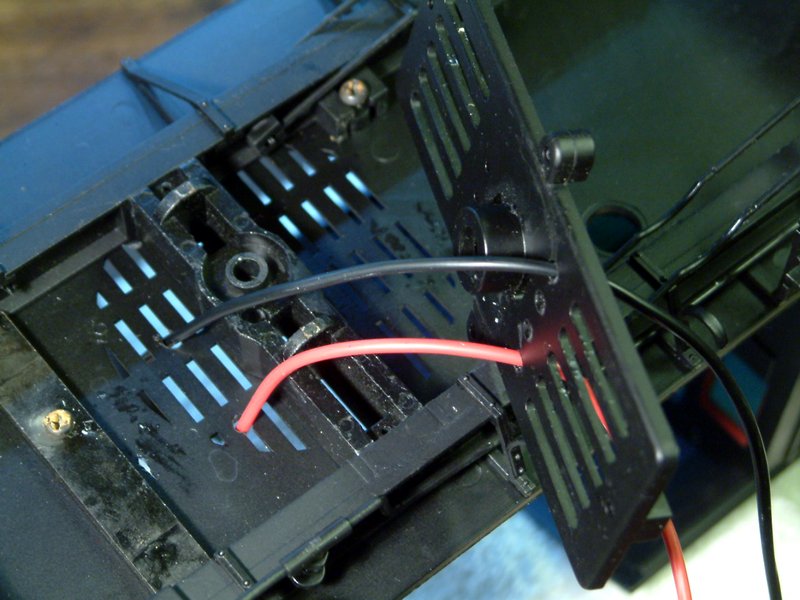
As you can see, each end of the frame has a vertical Tee beam that slides into a receiving slot in the plastic. Now, how to replicate this in wood! What I came up with is to make the beams in two parts. The first part is a thin beam the thickness of the leg of the tee with slots cut that would slide over the leg.

The second part is the main beam itself.

On the back, I cut out pockets to receive the cross of the Tee on the frame.

Now, these two are glued together to form a single, front buffer beam.

I’ve got 3 more of these to make, then I can attach them to the frame. I’ll discuss the attachment details once I get to that point.

Until next time …….

I’m not certain if it is something that you are planning, but I would strongly recommend that you convert to direct wiring of the trucks.

When I initially converted my two-truck Shay I just used the existing wires from the contact plates. It worked fine until the time that one of the trucks lost electrical contact with the receiver. This allowed the other truck to continue to run but the other’s motor did not. I was lucky that it just overloaded the circuit and blew the fuse. I have read about others that ruined their loco’s gears or shafts. I have used this technique on my three Bachmann geared locos: Shay, Heisler and Climax. It is pretty easy to do and I have not had a failure since.

Thanks for that handy tip, Mark. I will certainly look into that.

Oh yes, and direct wiring made my Climax run better, and a bit faster, so I would recommend it.

Excellent woodworking and a great solution. If the T had been just a little bigger you could have used a slot bit in a router, but i don’t think they make them that thin.

I’ll second the direct wiring. In my 2-Truck Shay rebuild I removed all the track power pickup components went direct to the motor with wire that I fed up into the boiler shell…

Ok, so when you say direct wiring, are you saying that I need to wire the power from the G3 receiver directly to the motor and bypass the contacts between the truck, the bolster, and the frame and remove the circuit board shown in the photo below? I had planned to remove all the track pickup wiring.

In my opinion, yes. Those contact pads are a weak link. The downside is that you will have wires coming out of the top of the truck that need to go into the body through new holes. You don’t need to tear it down any further, just splice to the motor wires after removing the board.

These pictures are of a 2-truck, but should give you a better idea of what I’m talking about…

Thanks John. I can handle that. Now that I look at it, it does make sense to get rid of the contacts.

I love the beams. Very clever and simple way to deal with slots.

To connect the new beams to the frame, I drilled and tapped the end of the frame itself in three locations.

The fourth one required the addition of a short piece of aluminum angle which was epoxied to the frame. It was then drilled and tapped as the others were done.

The slotted portion of the beams were then attached to the frame with 1-72 flat head machine screws. Previously I had stated that the two pieces that made up the buffer beam were glued together. Well, I decided against that. While trying to figure out how to connect the new beams, it became clear that attaching the slotted portion to the frame and then connecting the main beam to that was the way to go.

The main beams were then attached using 2-56 machine screws and square nuts. The screws on the front beam will be cut off a little at some point in time.

The front bolster came from the factory attached to the frame with screws. The rear one did not so I drilled and tapped it and screwed it to the frame too.

Now the frame is back together with new wooden buffer beams. Next task is to make the decking. That probably won’t happen for a couple of weeks due to work and spring break.

Until next time……

I like that arrangement. I was going to suggest screwing those pieces together, but I see you’ve come up with a better solution. A bit more realistic looking and functional.

Wow Nice (daring) work so far. I would be nervous to take my shay down like that.

I do think it would be a shame to paint that nice wood the prototypical black.

Keep us posted.

Wow how time flies. Its been almost 3 years since I started this project. I thought I would try and get this shay back in working order before Mik’s Challenge 2019 so the other day I pulled the box down with all the parts and got to work. Here is what I started with.

As you can see, it was a mess of parts and pieces. Fortunately, or unfortunately for my parents, I grew up tearing things apart to see what makes them tick so I learned real quick how to put it all back together. Here we go. I first started by taking the advice provided herein and direct wired each truck. I took out all contacts and associated boards. I left the wheel pickup wires and just put a piece of heat shrink over the ends, just in case I or someone else ever decided to convert it back to track power. I ran new wire to the existing motor wire and then used some hot glue to act as a strain relief.

I then twisted the wires together to help reduce the motor noise transmitted to the sound card. I read that somewhere on here, I certainly didn’t come up with that on my own. I also removed all the other boards and wires, replaced all the lights with LED’s and ran all new wiring. Each truck was tested individually to make sure they worked and all would run in the same direction when hooked together. I installed an on-off-on switch in the tender and a charging jack to charge the battery and then wired that all up.

I have checked all the wiring as I’ve progressed to make sure everything works including the LED’s. Here is the progress to-date.

I plan to build an open wooden cab to give it that backwoods look. I know that is not very typical for a 3 truck shay, but it is my railroad (https://www.largescalecentral.com/externals/tinymce/plugins/emoticons/img/smiley-wink.gif). Thanks for following along. Let me know if anyone sees something that I need to address. More to come.

Nothing like finishing an old project! I have a Connie that’s been apart for mods and battery / rc for 2 or three years now! I need to get motivated to get back to it, but I have so many things on my winter railroad to-do list I don’t think it will make it to the top.

Progress is looking good.

Dan: Looking good. I’m looking forward to seeing your wooden cab. I’m wishing I had done that to my shay and/or climax. Following with interest…

What type of wood are you using for the deck boards? Looks like a great project, will it be ready for glamour shot photos with your build by end of the MIK Challenge this year? Or better yet, with the finished WFO and the MIK build, and the Shay all in one! LoL no pressure there!

Jon, thanks for the truck wiring suggestion. That may turn out to be the best part of this build. It’ll never be seen, but will provide years of worry free service.

Jim, my plan is to simply put an open style canopy over the crew compartment with some type of metal roofing. It will have a timber post and beam style look.

Pete, I am using red oak for all the construction. It will get a good coat of stain and poly for protection even though it won’t stay out in the weather. I hope to have it completed sometime in January. I’ve been trying to work on the WFO, but Mother Nature will not cooperate. I need to install the insulation so I need dry weather and it has rained for like the last 4-5 weekends. Once I get that done I can start using it even though it is not 100% complete. BTW: your railroad is looking great.

Good job on the pilots.

I hardwire all the RC/batt conversions I do. (Including lights).

I’ve not got a whole lot done on the Shay over the holidays but I have managed to get the new water tank built and tested the sound card. I also managed to figure out how to get all the wiring to the tender. The stock connection only allows for 8 wires. I have at least twelve that need to go back there. The difficult part was figuring out how to connect the wiring harness to the tender in such a way that I could disconnect it without taking the tender shell off. My solution was to use a 24 pin PC power connector. I designed and printed a holder for the connector so that the male end (coming from the engine) will be flush with the bottom of the tender. Not sure how t is going to look when I get it hooked up.

Here are the components for the connection.

Female end inserted into holder

Cover to hold female end in place

Holder flipped 180 degrees. Male connector attaches here.

And finally, the male end connected

I hope this works like I think. Time will tell. Ok, here is a shot of the new water tank.