Good re-use of the radiator louvers. Project is proceeding nicely.
Nice progress Matt.
John Passaro said:
edit: how come I see the typos after I hit the post box? Geez!
Just the way our software works. Every day for me (http://largescalecentral.com/externals/tinymce/plugins/emoticons/img/smiley-surprised.gif)Just did now 'cause I didn’t notice the big red underlines on misspelled words!
Thank you for the comments, gentlemen.
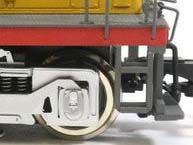
The next hard part after the radiators was the steps at each corner. The USA Trains steps look like this:
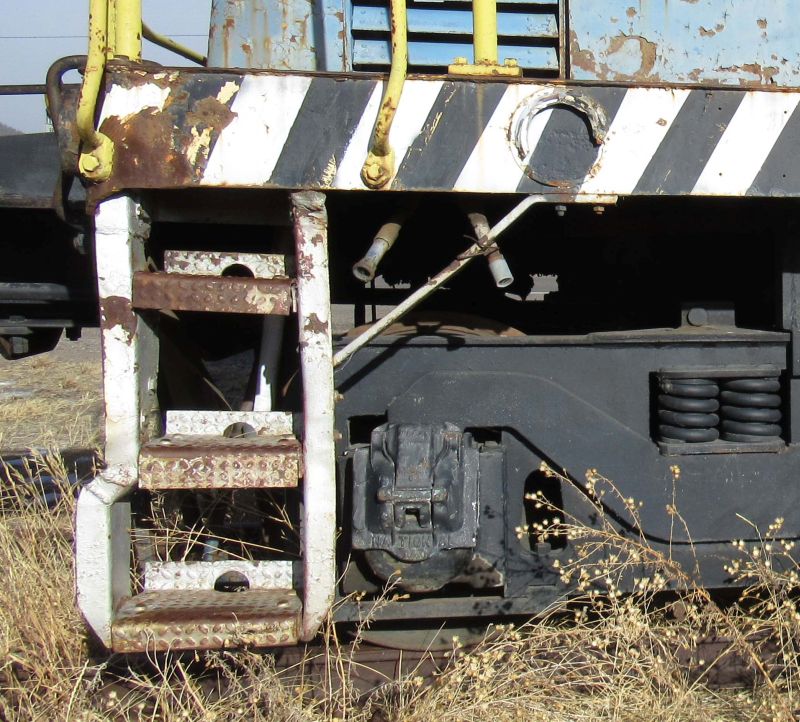
The prototype steps look like this:
I tried making them out of brass, but my soldering skills simply aren’t up to that kind of work. After much pondering, I finally decided to make them out of styrene shapes from Plastruct. I printed a picture of the steps at scale and found that the HO scale diamond plate plastic patterned sheet in the catalog matched the printed picture perfectly. I also bought some 3/32" fineline styrene angles. I cut and bent a bunch of pieces of each and them melted them together with Plastruct Plastic Weld. They came out like this:
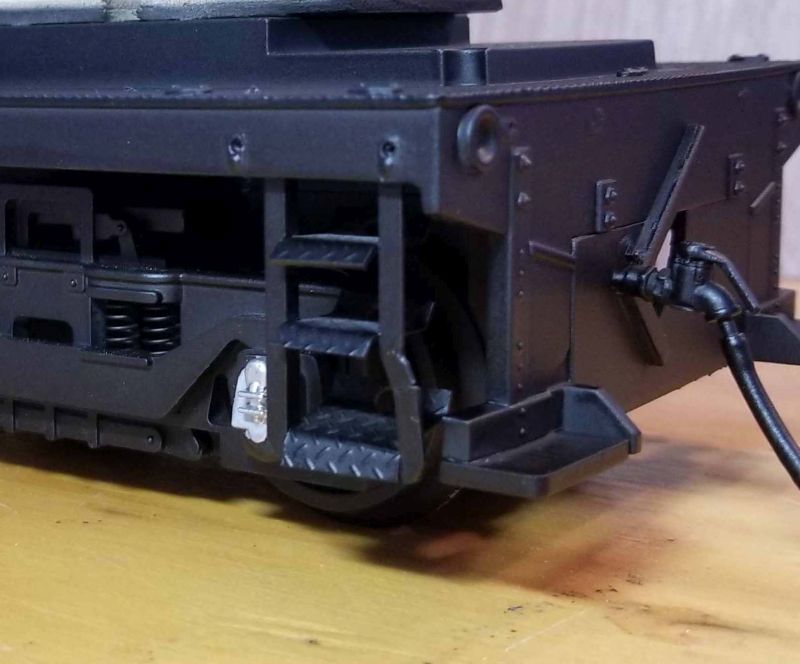
They’re pretty fragile, and if I still owned hundreds of feet of operational track I would fear for their survival. But since I have no track these days, they should be fine.
Cheers,
Matt
Looking good Matt.
Shane
Thank you, Shane. it’s been a fun project.
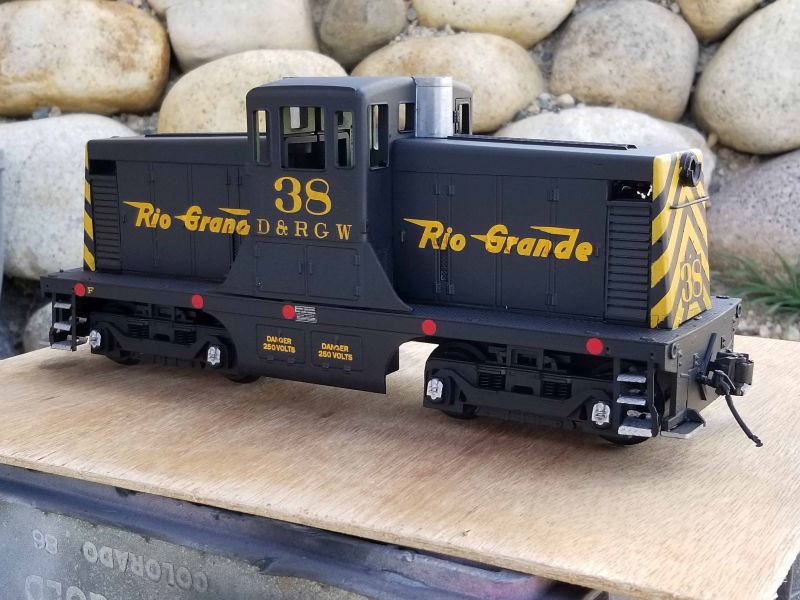
Okay, now it’s starting to all come together:
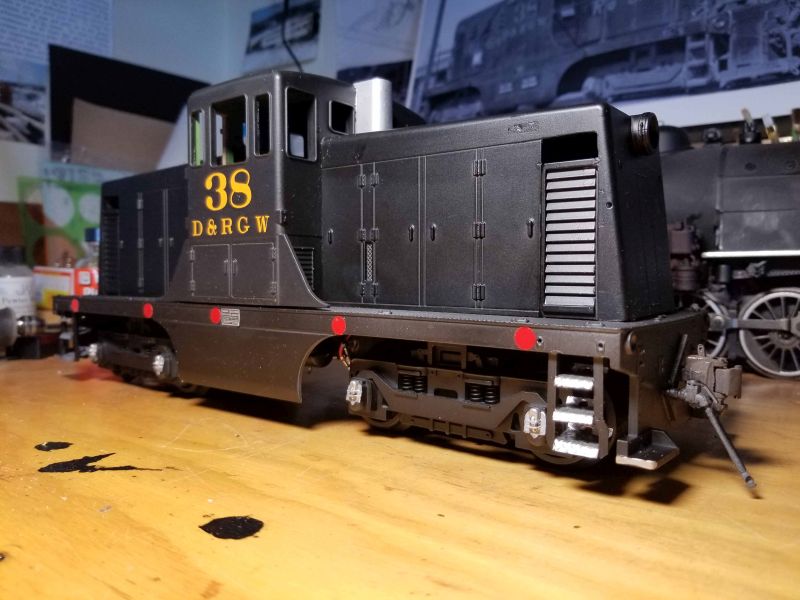
The reflectors are 3M red reflecting tape, made with my wife’s hole punch. Builder’s plates are from Microscale and placed on aluminum plates. Steps and journal box lids have been trimmed with silver paint.
Next up: stripes and more lettering.
Cheers,
Matt
That last photo looks terrific.
Great job, keep on bashing!
John R.
Thanks John.
Getting ready for stripes:
.jpg)
Stay tuned,
Matt
Careful Matt, While is fine for baseboards and latex paint in your home. For a sharp line on models, a more grippy tape should be used. I use this https://www.amazon.com/Tamiya-Masking-Tape-2pcs-Refill/dp/B00J3TLZQC
Although, you may be OK if you press the tape down with a credit card and use multiple light coats.
Or another trick is to respray your base coat (black) to seal the edge of the tape. Then spray white. Gives a nice sharp line because the 1st coat bleeds thru instead of the last finish coat if your tape isn’t perfect.
Excellent tips, thanks guys!
Stripes are done and the rest of the lettering. I still need to do the number boards, the sun shades, the visors, and put all of the railings back on:
Cheers,
Matt
Nice work
Yep some fine looking details (https://www.largescalecentral.com/externals/tinymce/plugins/emoticons/img/smiley-cool.gif)
Very nice, Matt. I’ve enjoyed following this build and learned a few things in the process. Thanks for sharing.
Thanks guys. I am calling the project done. I could still add cab sunshades, but I’m kinda over it, and they were apparently removed in later years.
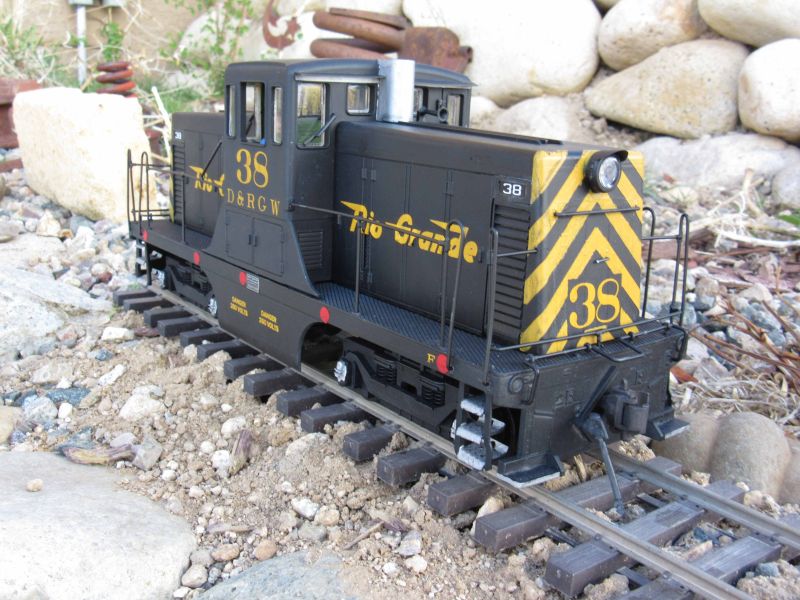
The number boards are made of white and clear .015 styrene, with Clover House 9603-21 dry transfer lettering. Cab visors are white .015 sytrene. It’s not perfect, but it meets the well-established standard of Marty Cozad’s patented “five foot rule”.
And now, back to what I WAS doing when I got derailed onto this project: http://www.largescalecentral.com/forums/topic/29052/d-amp-rgw-c-48-1151
Cheers,
Matt
Nice job Matt it looks Great and from your photo I’d say it passes the 2 foot rule.