Thanks!
Yeah, that red thingy is the pneumatic cylinder thingy. At least according to the article.
Thanks!
Yeah, that red thingy is the pneumatic cylinder thingy. At least according to the article.
Looks great Bruce.
Very cool!
Neato Bruce! I really like the design of the crane. It’d be a dandy to place on an industrial loading dock.
I think I have the original MR. Maybe I’ll copy just the crane as my RR lokies are all oil burners.
Bruce,
I gotta know, is that white slab under your coal crane a piece of UHMW?
Bob C.
Bob Cope said:
Bruce,I gotta know, is that white slab under your coal crane a piece of UHMW?
Bob C.
Richard, you can get the gears from Plastruct. I continue to be amazed at all the neat stuff they stock; you can order directly from them as well.
Finally got the floor done. I’ve put an India ink/alcohol wash over the floor and then used some tiny brass nails to hold everything in place. Not that I don’t trust the glue, but I like a bit of extra insurance. The nails were darkened using Blacken-It BEFORE hammering them in.

It’s a bit tedious, but the looks make it worth while. And, speaking of tedious, I also started sheathing the walls. Same process as the floors, but first sand both sides of the boards and then cut them to length. The boards are 1/16" x 1/2" cedar. Next, I glue them in place along the horizontal beams and use some weights to hold things in place. Once the glue has dried, I put the small nails in place. Eventually, I’ll put the India ink wash on these as well. Finally, the exterior walls well get a red paint.
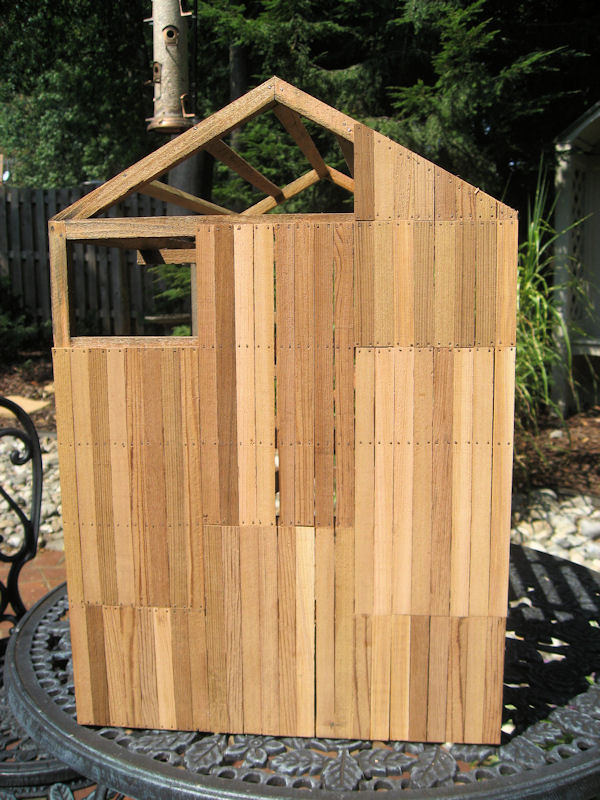

Note that the wall is NOT done yet; I just got tired of working on it. 
Any more progress on this, Bruce?
Funny you should ask! :o I finally finished the nails today. I know that they’re a bit oversize, but the REAL reason I’m using these nails is that I don’t totally trust the glue. Anyway, here’s a shot of the inside:

The right side:

Left:

Back:

The building is not very heavy, so in order to weight it down a bit, I decided to glue some LARGE chunks of coal down before I add the smaller pieces of coal. This adds quite a bit of weight, so it shouldn’t blow away during the next storm. I also coated the entire building with a wash of India Ink and alcohol - this helps tone down the new wood a bit.

Wow Bruce I did not notice the two nails per board, no wonder you got tired of nailing. I only use 1 nail per board and my buildings stay together in Colorado. I also am using the titebond III glue. I have trouble with the nails wanting to back out. Every spring i have to put some glue on the nails backing out then push them back in.
Old woodworker’s trick - toe your nails in on an angle. Make them at alternate angles - one nail like this \ , the next like this / , and things will hold much tighter than if you put yr nails in like this | .
Isn’t all this going to drive you nuts? No. Do all your / angles, then turn your work and proceed to do those intervening nails at the same angle. Result: \ / \ / \ / \ / . A thing of beauty. 
The crane and building are both turning out great! Nice job on that crane mechanism. I love the look of all the nails, and agree it’s preferable to glue alone.
Crimeny! I thought I was the only one to pound in thousands of nails. 
I broke down and bought a pin nailer.
Good job!
That looks excellent Bruce. Nothing like an old building
On the pin nailer - I have one, but I don’t think you could achieve the look since the pins are headless and couldn’t be pre-blackened. I’ve used the pin nailer when building wooden rolling stick and once the car is done you need to look very close to see the nail marks.
Hehe. Well, it’s been awhile since I built anything in wood. I’m hoping it does OK. I do plan to put something under it, as well as treat the cedar. Of course it still needs paint on the outside; that will help.
I thought about getting a pin nailer awhile back, but since I don’t do much with real wood, I quickly discarded that idea. On this building, I’d be afraid the pins would go through the other side. The planking is 1/16" and the horizontal beams are 1/4".
Your right on the pins Bruce. 3/8" is about the shortest. That’s probably about 1/8 too long for your siding.
I believe you’d be better off just letting that old cedar weather au naturel out there and not treat it. Think of those old wooden barns, unpainted, cedar-clad, that have lasted two hundred years or more. Cedar is awesome. Keep its ends off the ground (a gravel base will do it, so will a concrete slab or a brick). All this will let yr wood dry out between rains just like those old barns, and the weather will grey it up nicely over the next year or two. Really, unless you’re particularly impatient you don’t need to stain it either, (I would have advised against staining, to tell the truth, but no real harm done) -Sun and wind will give you a much more authentic and durable finish, believe me…
Interesting comments about the pins and the nailers. I really like the nail effect youy achieved on this model, Bruce. D’ja drill and push. or how DID 'ya do it all?
One more comment… I wish I understood what that cylinder back there is supposed to accomplish - I don’t get its purpose at all… answers, even speculations, from anyone out there?
I love to watch your work in progress, Bruce…
Bruce Chandler said:
Hehe. Well, it’s been awhile since I built anything in wood. I’m hoping it does OK. I do plan to put something under it, as well as treat the cedar. Of course it still needs paint on the outside; that will help. I thought about getting a pin nailer awhile back, but since I don’t do much with real wood, I quickly discarded that idea. On this building, I’d be afraid the pins would go through the other side. The planking is 1/16" and the horizontal beams are 1/4".
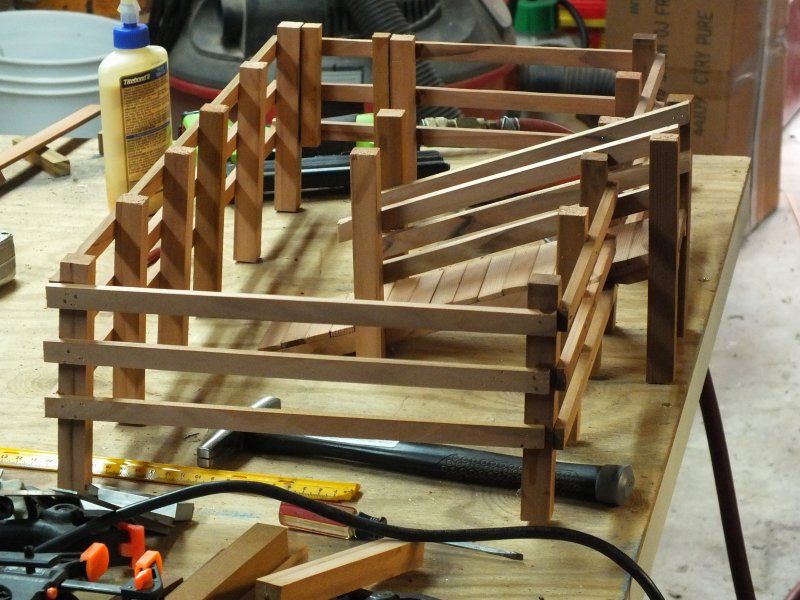
A pin nailer comes in handy when you want to hold the pieces in place while the glue drys. I used that on the stock pens I built.
(http://i253.photobucket.com/albums/hh58/rgseng/Mancos/stockyard07.jpg)
Once the glue dried I went back with an electric brad nailer and reinforced it a bit more. After that where any of the pins went all the way through the wood I just pulled them out. Then a good dousing with Boiled Linseed Oil after I stained it. The brad nailer a bit more of a PITA to use, since it also shoots stables and the brads are placed on one side of the feed. It’s easy to forget which side shoots out the brad if your not careful. It also has a wide hammer which will leave an indentation in the wood. I’ll hold it a little off the wood, them seat the brad with a tack hammer.
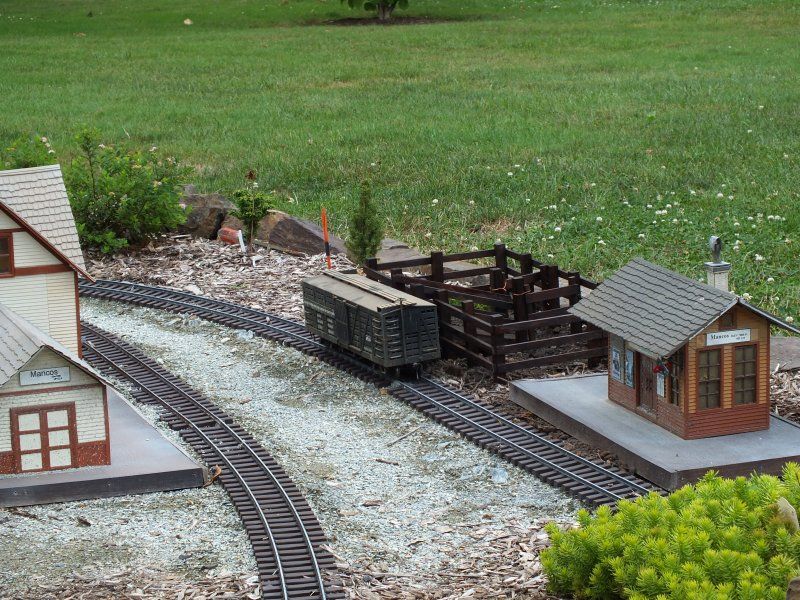
(http://i253.photobucket.com/albums/hh58/rgseng/Mancos/stockyard21.jpg)
John Le Forestier said:
[snip] I really like the nail effect youy achieved on this model, Bruce. D'ja drill and push. or how DID 'ya do it all?One more comment… I wish I understood what that cylinder back there is supposed to accomplish - I don’t get its purpose at all… answers, even speculations, from anyone out there?
I love to watch your work in progress, Bruce…
 Thanks for the comments!
As for the cylinder, the crane is supposed to be pneumatic - otherwise there would be some serious cranking to lift those heavy buckets. Of course there IS a hand crank, but according to the article, that’s just something left over after conversion to the pressure system. I tried to find out more information, but really didn’t come across much in the way of details. There’s some speculation that they’d hook it up to the locomotive and use steam pressure. It could also be oil filled and the hand crank could be used to activate it. I wouldn’t think it would be compressed air, but I guess it could be.
Ken,
One of the reasons I never went with a pin nailer was that all the good ones seemed to require an air compressor - and I wasn’t ready to make that investment. I’d prefer just plain electric, but never could find one that did TINY pins.
Bruce Chandler said:Well, yea, there is that. but since I already had the A/C, and use it for a lot of other things, that didn't figger into it. But I see your point...;)
Ken, One of the reasons I never went with a pin nailer was that all the good ones seemed to require an air compressor - and I wasn't ready to make that investment. I'd prefer just plain electric, but never could find one that did TINY pins.