Large Scale Central

Bachmann Rail Truck Axle Fix - Maybe

Just thought I would entertain you with a photo essay of the fun I am not having with the rear axle on a Bachmann Railtruck. My Railtruck is actually working, as is my friend’s unit, but the axle gears break. I happened to find a vendor on aliexpress selling 5,000 bevel gears for $101 which looked about the right size, so I messaged to ask if they would sell me a “sample”, so they offered me a pack of 10 for $0.42. I had just bought a gear puller and a wheel puller, so I went ahead and bought 3 different sizes thinking I’d be able to address the problem when my axle failed.

About that time someone piped up on Facebook asking if there was a way to fix a bad gear. Then the guy who sold me my Railtruck offered to sell a spare but working axle, so I hastily bought the spare and promised to investigate swapping/fixing gears. Mr “Gear Man” Jerry indicated he couldn’t cut bevels on his equipment, and his 3D print doesn’t seem to have worked. So the ball was back in my court.

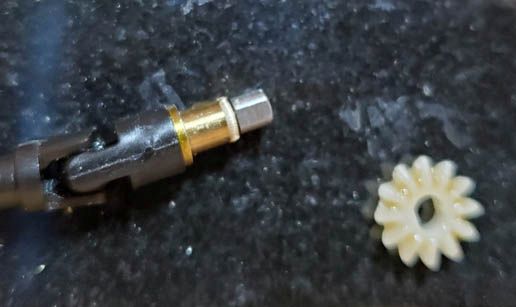
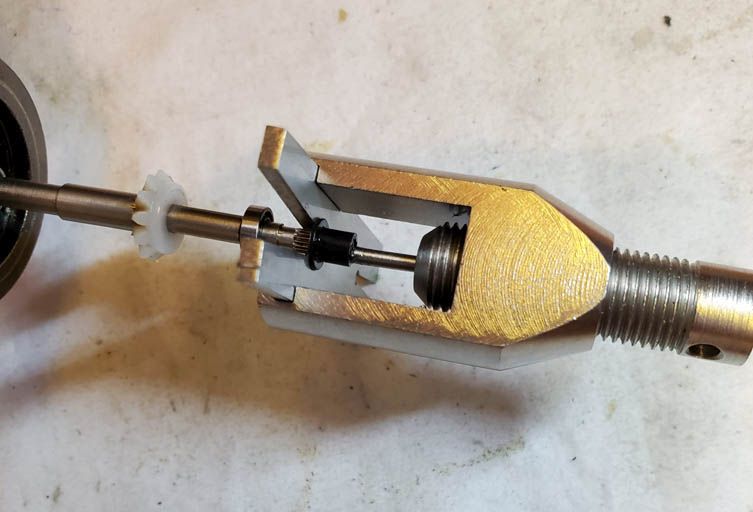
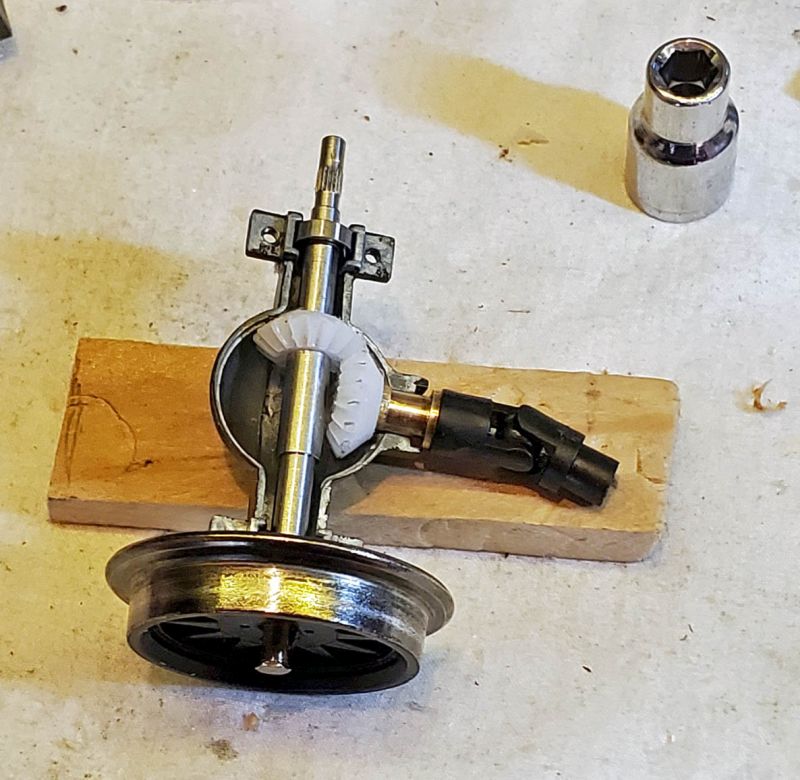
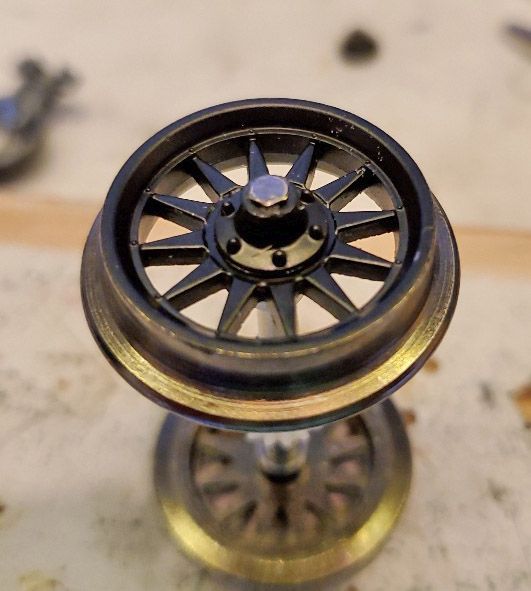
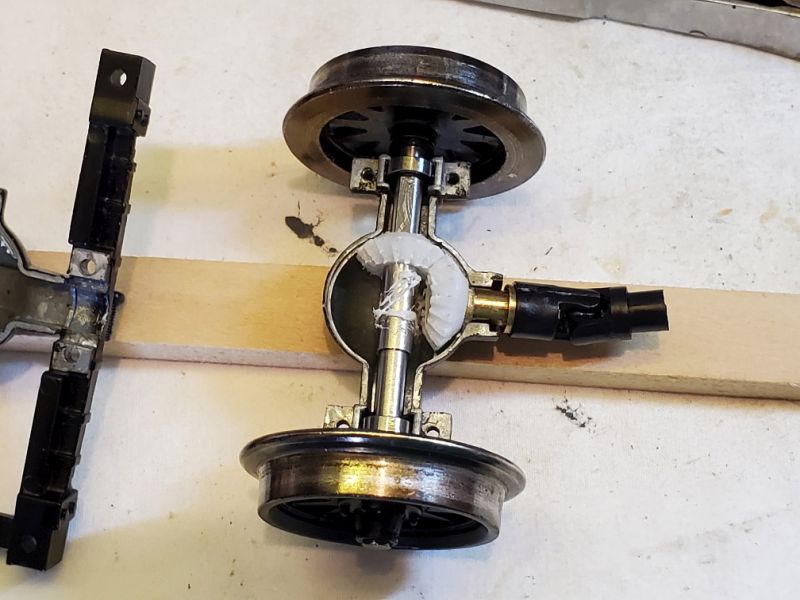
I took this pic shortly after I got the axle so I could give Jerry the dimensions.

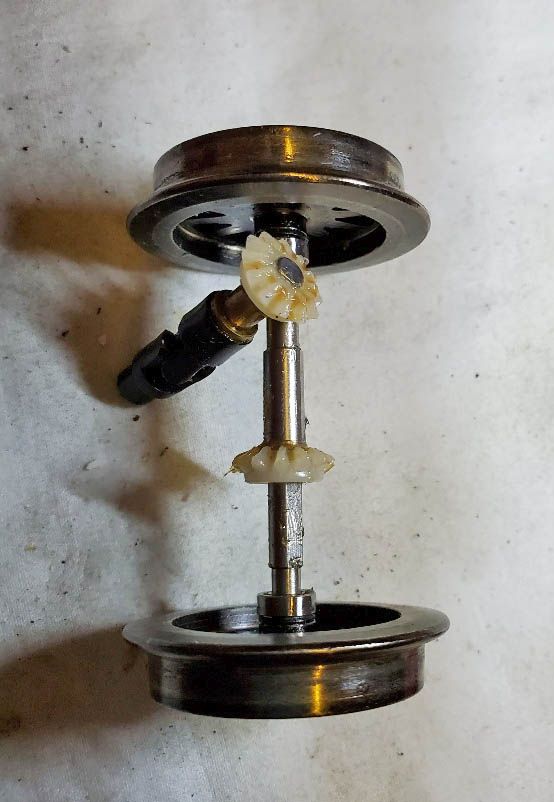
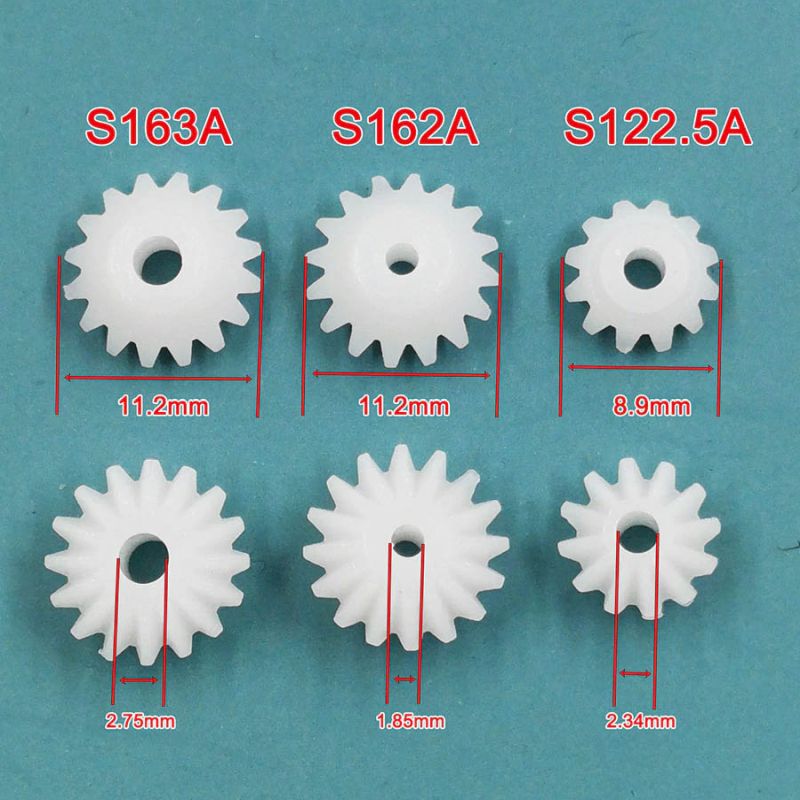
A few days ago my samples arrived, and as the Boxcab is essentially finished, I made this my next priority.

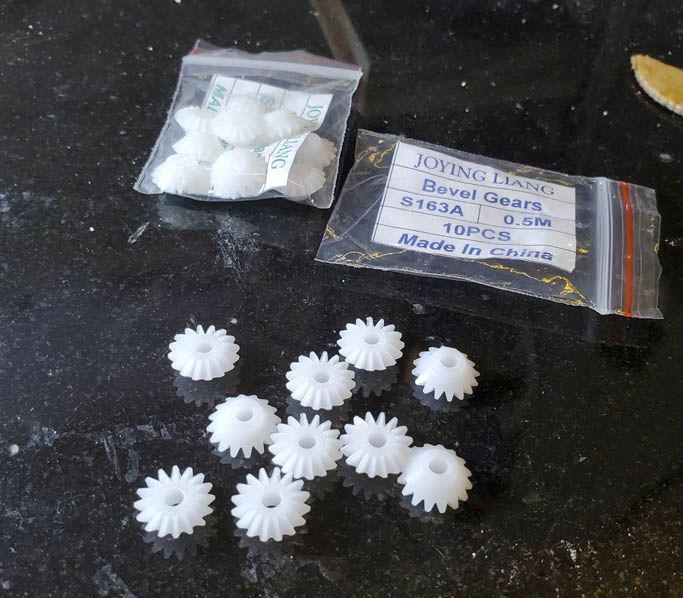
The gear in the axle is 10.5mm diameter, and these are claimed to be 11.2mm. That’s a mere 0.3mm to be sanded off. I set the gear in a rig made from a pcb stand-off and held some emery to it while it spun in the drill.

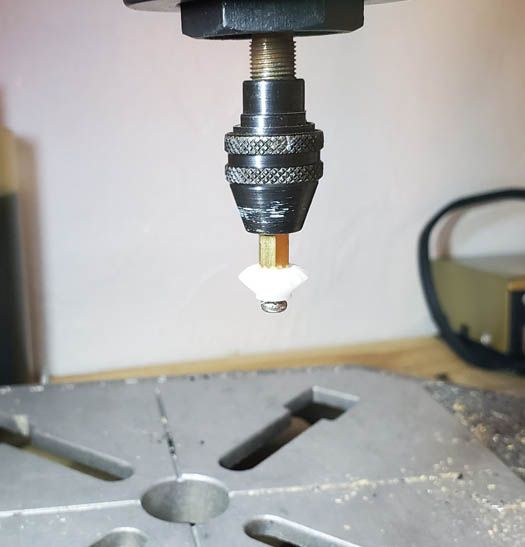
I then tilted the drill and cut off about 1mm in thickness using a small saw (about the size of an Xacto blade.) The originals are 3.5mm and this was 4.5 - not any more.

Then I got out my new gear puller ($5 at Aliexpress,) and pulled the gear off the drive to the axle.

Once it was off, it was clear it had 2 flat sides, as suspected. The axle has flats so it seemed likely they would be the same part.

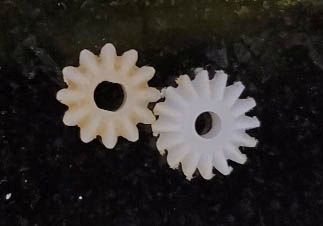
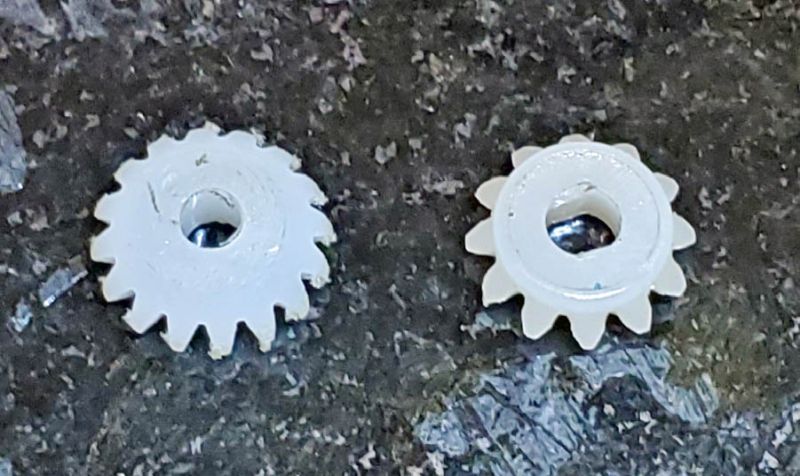
Here’s the Bachmann gear and my new gear, with a little fuzz from the sanding. The new gear has a 2.9mm hole, whereas the old one has a 3.2mm with the 2 flats which are, surprise, 2.9mm apart.

The gears will actually mesh, sort of, and using a new gear in the axle and leaving the old one on the driveline may be a fall back option.

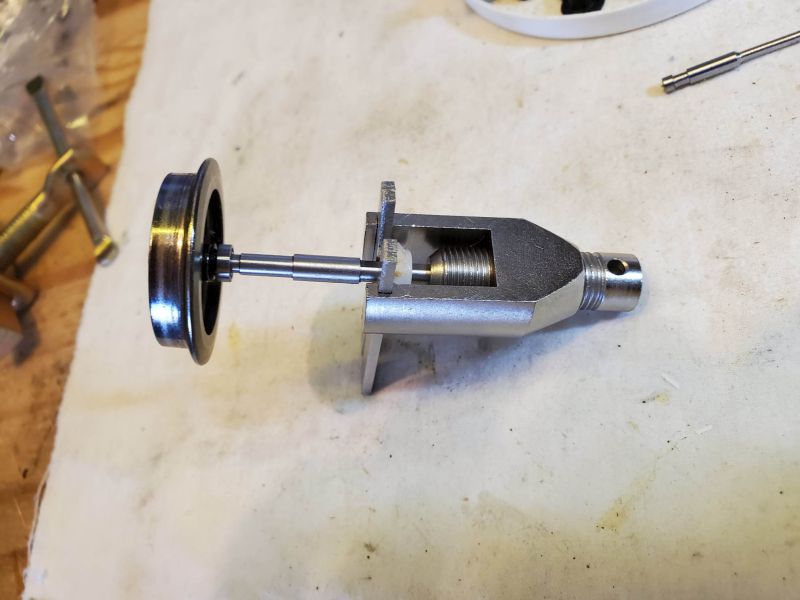
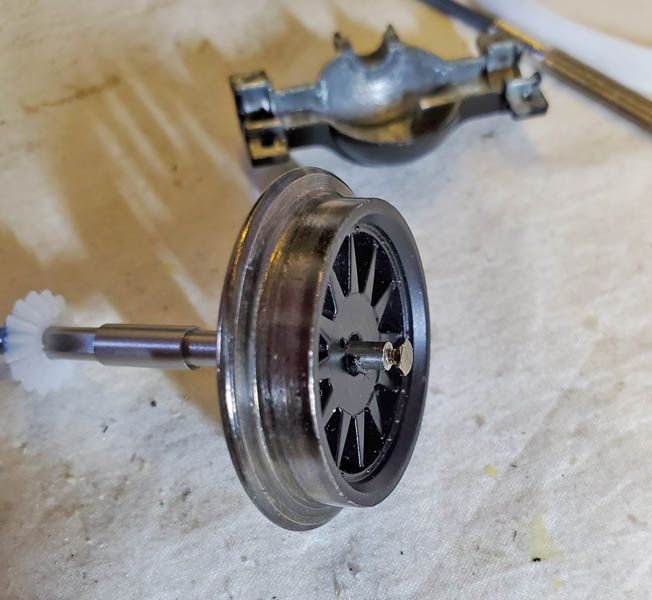
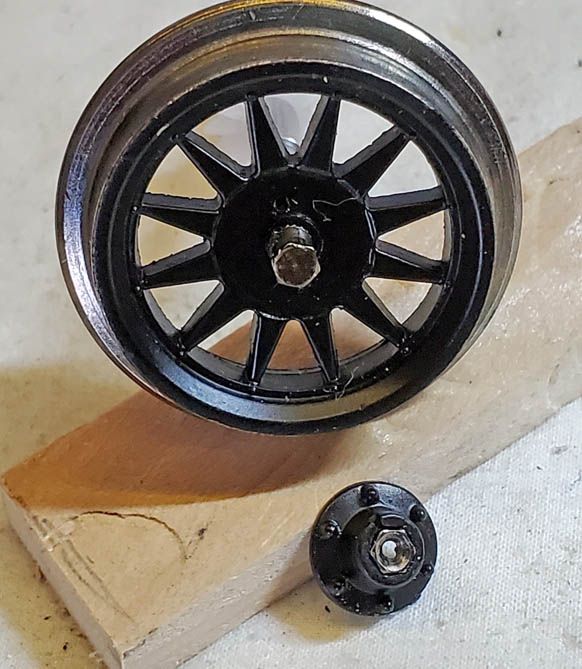
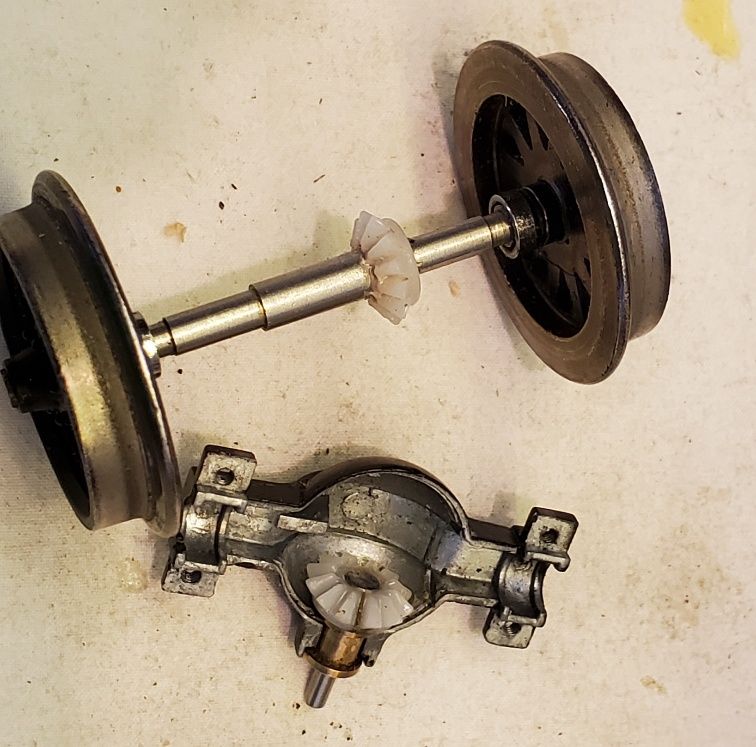
Having dealt with the driveline, it was time to remove the axle gear. First the wheel puller:

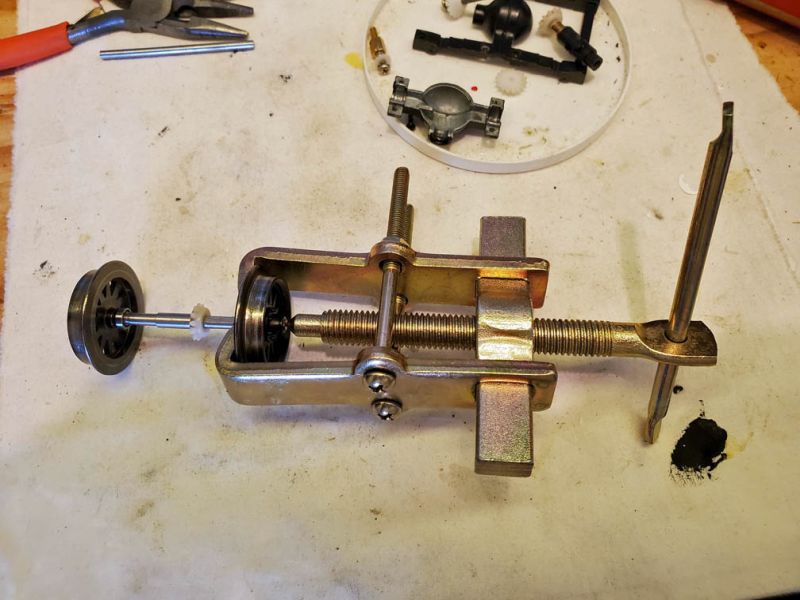
There’s something odd here, as the axle end looked like solid steel - but it wasn’t. There’s a plastic overlay hub, and a tiny, tiny (m1?) bolt in the center (arrowed.) And the wheel pulled off the insulating sleeve.

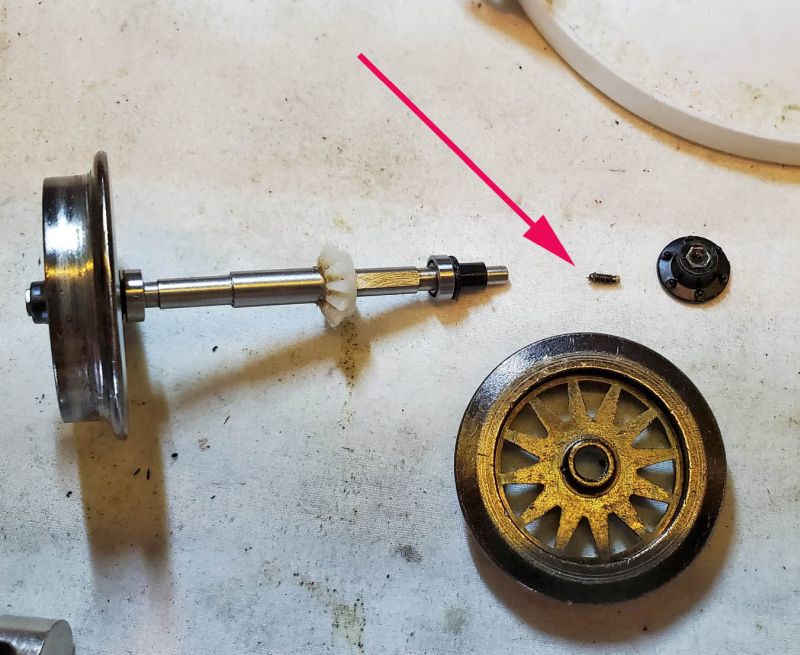
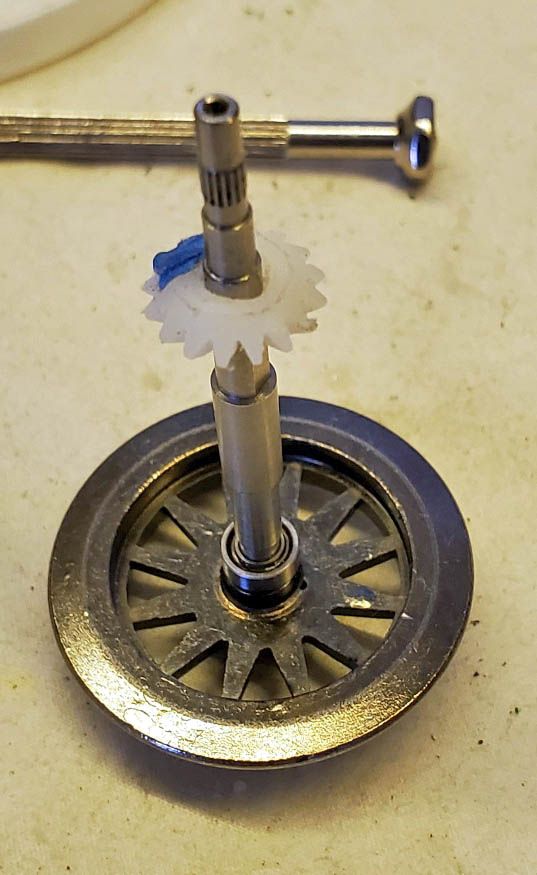
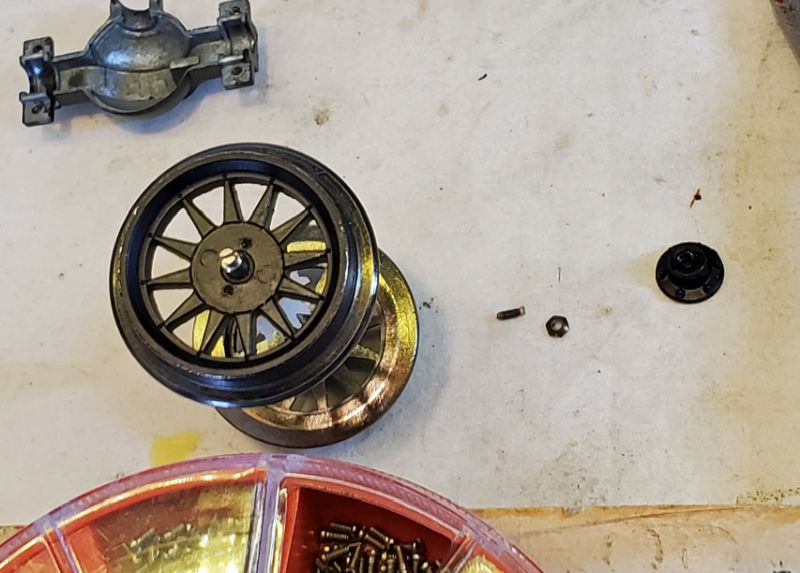
So out comes the gear puller again, and I got the hub off the shaft.

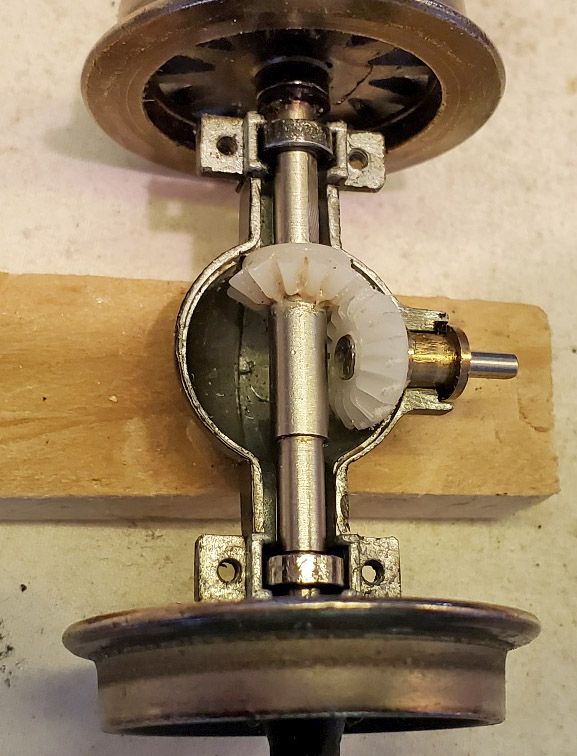
As you can see, the axle is splined to hold the wheel hub. I’m not sure what holds the wheel on the insulation - probably glue. I also discovered the bearings are nice little ball bearings.

You can also see that everything tapers to the outer end, so that the gear can come off. The trusty gear puller, using the axle as the pin, managed to pull it off with no fuss.

I then drilled out one new gear hub 1/8", which is 3.18mm. It was a little loose on the shaft, so I may have to junk that one - though I could pin it on the flats. TBD. Here’s the new and original gears again.

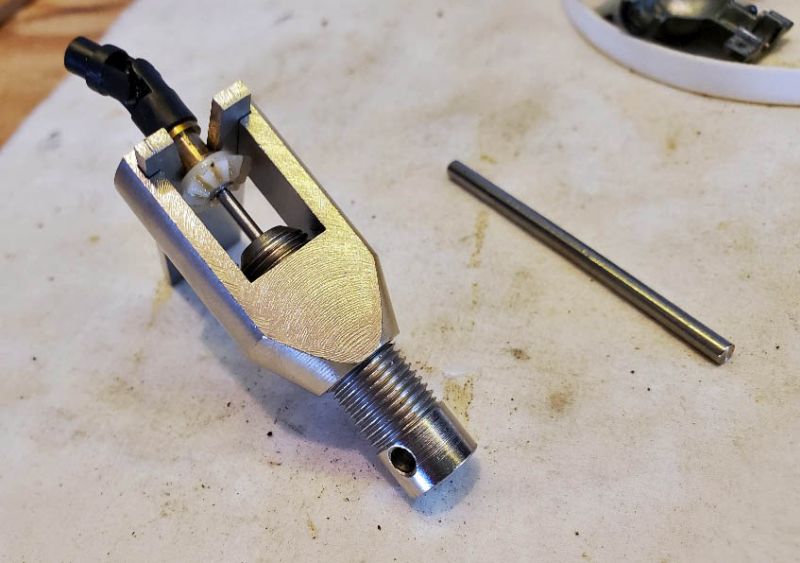
My final process before dinner was called, was to file the center of the other gear with a mini round file to make it an elongated 2.9mm/3.2mm hole, which I could then force on the flats of the axle and drive shaft.

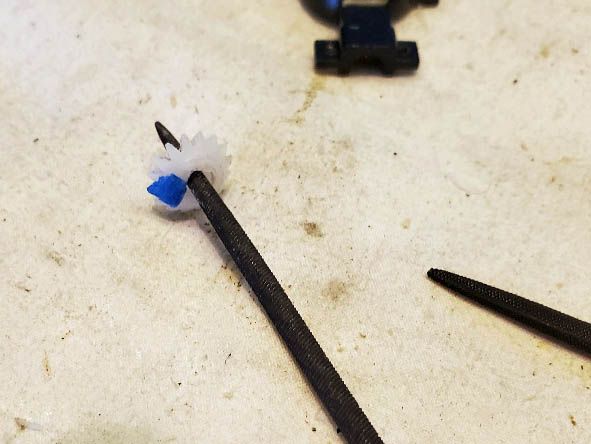
At this time it does not yet fit either axle or drive shaft, but when I get a minute I will continue to file away at it.

I an tell you one thing - I will not be offering to fix anyone’s broken axle gear. I will get a broken one and fix it just to see how easy it is when I know what I am doing.

Anyone want their broken Railtruck axle fixed? Message me.

Well, after a couple of days of reflection, I did the obvious - looked at the specs of my new gears and found the bore was 2.75mm, not 2.9mm.

The 162 and 163 gears are identical apart from the bore, so I have plenty of spares. As I also found that drilling the gear 1/8" (3.175mm) just made it too loose, I figured a 7/64ths or 3mm drill might work better. The former is only 2.75mm so that went back in the box, but I did find my 3mm drill.

At the same time I decided to investigate that tiny little screw from the hub of the wheel, so I tried removing the hub molding on the other wheel. Not surprisingly, it turned out the molding was held by a tiny screw with a big head. The problem here is that I need to be able to tap the gear on to the axle when it is tight, which means the screw takes the strain or I bash the end of the axle and mess up the threads/hole. I discovered I can tighten the screw all the way into the hole so the head is flush with the axle, so that should prevent too much damage. Not sure what I can do about the other end, where my wheel puller tore the head off!

Not making it easy, are they. They probably put the gear on first with a special tool. Huh. Talking of special tools, pal Tim suggested making a hardwood ‘gear holder’ to keep it in one place while drilling. I’d sorts come to the same conclusion, so I drilled a piece of wood 3/8" and chiseled around until the gear fit fairly tightly.

Anyway, using my 3mm drill, I drilled out the 2.75mm hole and filed it a little more. Then I gently tapped it on to the axle. If you hadn’t figured it out, the piece of blue tape tells me where the flats were filed - in theory.

Next step is to find a tube that will fit over the axle and let me tap the gear all the way down to the shoulder where the flats finish.

Success! I found a socket that fit nicely over the gear (using the V-shaped metal plate off my gear puller,) and I gently tapped the gear down to the shoulder. I tried the mesh with the original gear but it was a bit so-so. So I got out another gear, clamped it in the wood holder, drilled it 3mm and gave it a few strokes with the file until it looked like it was elongated. I then tapped it on to the driveshaft.

The two gears mesh very nicely. I won’t close it all up until I get the grease I ordered (I decided not to attempt my usual Vaseline.) The width of the gear is definitely an issue - even though I shaved some of the gear it is still a little thicker than the original. Maybe I’ll make the next one a bit slimmer.

Still looking for a victim with a bad axle that needs fixing.

Isn’t that axle the most complicated piece you ever saw on a model? Must have cost a fortune to make/procure it.

Thanks Pete! And Hopefully the gears last. Unlike the original ones.

Jason

Pete Thornton said:

Still looking for a victim with a bad axle that needs fixing.

If one of mine breaks, I’ll let ya know…(https://www.largescalecentral.com/externals/tinymce/plugins/emoticons/img/smiley-wink.gif)

I was asked to clarify what was going on with the little bolt.

The wheel is metal with a plain hub area, on an insulated sleeve. There is a plastic ‘hub’ with nbws molded on it that is held on the wheel by the little bolt.
It’s pretty easy to take the bolt off, pull off the hub molding, and then put the bolt back tight so you have something to tap against and to screw against when replacing/removing the axle gear. (Not knowing it was there, I broke the head off with my wheel puller, as the other pics show.)

A final wrap-up as I unpacked the grease today. The good screw on the axle end came out so I could tap the wheel back on to the hub insulation and the axle.

Then the question was how to fix the other side, which I broke in removing the wheel. I did find a bolt in my kit, probably 1mm. The large head of the old bolt looked promising, so I persuaded (filed) the hole in the head to go over my new bolt.

That worked. A dash of black paint and you’ll never know the two sides are different.

Wiped some grease on the new gears, oiled the ball bearings on the axle and the brass collar/bearing on the drive shaft, and fastened it back together.

I am sure it will actually work in a railtruck, but it may not be as smooth as the original. The dimensions and gear mesh are set by several obscure parts, like the axle has a shoulder for the gear - so that is probably in the right place. The drive shaft gear, on the other hand, was cut down as my replacement was too wide, so the mesh is dependent on how good I am at cutting it to the ‘right’ size - and given these are different gears, the width of the gear may not be the same.

Hey, as long as it works. . .

A short postscript - don’t want to overstay my welcome! I asked for a victim/volunteer with a bad axle to let me try the fix on theirs. Winn sent me his, which he’d tried to fix with super-glue. It turned out his drive gear was bad, not the axle gear.

As an experiment, as I had figured the gears might mesh, I created another compatible gear (3.2mm axle, 3mm flats, 3.5mm wide) and put it on the driveshaft. It meshes as well as the other axle I just finished. I think these 163A gears are 16 tooth and the Bachmann is 12. You can see mine is bigger.

Anyone else not see photos in this thread? Jerry B said they were gone.

Pete, I see them. Yes, I do (to meet character requirements)

I see them but why does a Bachmann rail truck need and open differential with roller bearings on the end of the axles? Thought they just delivered mail, goods and bootleg whiskey ?

Pete,

This is making Oldest Son’s “pusher car” look like an easy solution! Talk about overengineered / under-manufactured!

Eric

Are we talking about the model or the real thing ? :face_with_monocle:

The model’s diff is not ‘open’ unless you take the screws out and open it up to get at the gears. And yes, the ball bearings do seem like overkill.

1 Like

Don’t matter either way Pete as it’s good thread!

Ah, I knew someone had posted a fix. I got two of these from Ken’s estate, and they both have now given up the ghost. Going to take them apart and see which of the four gears are fubar. I wonder if Stock Drive Products has something in brass or stainless?

EDIT: Yep. Something in here should work.

https://www.sdp-si.com/products/Gears/Bevel-Miter-Gears.php

I have a friend with a broken drive line in his. Haven’t found a good fix yet.

I have a spare axle and a bunch of spare gears. The ones I used, as described earlier in the thread, are not Bachmann and should last a lot longer.

There is a similar bevel pair at the other end of the driveline, behind the motor. No idea why Bachmann made it so complicated. Eric’s truck blew a motor, and despite my efforts to resuscitate it, I think it is still dead.

Metal gears will be a bit noisy. If you are not fussy how it looks underneath, you can get a motor+gear package that fits under the back. The original wheels wont fit though.

Depending on what I find when I take these two apart, I may be inquiring about your extras. :slight_smile: