Large Scale Central

Fir trees

here i document my conversion of small (and cheap) christmas trees into firs for my layout.

(the first part is partially copied from another thread, but i think, the new indoor section of the forum deserves well structured threads. so i start over again.)

first i took some copper and alu pipes and sawed them into different lengths.

then i used copper wire to make sceleton roots.

soldering didn’t work well, so i took the short lane. some tape and they stay more or less in place.

i think, i will use silicon sealer, to flesh out the roots.

the finish of the bark will be paint with sawdust.

how to make the foilage acceptable i will know after some tests.

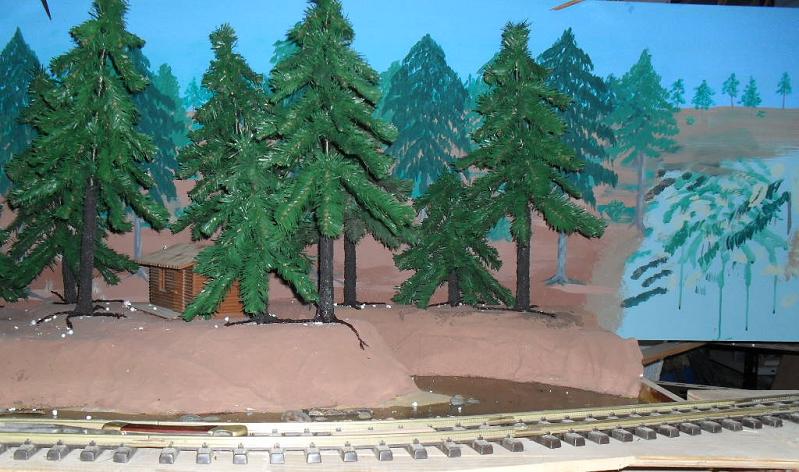
the trees will be planted 2" deep into the foam that makes up the ground.
hence the treetrunks go further down than the visible part.
for additional stability and for looks there will be some roots spreading out on the surface of the ground.
these are made from pieces of copperwire, twisted and fixed to the stems with tape.
and, no it is not just because i’m sloppy, that the tape is not laid on smoothly. this way i hope to get slightly unregular treetrunks,
the loops at the ends of the roots will be cut open before texturing.

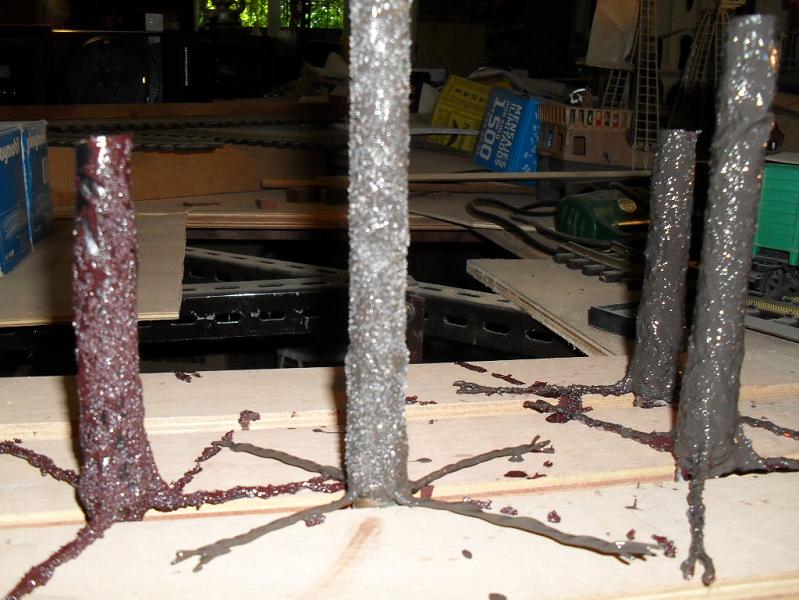
then i fleshed out the roots, and specially the “knees” at the union of trunks and roots with some silicon-sealer.
(used that, because it stays flexible, for later bending the roots individually according to the positions, where the trees will be)

no pic. i forgot to take that step.

with a nixture of normal, oilbased householdpaint and some spoons full of sand for poolfilters i made a thick smear.
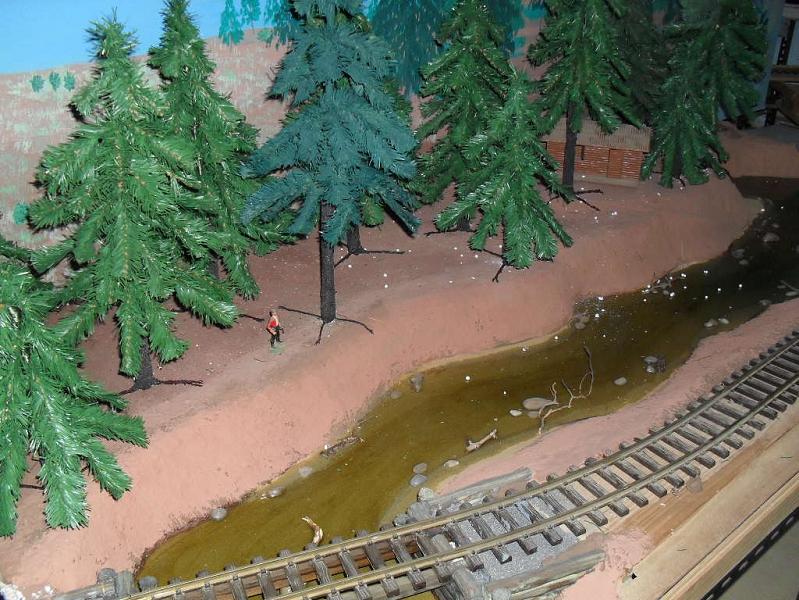
in the pic below one can see, how coarse the treetrunks became from this stuff.

when they are dry, i will cover them with a mist of dull, light grey from a spraycan. (that will be quicker than drybrushing)

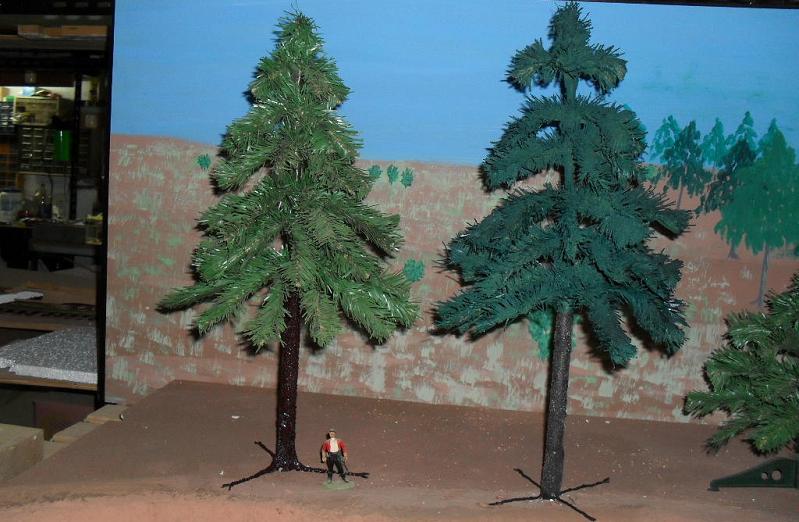
next step will be to give the very cheap and plastic-like looking treeheads some additional foilage.
first try will be to apply a abundant coat of green from a spraycan, then covering it with sawdust - and spray again.

Now that’s a neat idea Korm… I found a box of Xmas plastic Trees and looks about like yours, guess about 6 or 8 inch tall.
Wonder if I can do like yours and try to seal them some how for just Summer set up runs… and then put them away for next week end run.
Be watching to see how you detail them. Nice work guy…

mine come in three lengths. from 12" to 18", including the foot (on the left).
when i cut and double back the antenna like twig at the top, they are about 3" shorter.

the second from the left shows the final height of the biggest xmastrees with the longest trunks. 22" inches - or 55 scalefoot high.
the smallest trees will be about 12" high.

the figure in the pic is 1:29.

we learn fromn our errors - i learn a lot!

yesterday i made two relevant errors:

  1. i took the wrong can of paint. brilliant instead of dull.
  2. i forgot to paint one of the treetrunks.

so this morning i decided to straighten both errors out.

i painted the first two trunks over with dull paint. - result, the bark is not as rough, as it was with the sandy paint alone. (the two trunks at the right)

then i decided to do something for the forgotten trunk, before i should forget it again.
i gave it one dull coat, then i salted it with filtersand, while still wet. (i was too lazy to make a mix for just one trunk) ( the one in the middle.)

for comparison at the left one treetrunk as they came out yesterday.

and now i am waiting for them to dry, to see, how they look, once they are dry.

from first looks, it seems to me, that putting the sand upon the color, instead of into it, the result might be good enough, that i can save myself the drybrushing or misting over the trunks with this method.

Looks good.

thanks Noel and Ric.

its done. the first fir tree for my river scene.

no, it is not, what i would call good, or even perfect, but it is a lot better than the trees as they came. (and i hope, needlecounters might even be scarcer, than rivetcounters.)

edit: another pic without flash:

They look VERY good!(http://www.freesmileys.org/smileys/smiley-chores018.gif)

at last! i positioned the trees of the forrest.
before i will paint all the treecrowns, i will make the underbrush and the earth with fallen needles, grasses an the like.

when i took the pics, i noticed something.
here two more, to stress the point.
while on the right side the background melts nicely into the layout, the painted grass at the left stands out like a sore thumb.
i will either have to change the background, or try to plant some grasses at the left side.

and just for the fun of it…

Nice look there Korm, that scene is really coming along

pics repainted. after years

1 Like