First of all, friendly greetings to everyone here on LSC, as this is my first post here. I have signed up here since another forum I frequent seems to have withered into nearly-inactive oblivion… In any case, onto the topic at hand, which is now my second favorite locomotive on my roster;

…Being an Aristocraft ‘Rogers’ 2-4-2 I purchased secondhand from some big online auction website. The envisioned project was to be an addition to the generic-colonial-export styling that embodies a majority of my motive power and two-axle rolling stock, as well as the utilization of a favorite wheel arrangement and a particular model that I’ve had my eye on for a length of several years. The only thing initially preventing such a project was uncertainty of spare parts availability with Aristo’s decline into defuct-ness, and frankly having no other Aristocraft products whatsoever.
That said, halfway into November, the new arrival showed up and was unboxed for first impressions.

Apologies to fans of slopeback tenders, but in my eyes, that was the first thing to go, particularly in contrast to a saddletank locomotive of 1890s-1900s vintage that is suggested to be a Rogers product. In that regard, with prior successes of using the generic small tender from Bachmann’s Lil Big Hauler line, I took the previously acquired tender from a certain blue/grey 0-4-0, and stuffed it behind for comparison.
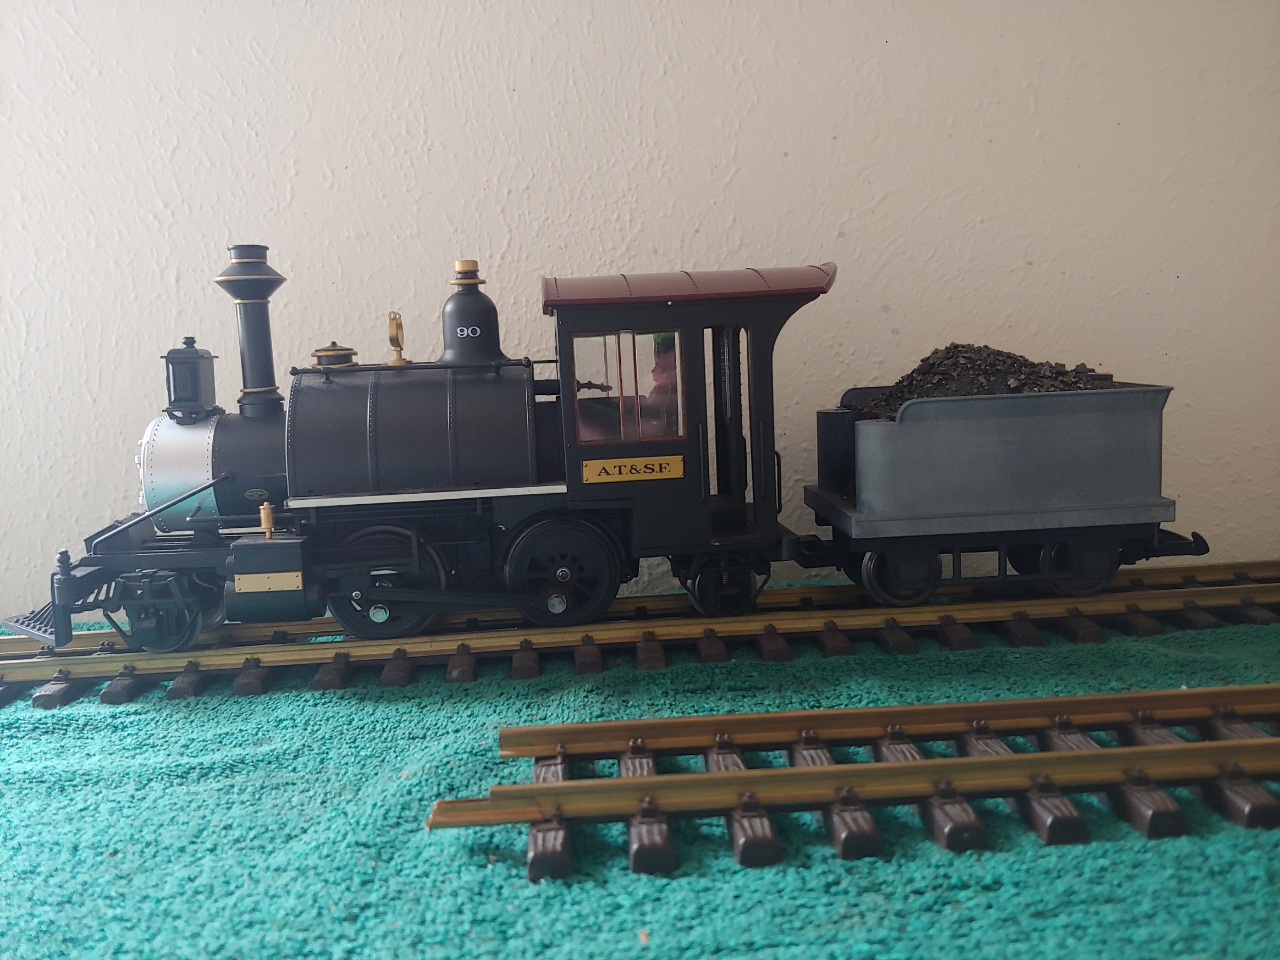
Looking a bit more fitting, and providing +1 metric ton of Bituminous coal and a couple hundred extra gallons of water. Research in literature also provided some interesting inspirational fuel for the project, with regards to little two-axle tenders.
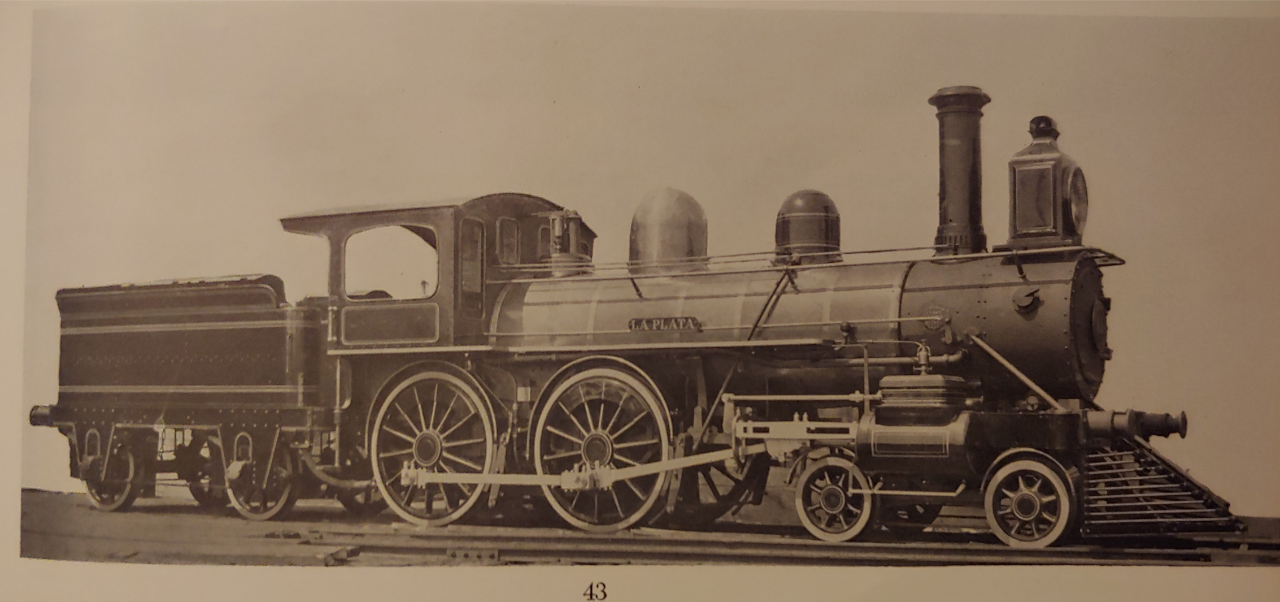
As well as a Baldwin product looking very similar to the overall appearance I was after.

With the overall appearance settled, work promptly began to service the modular motor block, which promptly revealed the death of the front driving axle’s gear, forcing the retirement of the block’s front motor.
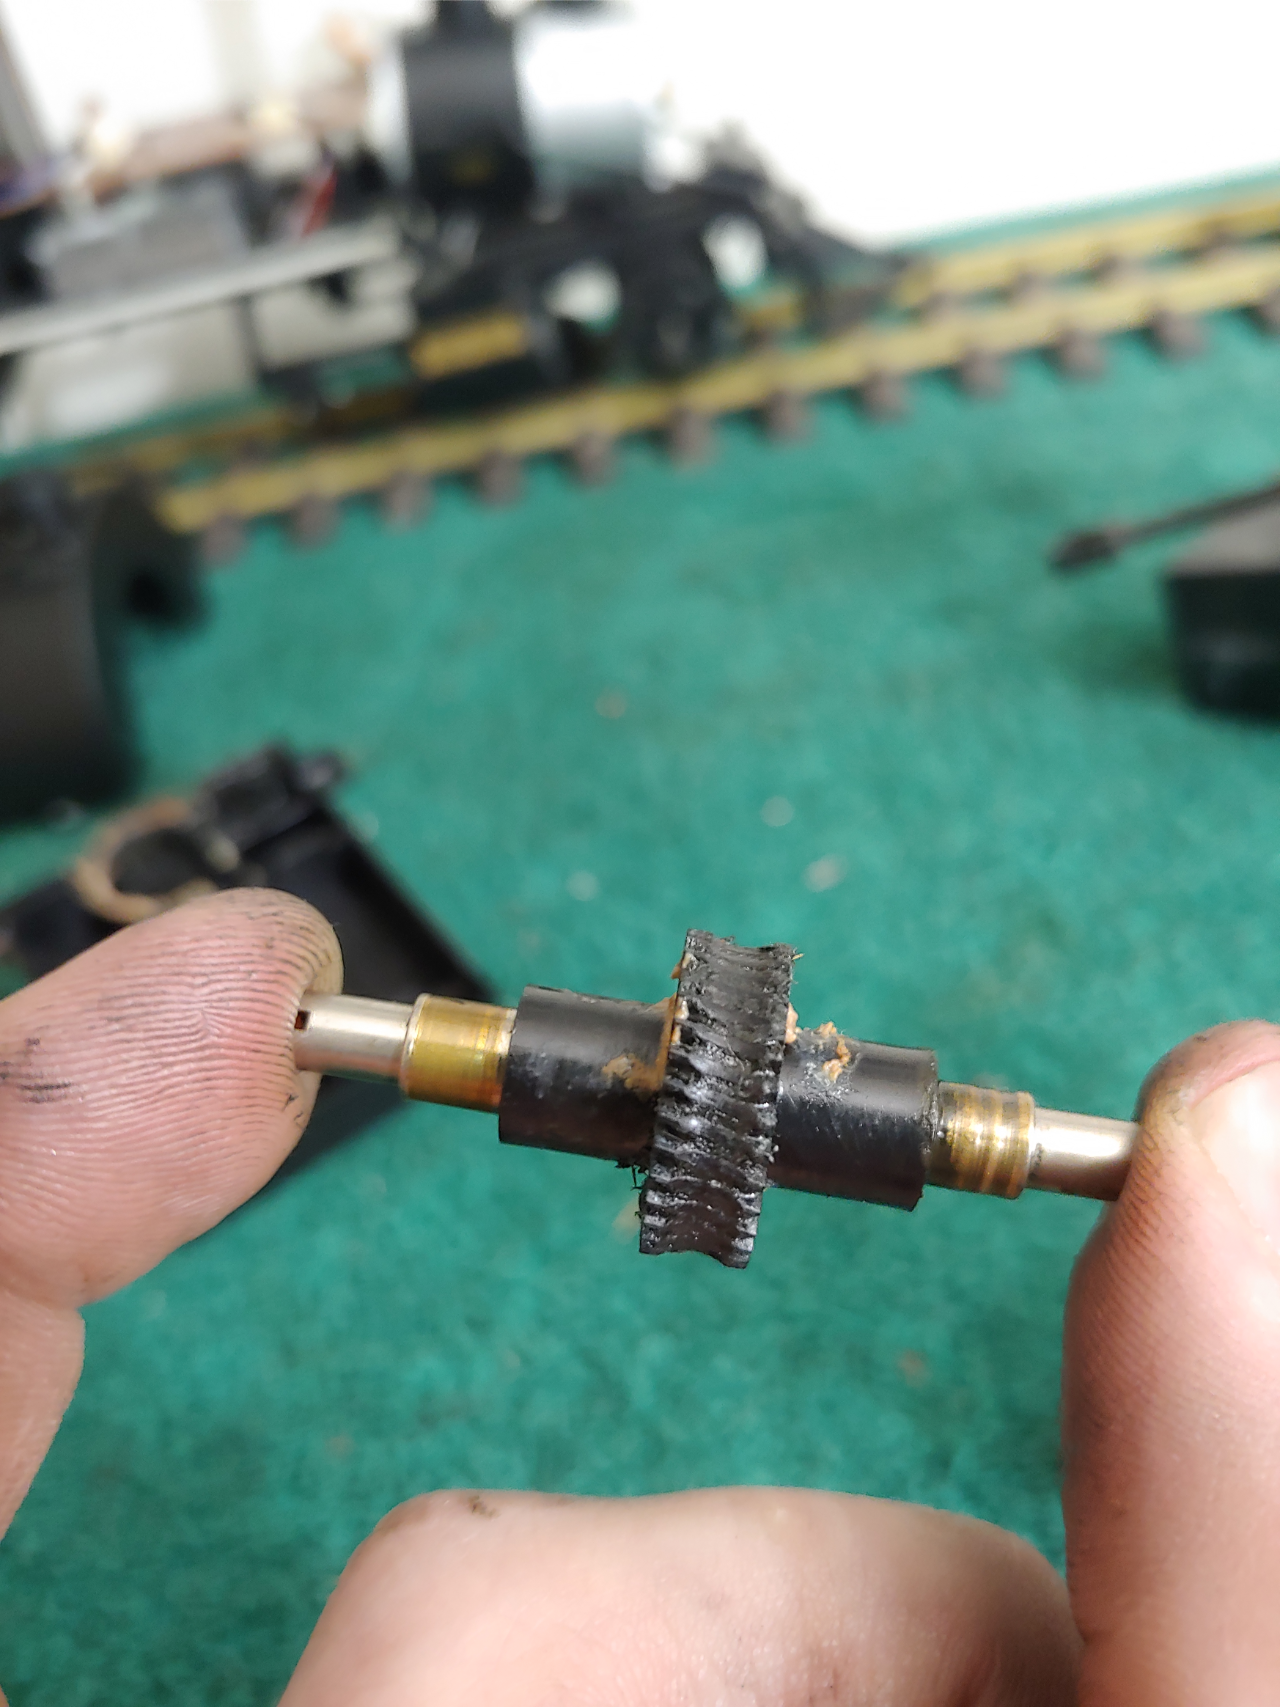
Fortunately the remaining motor on the rear axle is more than capable of moving the locomotive, with the normally twin-motor motor blocks of these engines supposedly equaling the pulling power of an LGB 0-4-0 + powered tender. After oiling and greasing, overhaul of the engine’s power pickup ability was largely done with LGB contact brushes replacing the brass sleeves installed by Aristo, as well as the installation of two traction tires on the motored rear axle. With general power pickup marginally improved and tractive effort vastly improved, a boost in operational ability was realized, and was decided to be supplemented in the near future with extended tender pickup.
In the meantime, cosmetic work began, initially with black paint to eliminate the different colored smokebox halves, and make the engine’s appearance a bit less garish in general.

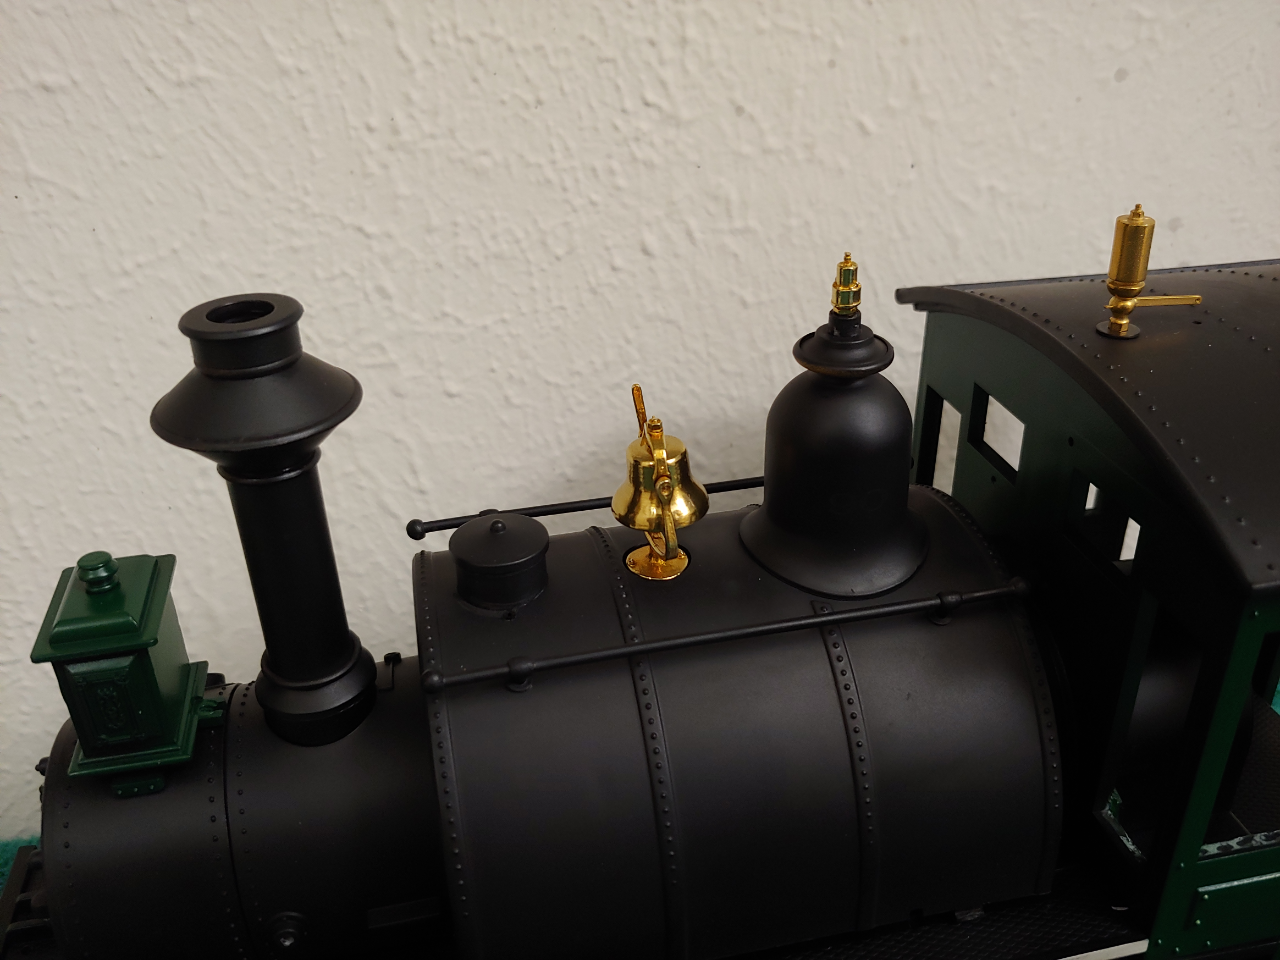
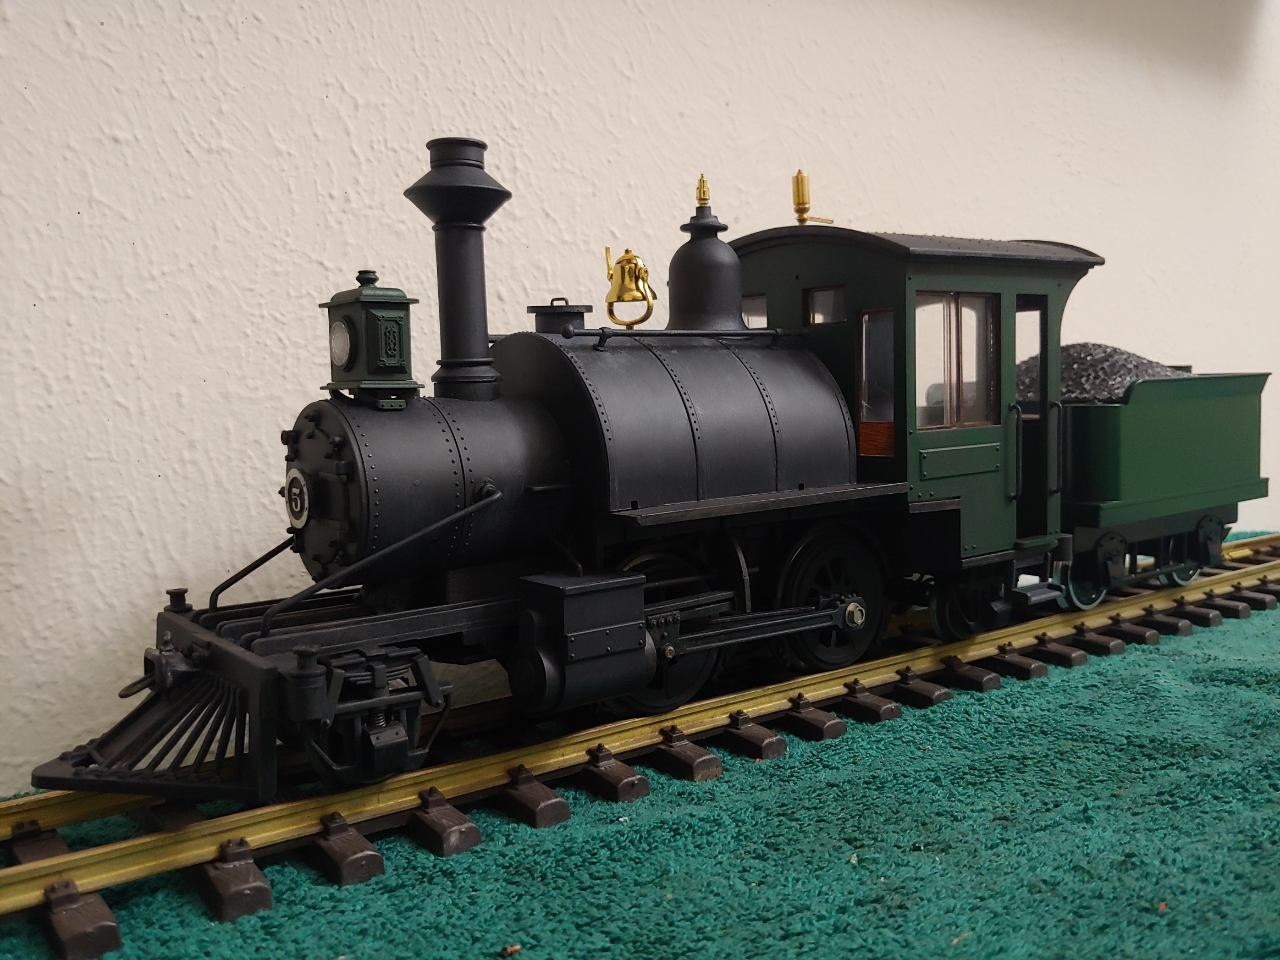
Then, in consideration of several of my locomotives having green cabs, the contrasting color was decided and promptly applied to the cab and headlamp.

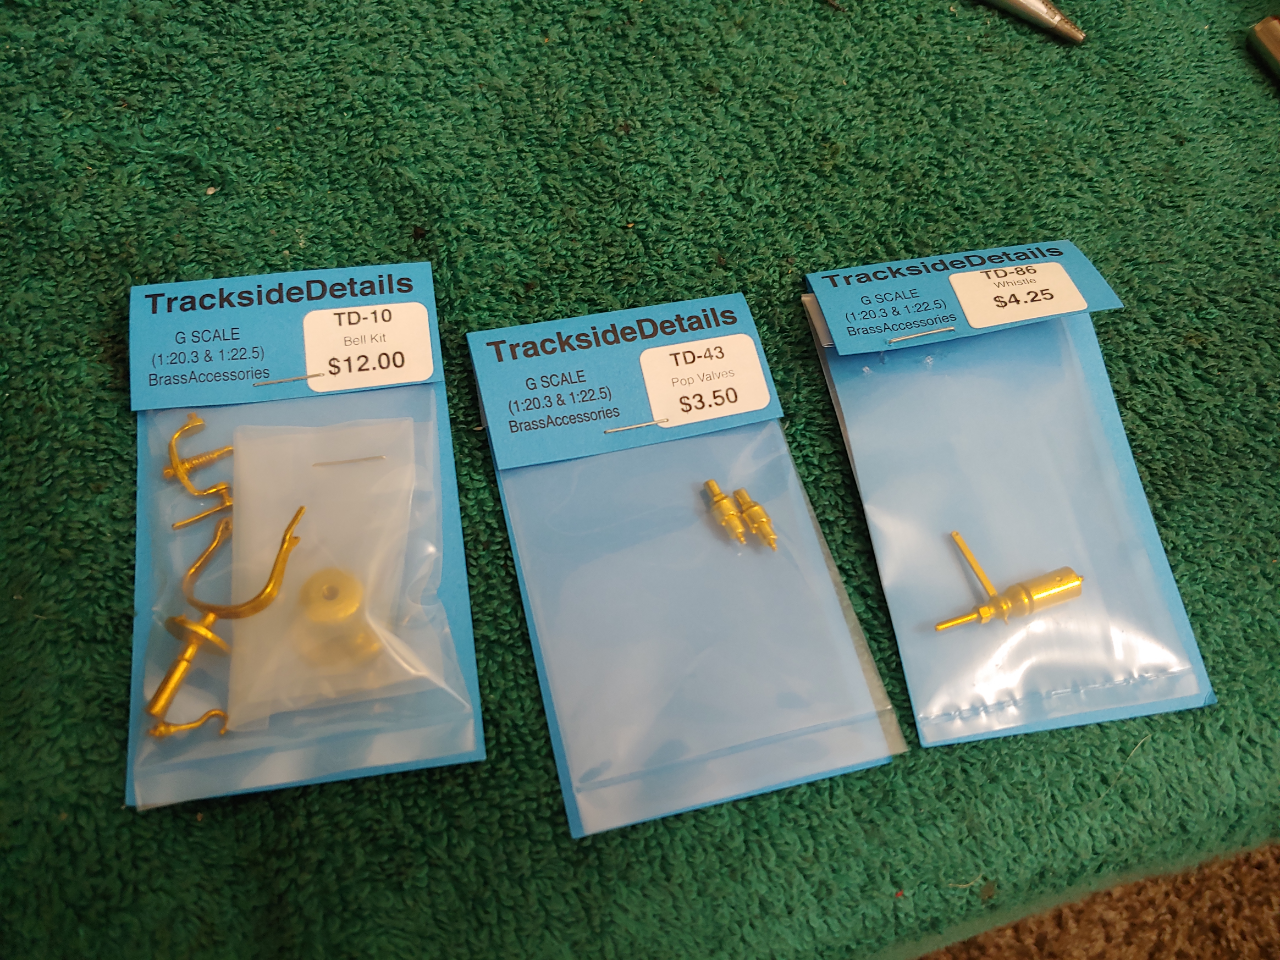
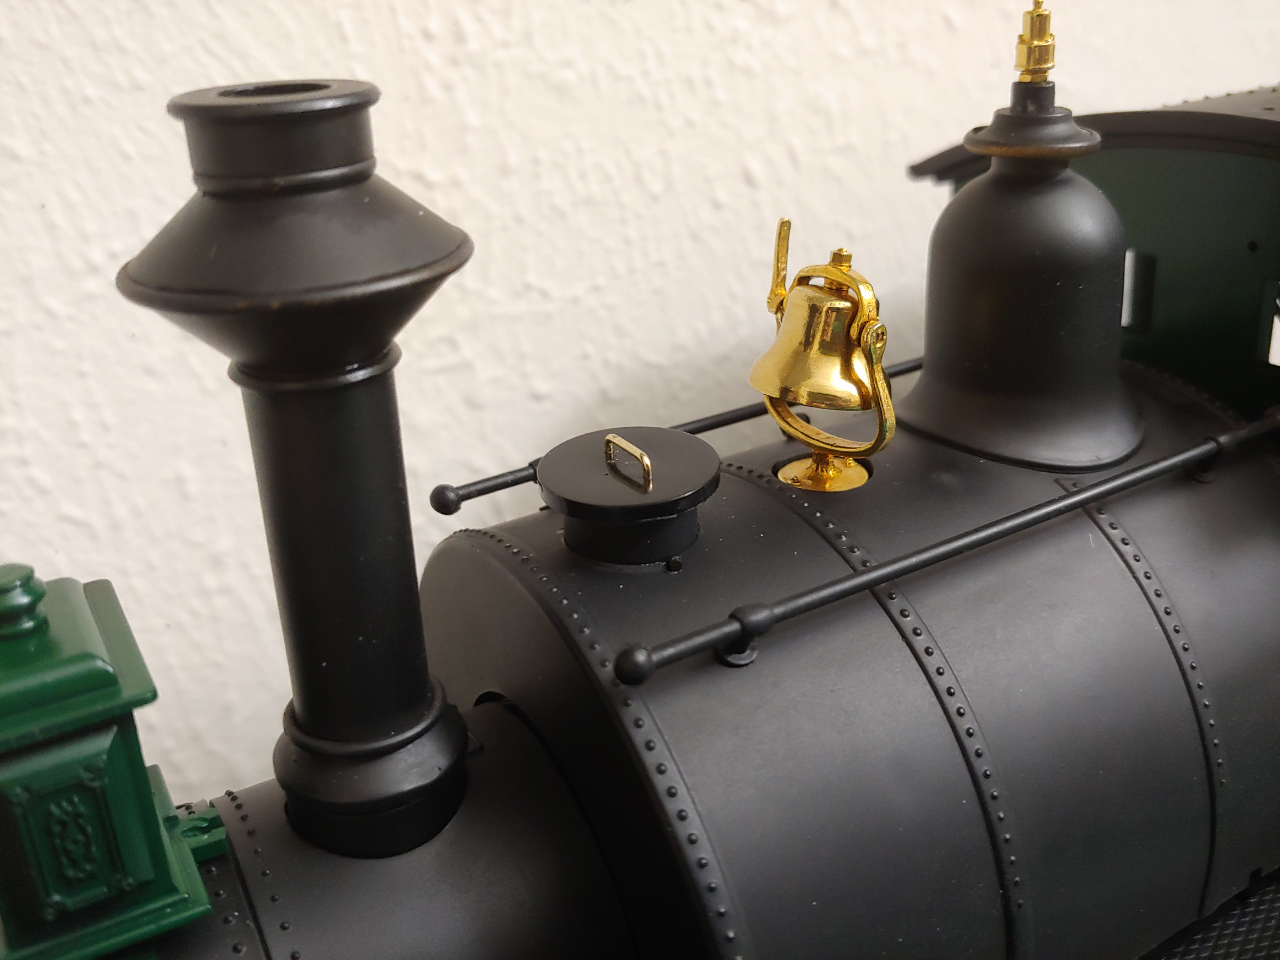
Brass bits, ‘jewelry’ as a friend of mine called them, were purchased from Trackside Details and test fitted.
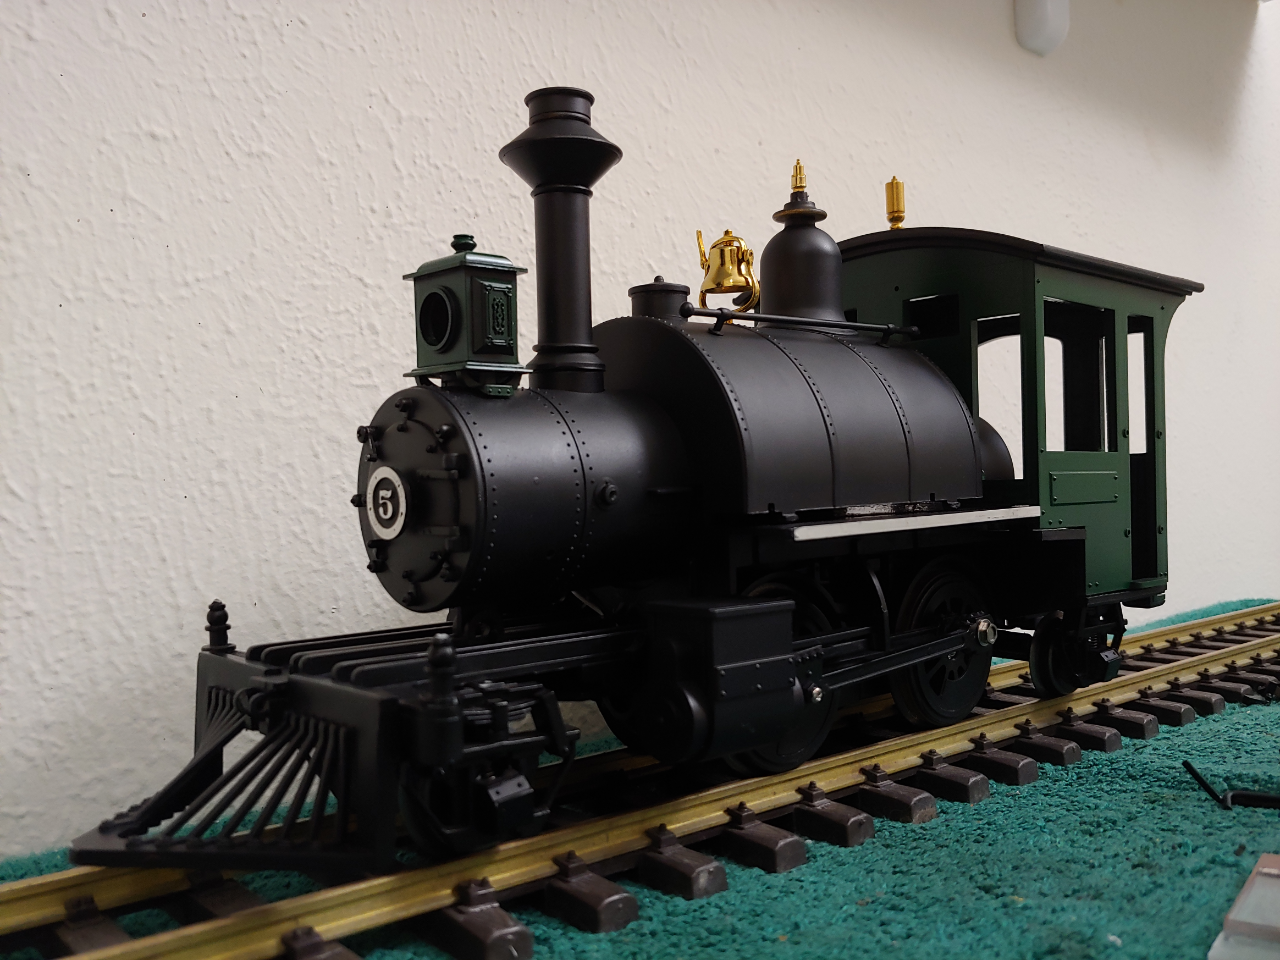
Coinciding with the brass bits is the addition of a #5 numberplate, done in my black and silver style.
Another view from higher.
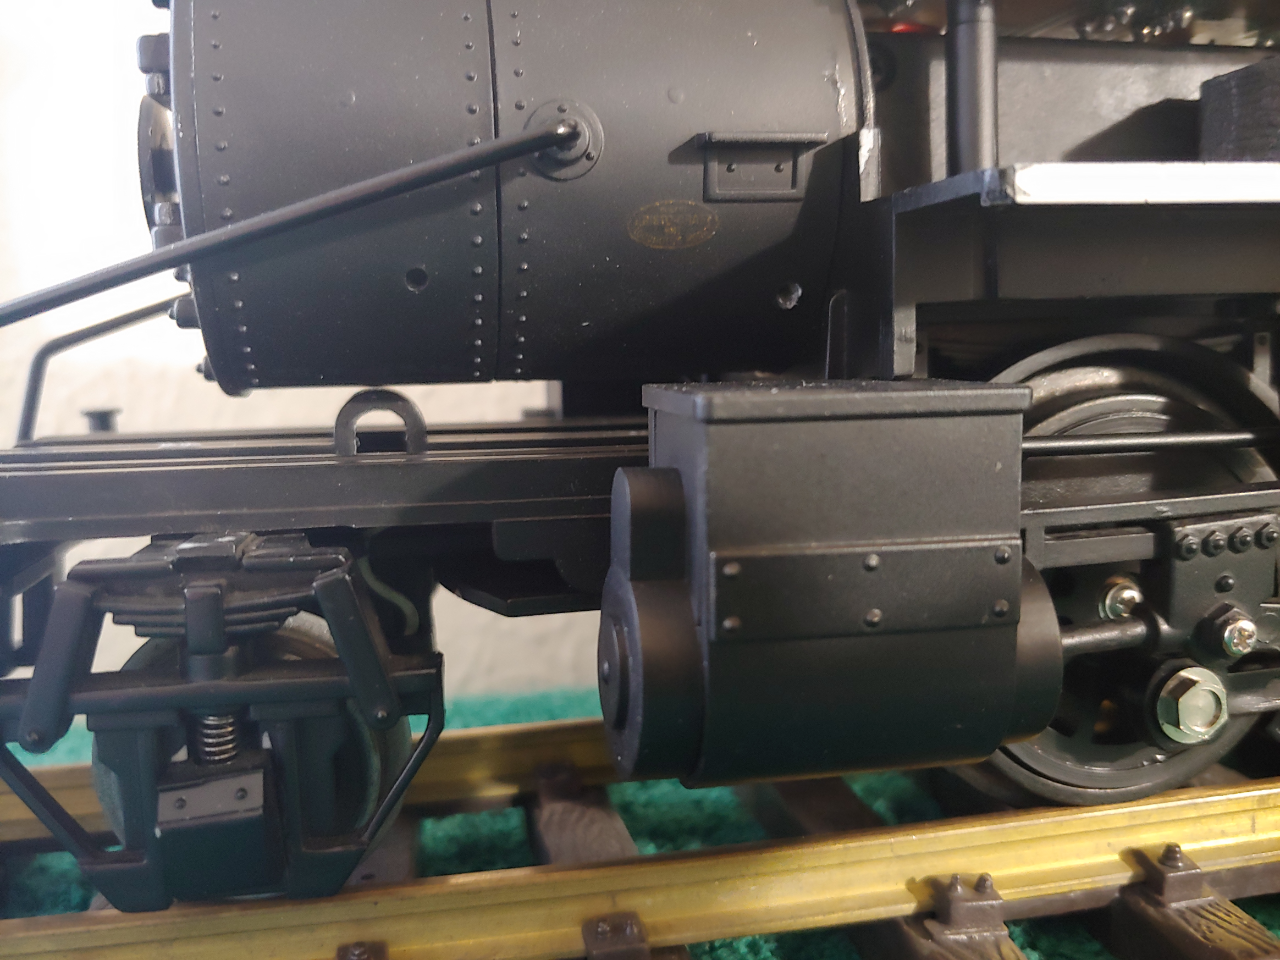
Next on the itinerary was tackling two cosmetic issues - The wide open gap on the middle of the cowcatcher and its missing hinged drawbar, and the realized absence of any means of a cylinder saddle beneath the smokebox.
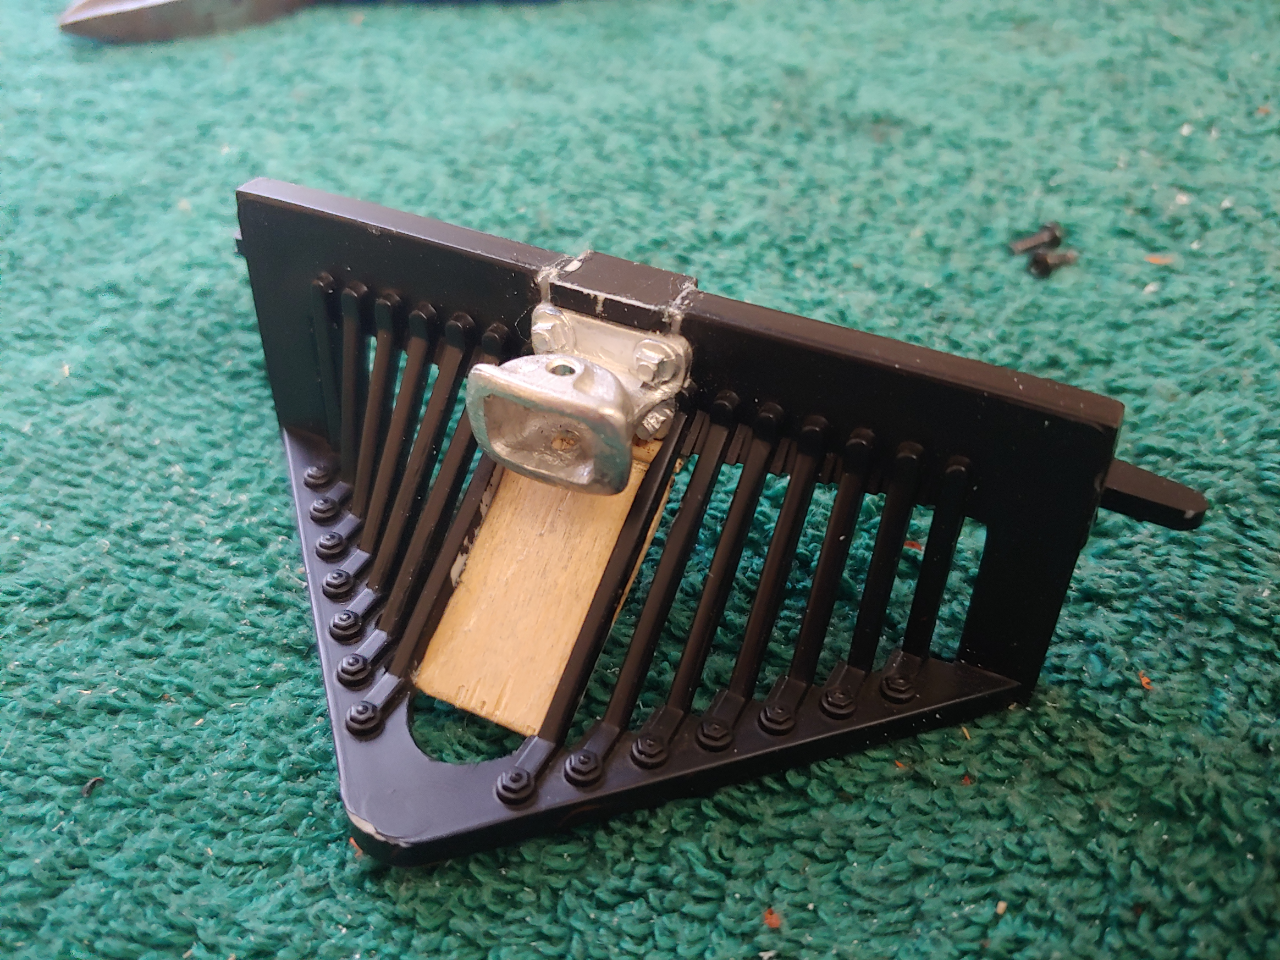
First up was the cowcatcher, seeing the addition of a plate to fill the gap, as well as the addition of an Ozark Miniatures single-pocket link/pin coupling.
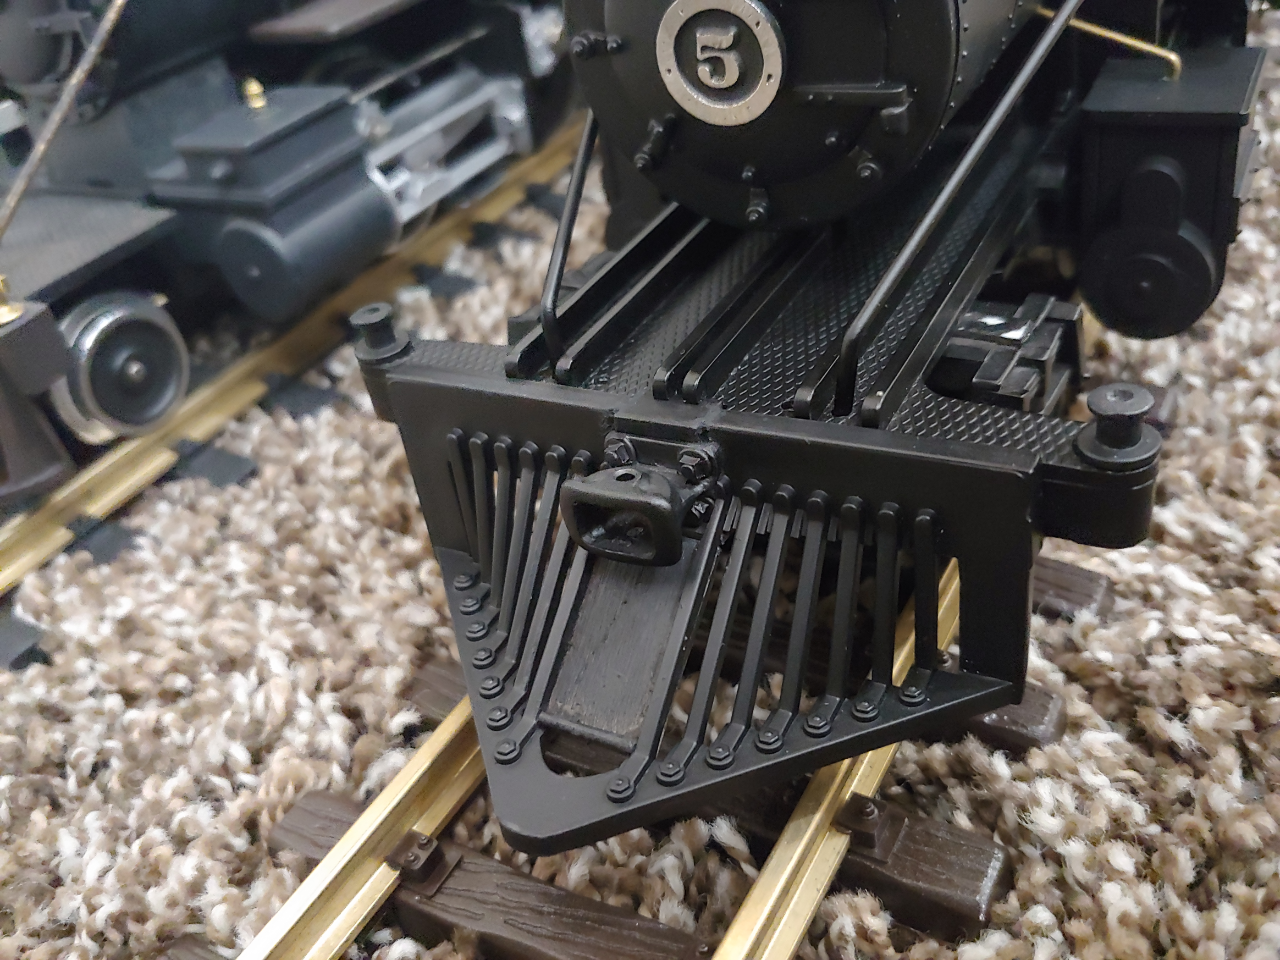
Painted black with the later addition of a bottom brace between the outer bars. Looking much better overall.
Next up was the cylinder saddle.
Some ingenuity and wood chopping later…
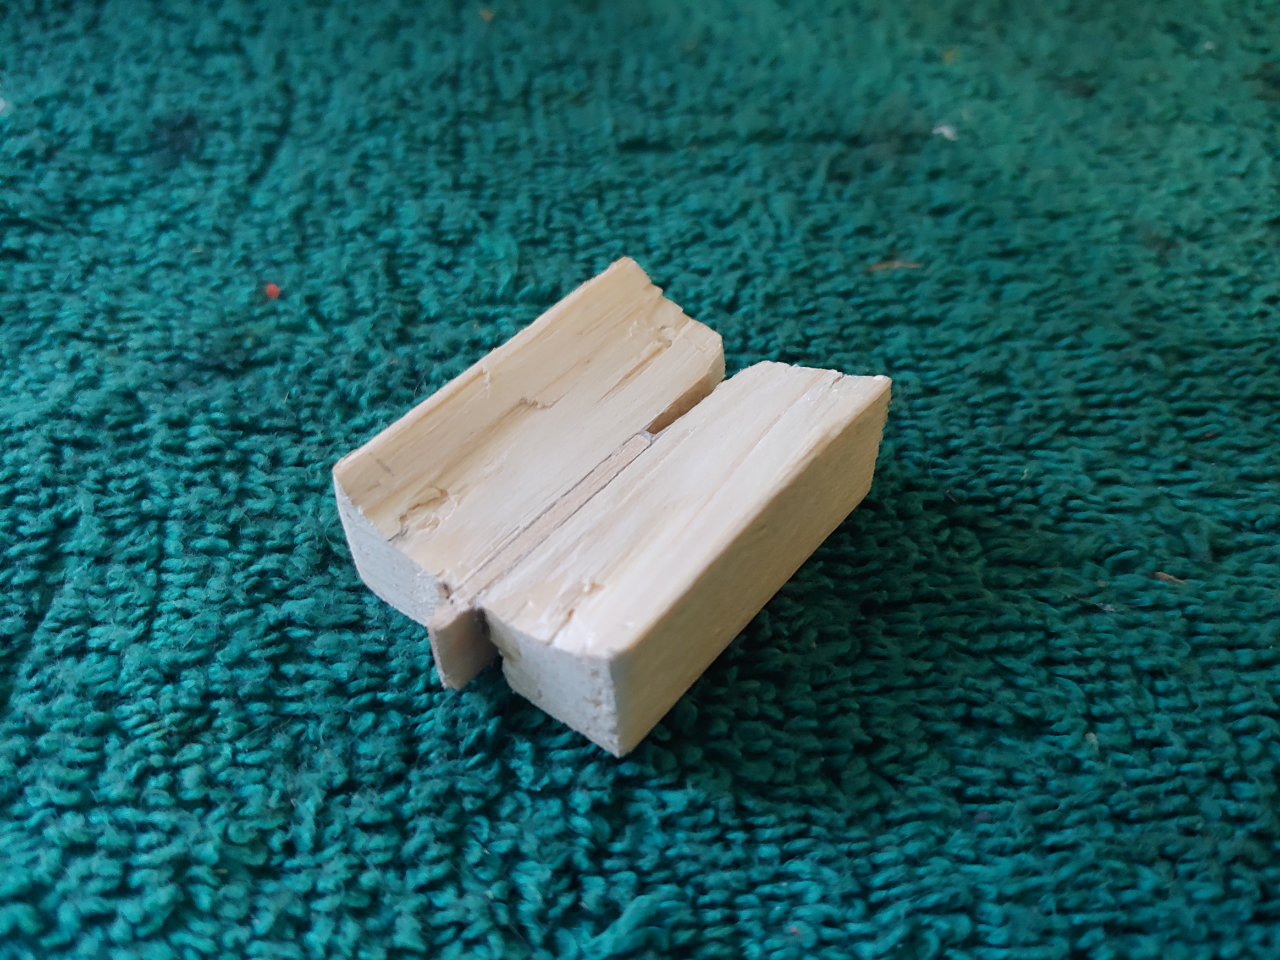
A mockup of a saddle’s top came forth, fitting between the frame rails of the front, and sporting a mockup of the half-flanges that would be riveted together on a real saddle.
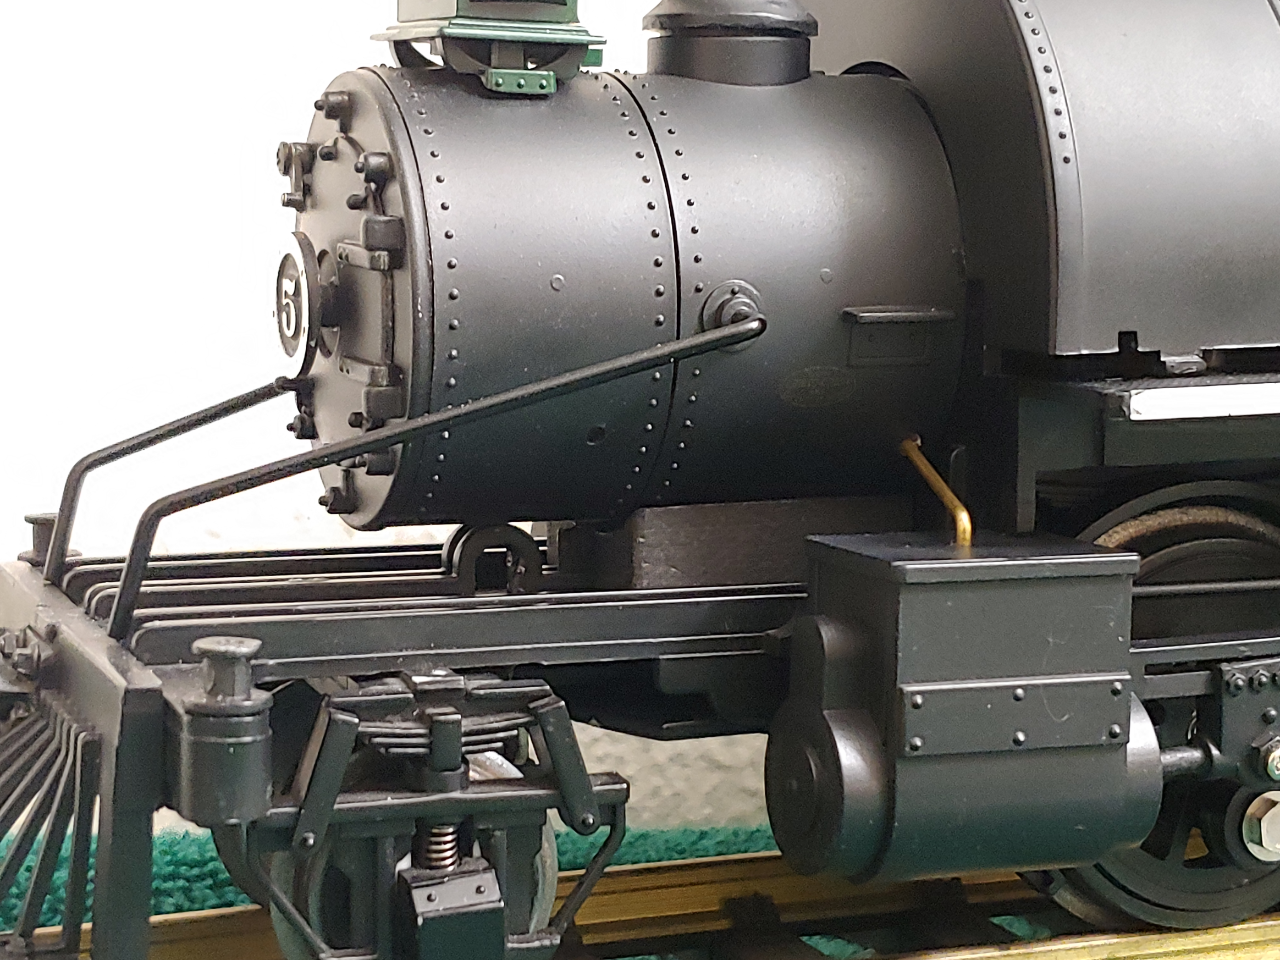
A coat of black paint later, and it fits snugly in its intended spot. Also visible are lubrication lines added from the smokebox to the tops of the cylinders.
Around the same timeframe, the top of the forward dome was replaced with a handle-bearing hatch, in regards to the otherwise invisible means of filling the locomotive’s large saddle tank. This part is a chopped-and-glued spare from Bachmann, normally being on the tender water tank from their Spectrum 1870s 4-4-0s.

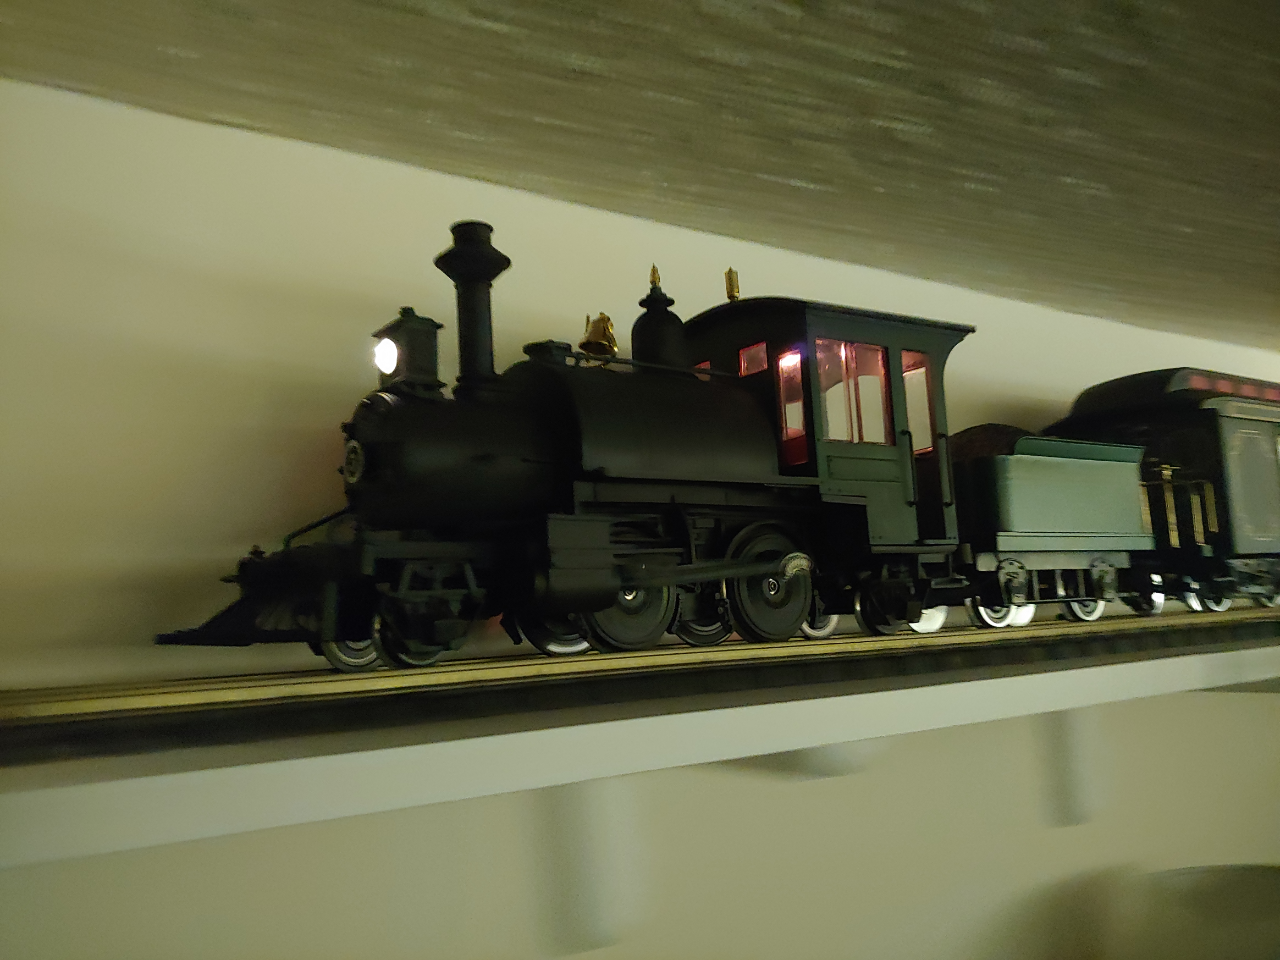
Later on, new friends and parts arrived, in the form of the desired 2-axle tender, as well as LGB ball bearing axles and wire leads, to increase the locomotive’s power pickup footprint. A nice side effect is the nearly complete reduction of friction with the ball bearing axles, making the already small tender almost nonexistent behind the locomotive in operation.

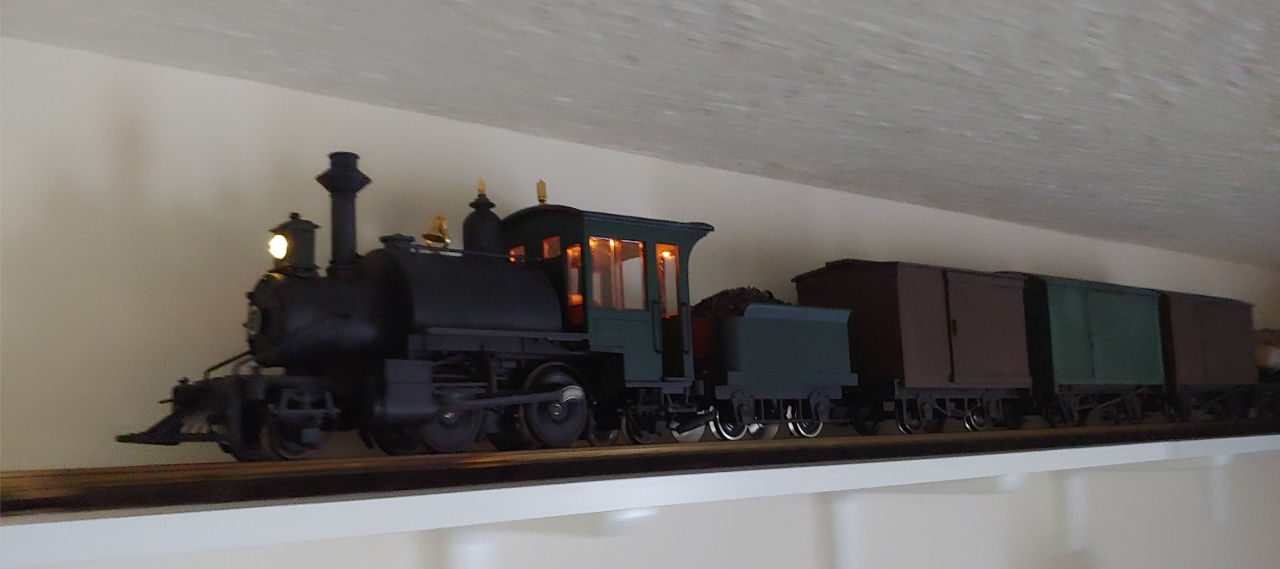
First test runs of the wired combination on the ceiling railway, and success was had. The locomotive roars around with relative ease, which says a lot regarding its unknown age and having Aristocraft wheels, known for their funky metallurgy and questionable power pickup. Every single axle on the unit now picks up track power and delivers it to the motor.

With operational abilities confirmed and everything available to finish the project, the next step was further painting and weathering by my own hand.
With the locomotive’s paint done and sealed with my normal blastings of Krylon Matte finish, final reassembly took place, with the tender receiving base coats of black and green around the same time.

All remaining parts on, glue dry, and in my opinion, looking exactly as I intended. An initially-uncertain project was coming together nicely in the end.
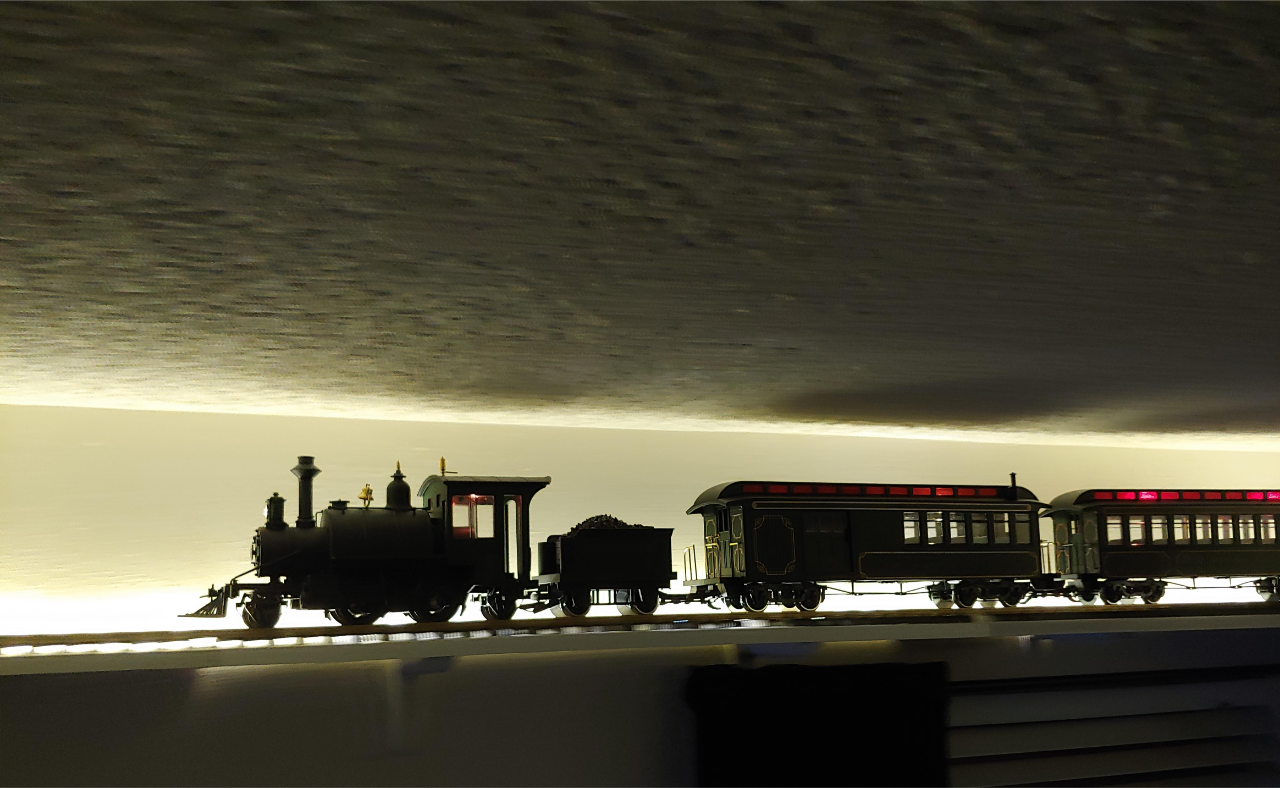
More test runs with a newly painted tender, toting varnish at speed. A consist combination I had long desired to see was now doable, in the style of the New York Elevated and any other steam-powered passenger lines that may have used 2-4-2s and similar types for service.
With the tantalizing thought of a month-long project being complete, the tender’s paint promptly saw general darkening and weathering, and the addition of coal boards in the same style as those of the blue/grey locomotive.
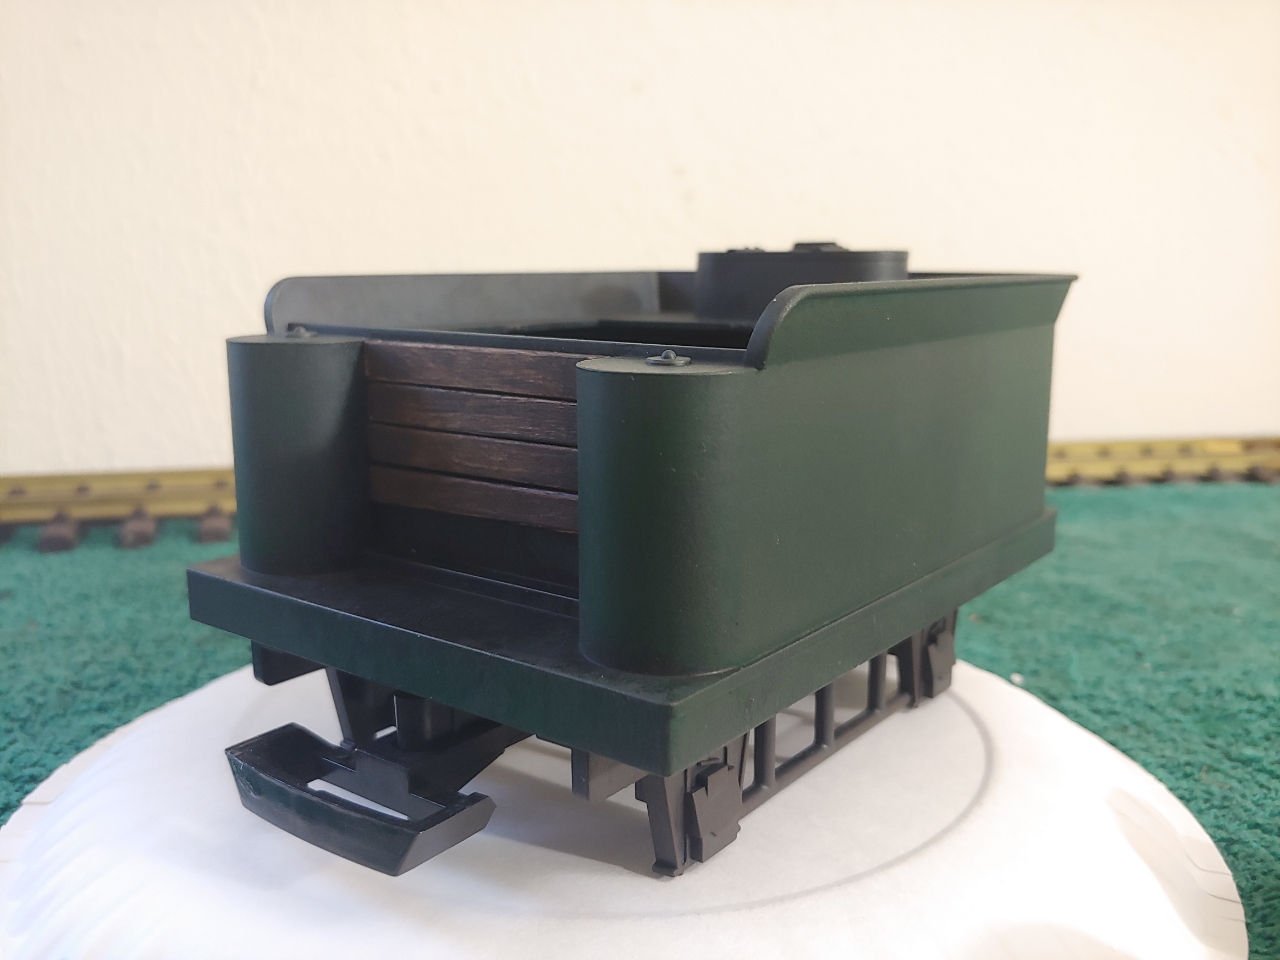
And then the final touches, real coal dumped atop the cast factory coal piece, and the addition of a rear link/pin coupling.
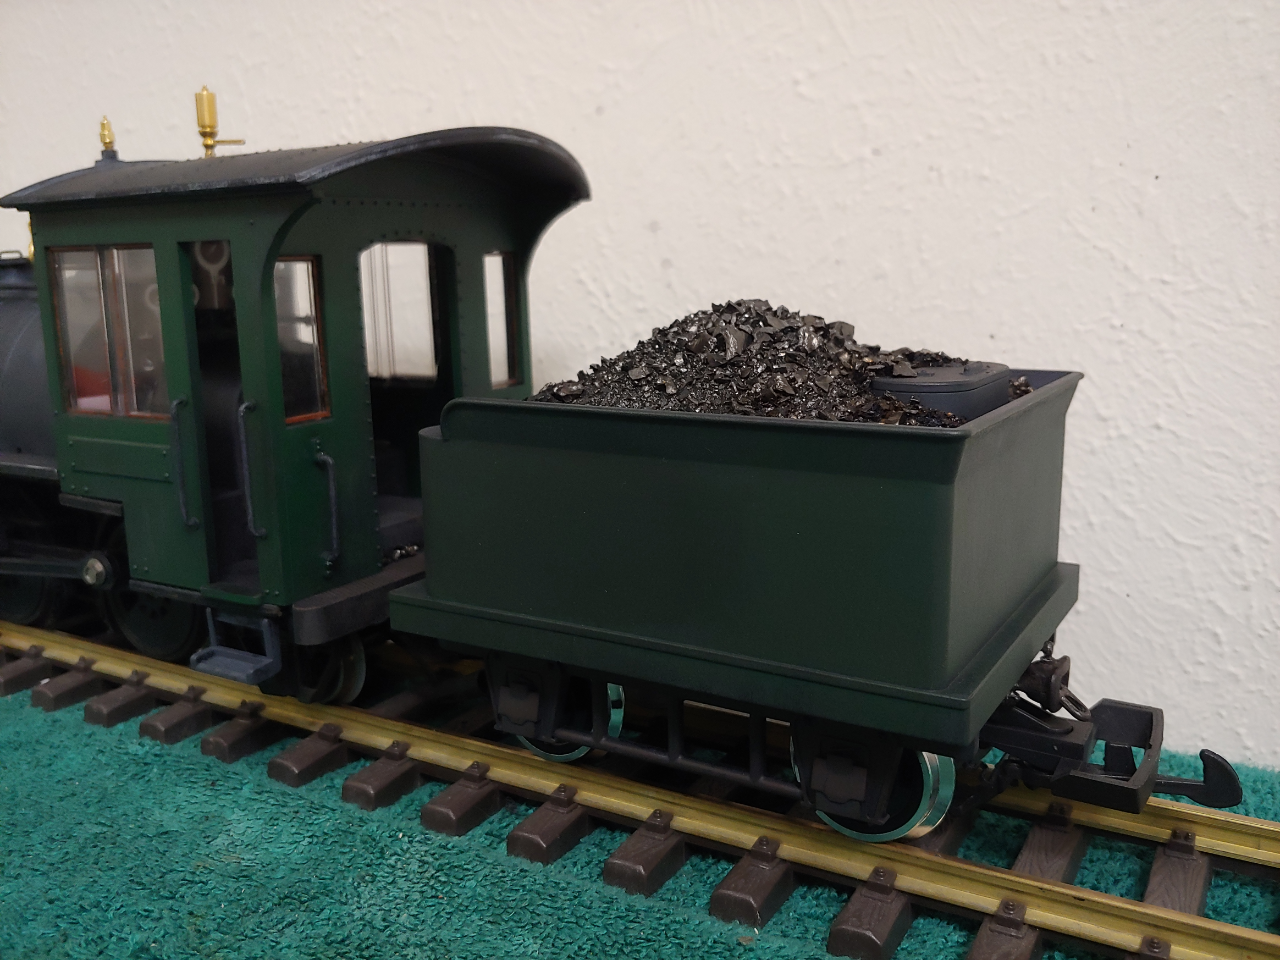
Final reassembly, and aside from the addition of crew figures, 2-4-2 #5 was complete and ready for active service.

Overall this build was quite interesting start-to-finish, being the first Aristocraft product I’ve had in pieces on my workspace. It runs well even devoid of one motor, and looks good, matching the styling, scale, and character of other locomotives on my roster. Quite pleased with it overall, enough so that it will be seeing an upcoming installation of Phoenix sound into the tender…!
Best,
~ Nick