Hello,
I thought about sharing this information with the large-scale community many times after working on these two projects, however, after looking for previous posts about the subject, I couldn’t really find anything that actually showed the interior of the Bachman Trains eggliner drive.
I am almost certain that there are posts out there about the Aristocraft U-25B and the issues it had with cracked axle sleeves on a good number of their units. Now I’m not real sure if there was any prior posts about the Bachmann eggliner drive being used to replace the U-25B drive or if anyone ever posted photos of the interior of the eggliner drive but regardless, I thought I would bring the subject up and show some photos of these drives and how I installed them into the U-25.
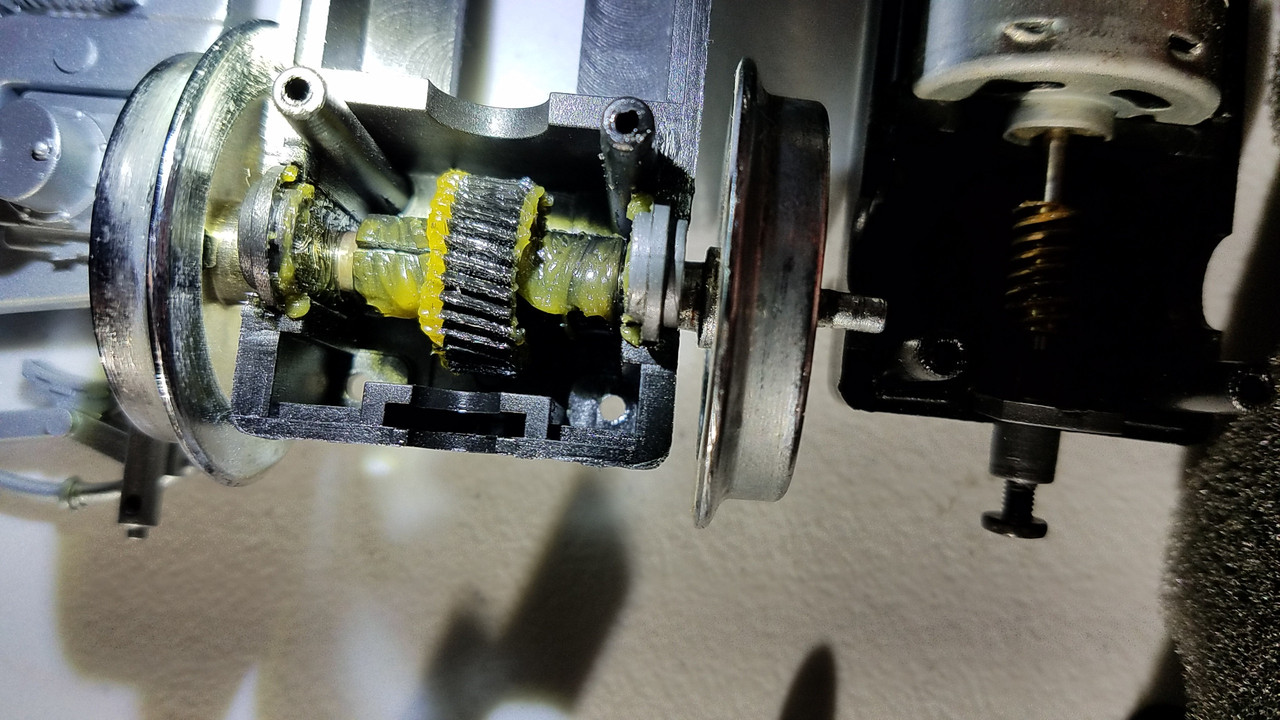
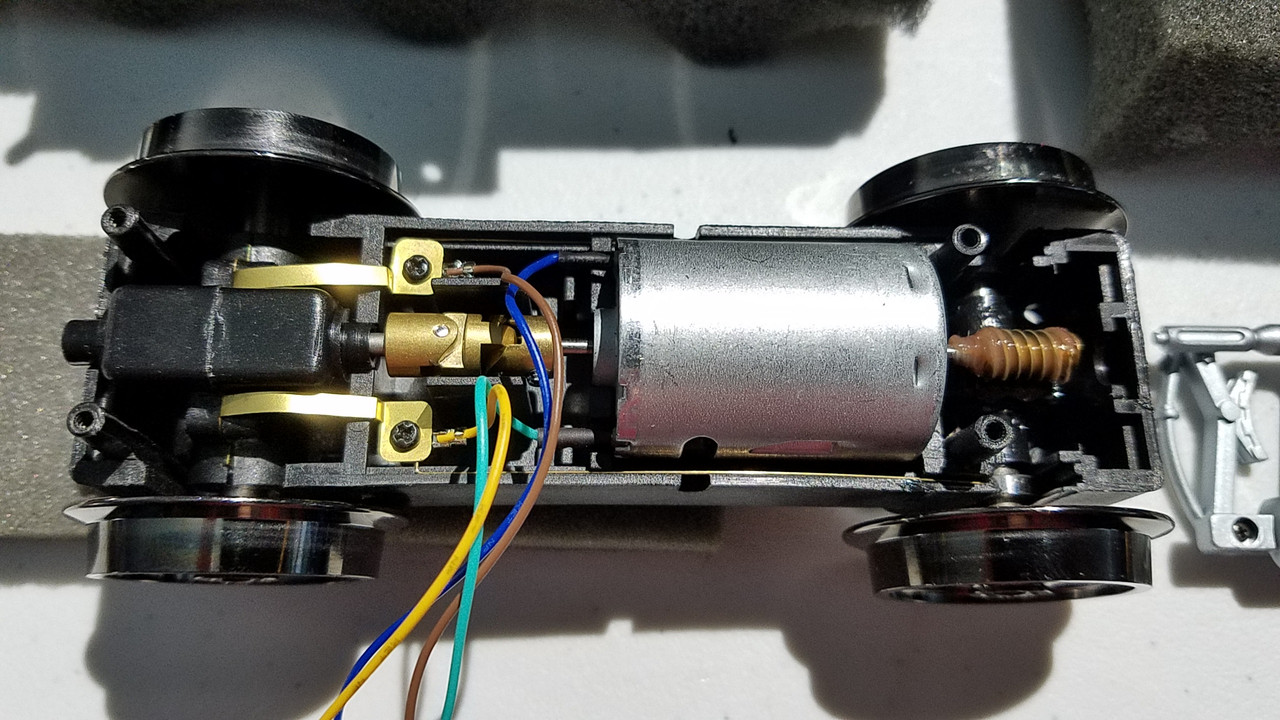
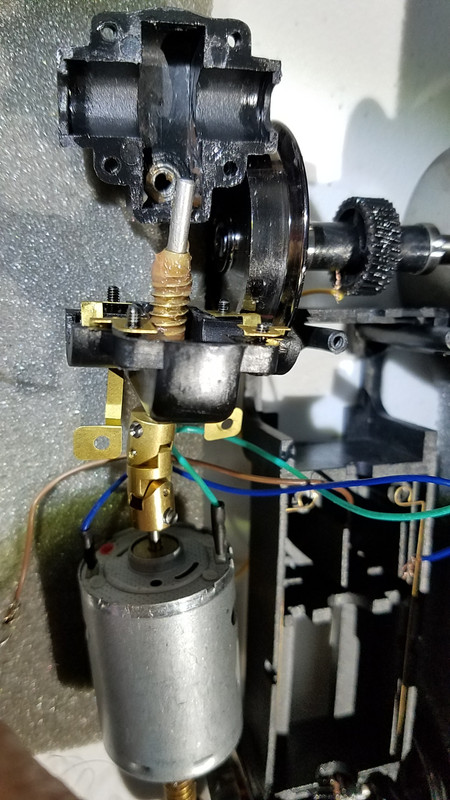
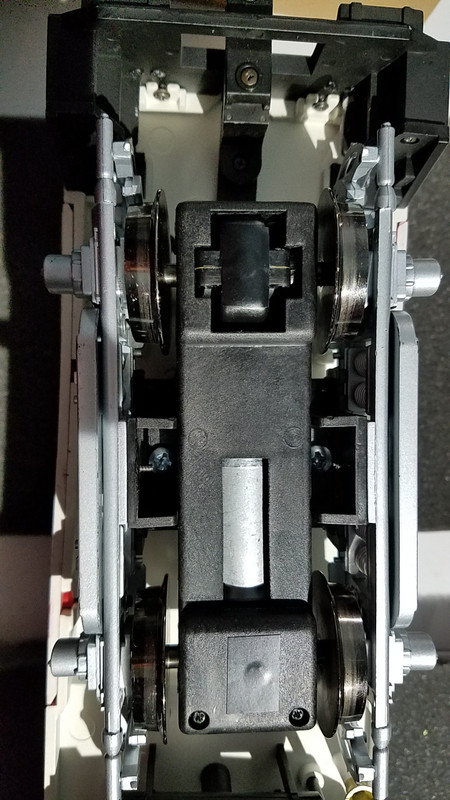
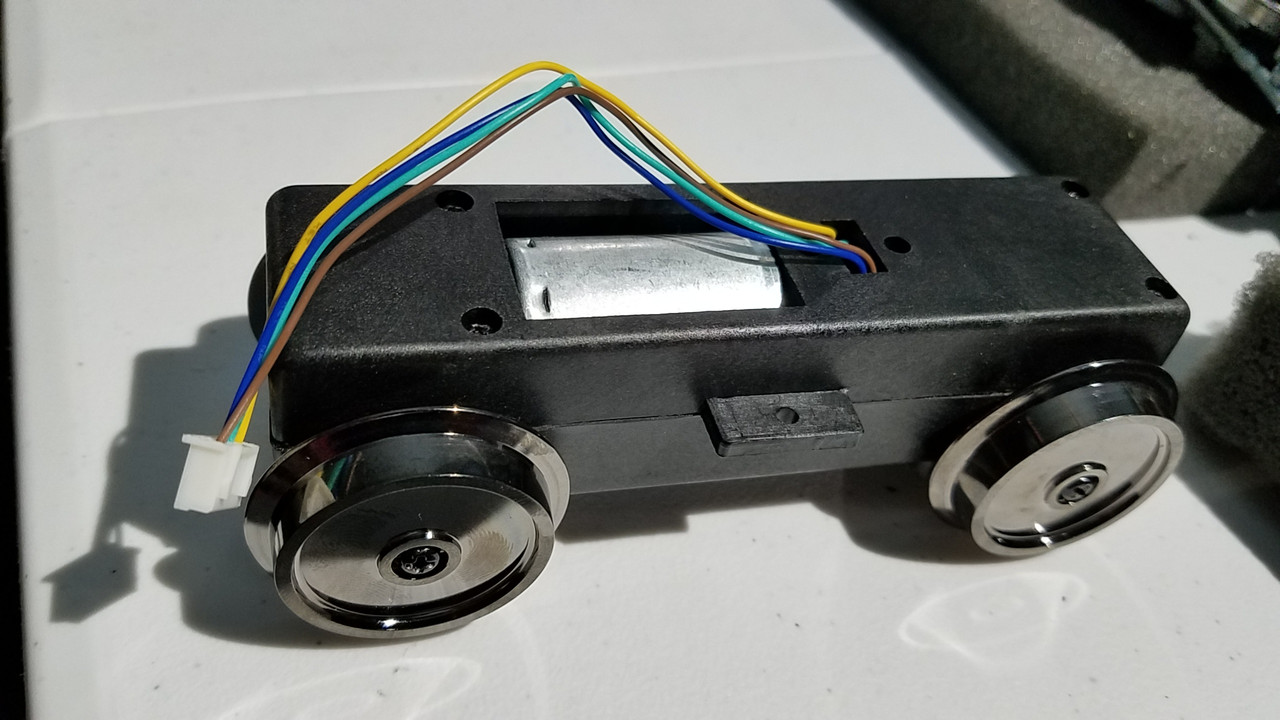
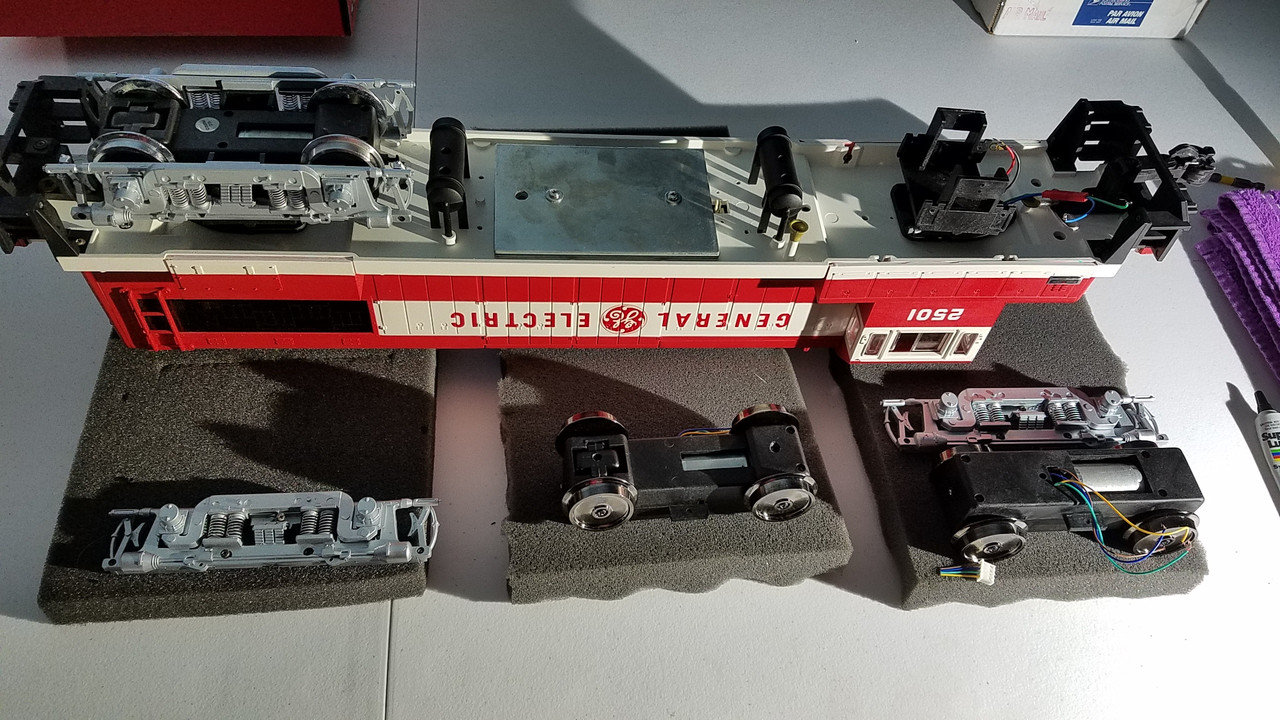
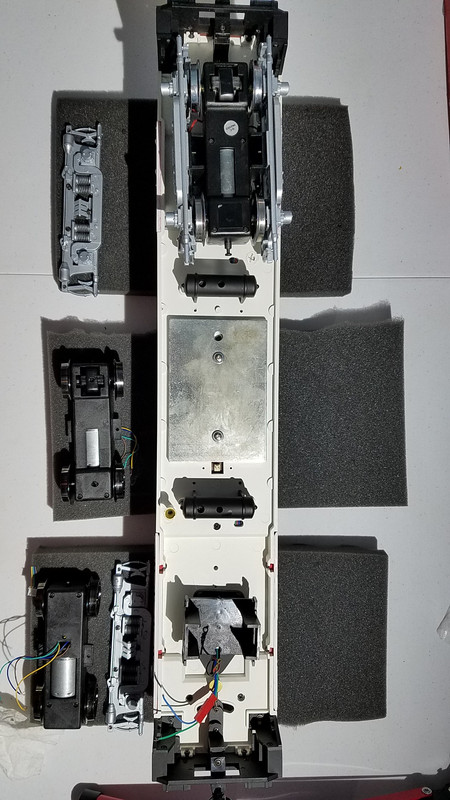
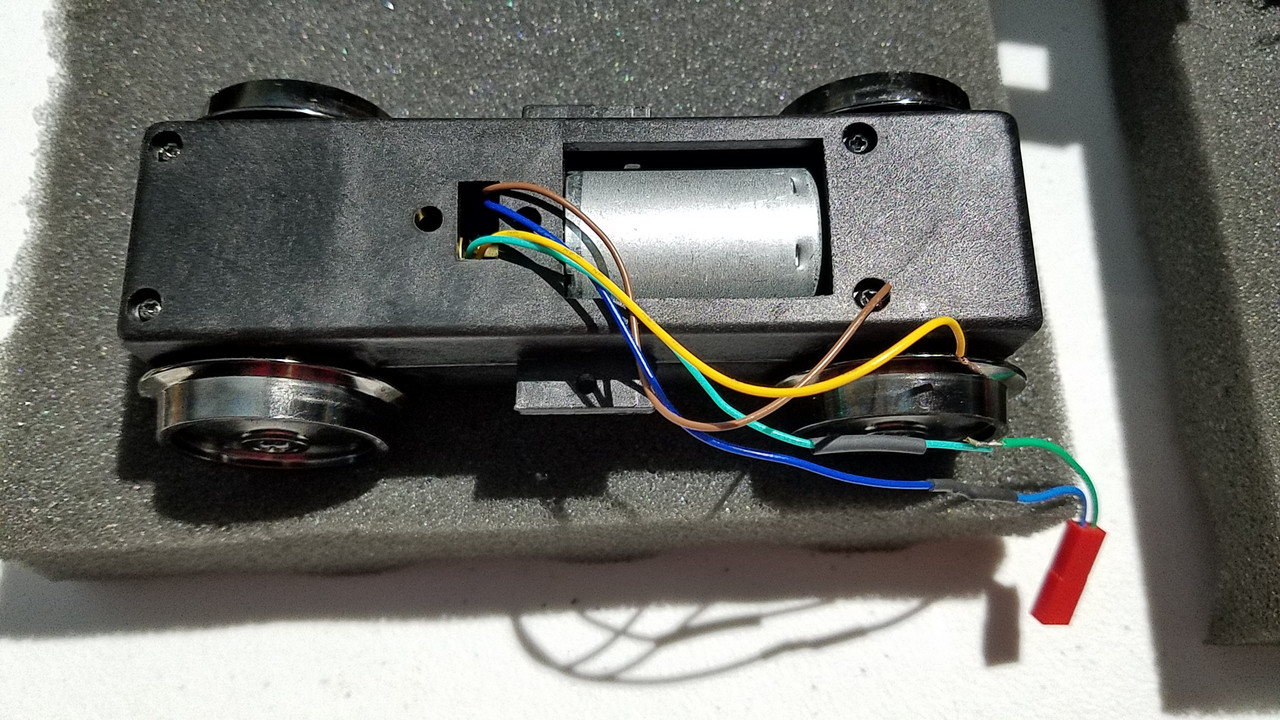
As you can see in the photos, this drive is all ball bearing, including the motor shafts. The contacts are internal and do not need to rely on the axles and side frames. As with all of our locomotives in our program, we install grease port holes on the bottom of every gear box on every locomotive we own so that greasing does not require disassembly. One thing that I found out when installing the new drives into the locomotive was that the clearances are so close between the new drive and the side frames that you had to remove all of the original protruding side frame bearings and wiring before you could remount the side frames.
Another interesting fact is that you had to move the side frames up on the mounting bracket, which required drilling new holes. If you don’t do this, the side frames are actually too low and will drag on switches and crossings. I mounted my new Bachmann drives into the U-25B with 1 mounting screw on each tab on both sides of the drive to the mounting bracket under the locomotive. I’ve read some posts out there that said that you had to put a plastic spacer block underneath these tabs but I found that this was not necessary because the tabs are very thick, as is the bracketing underneath and the clearance is close enough to hold firmly without spacers. Wiring was a lot more complicated than I thought it would be and the locomotives ended up running the wrong direction twice in a row because the Bachmann Drive was wired the opposite of the original Aristocraft drive. At least the ones I received were.
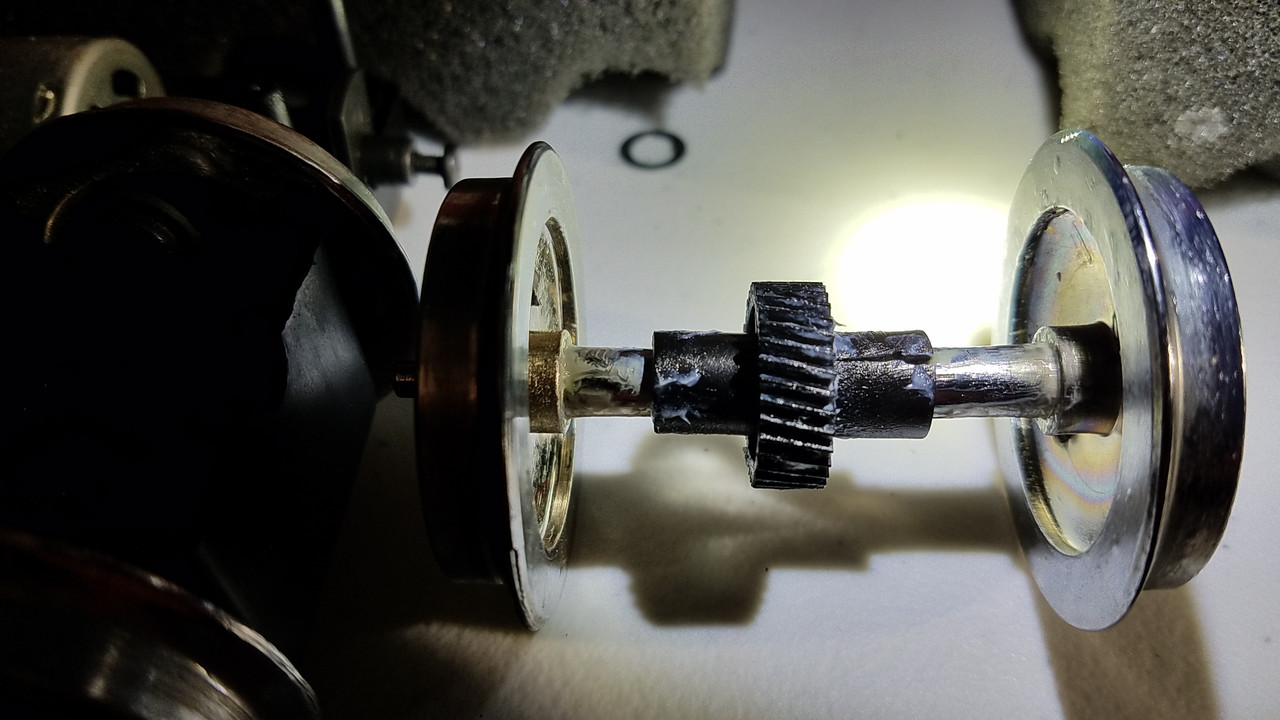
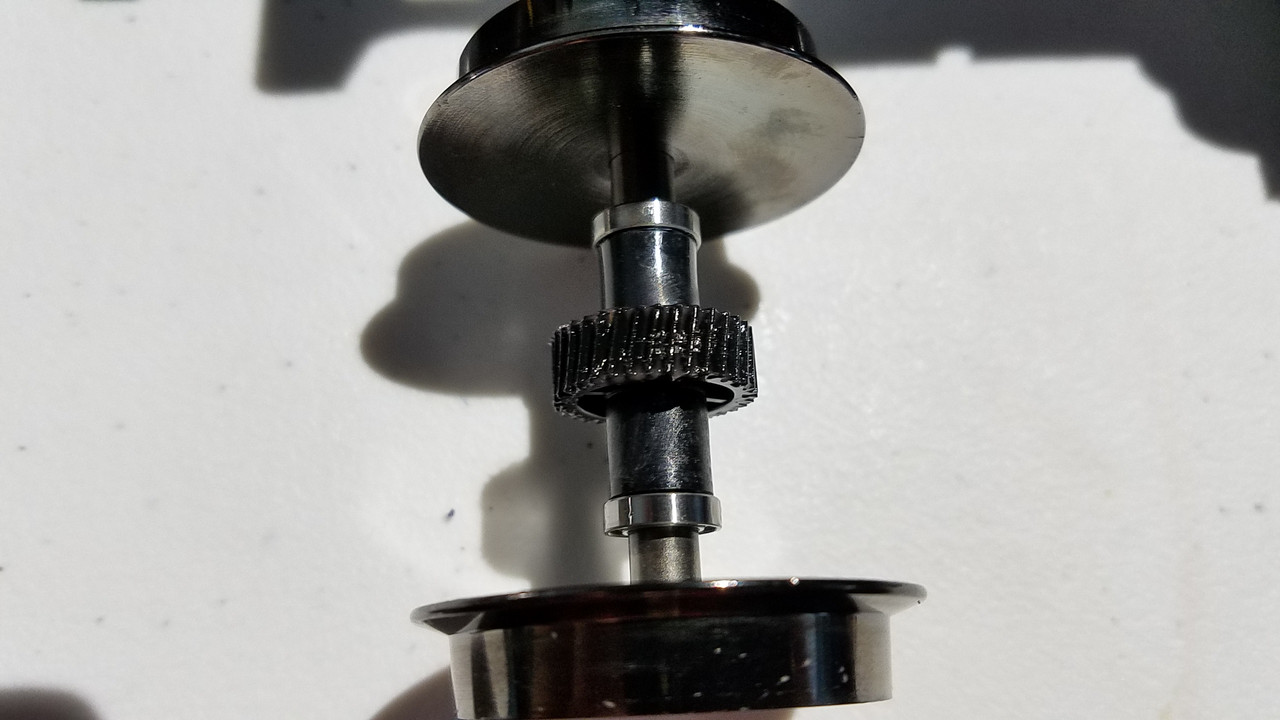
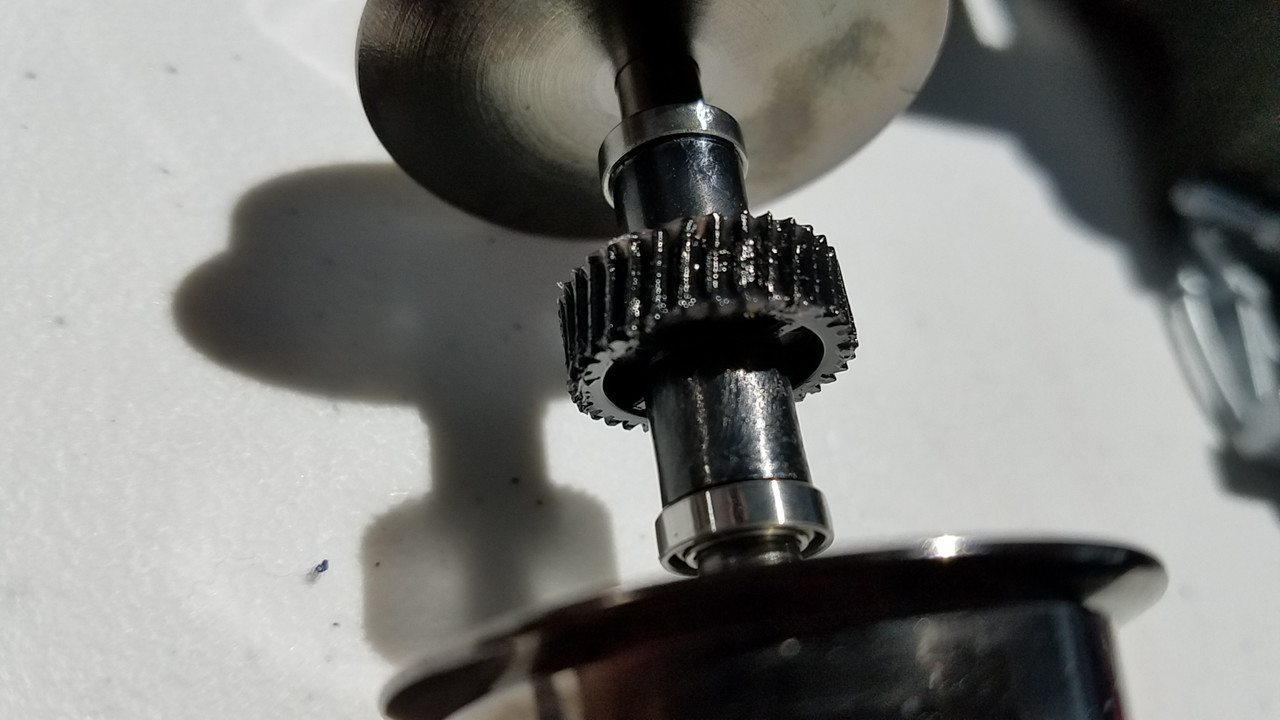
I disassembled a couple of the Bachmann eggliner drives so photos could be taken of the interior. I kind of liked the way it was built and wanted others to see it, just in case it had not been shown before. I also removed the entire motor and shaft assembly so everyone could see what that look like inside also. I have included some photos of the previous drive from the Aristocraft to show how the axle sleeves crack. This should be the first few photos. Finding new axle/gear parts for these original drives is almost impossible because most of them are broken and they are one solid piece plus with Aristocraft gone and out of business, parts are at a premium, if even available.
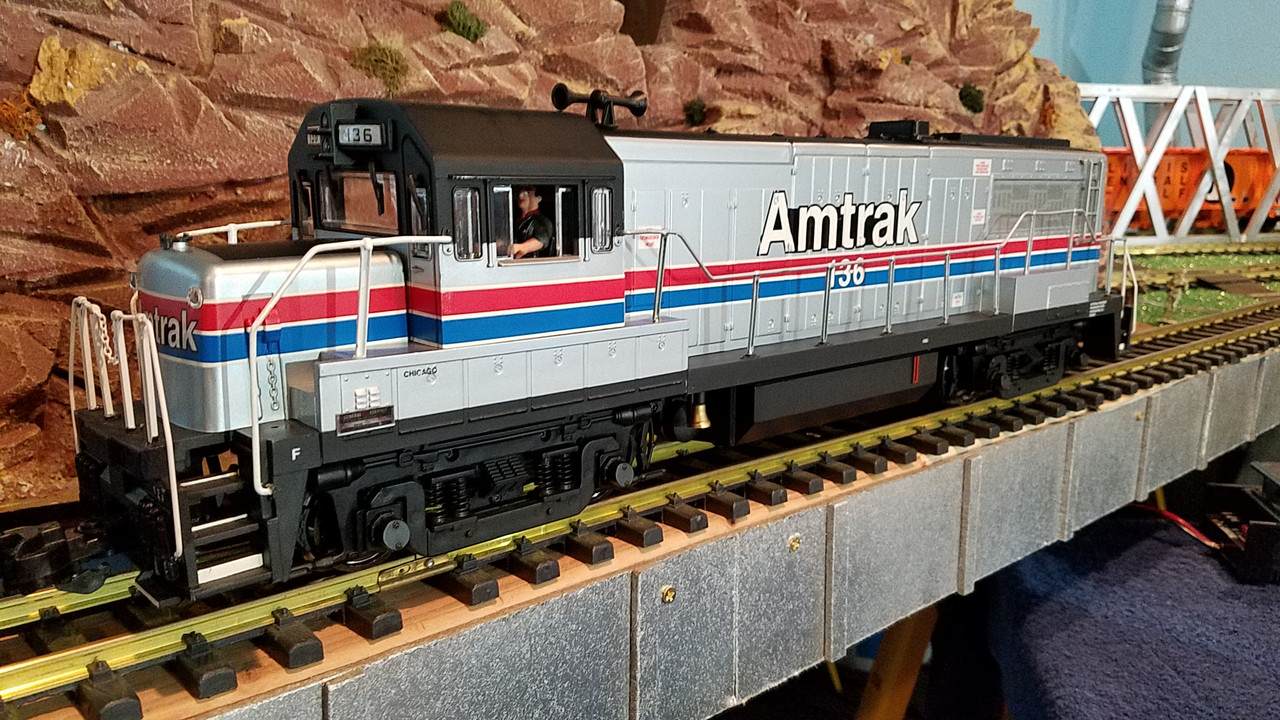
Bachmann has built the new drive a bit more durable and as far as I have seen, there doesn’t appear to be any cracking on the Bachmann drives even though they look and function identically to the original, with some design modifications. One big advantage to the Bachmann drive is the lack of drag, contact and wear from reliance on side frame bearings that the original drive had. The one nice thing about the eggliner drive, is that when it’s installed, especially the way I did it, it actually brings the locomotive down in height without modification, other than raising the side frames that is. I think it makes the locomotive look much better.
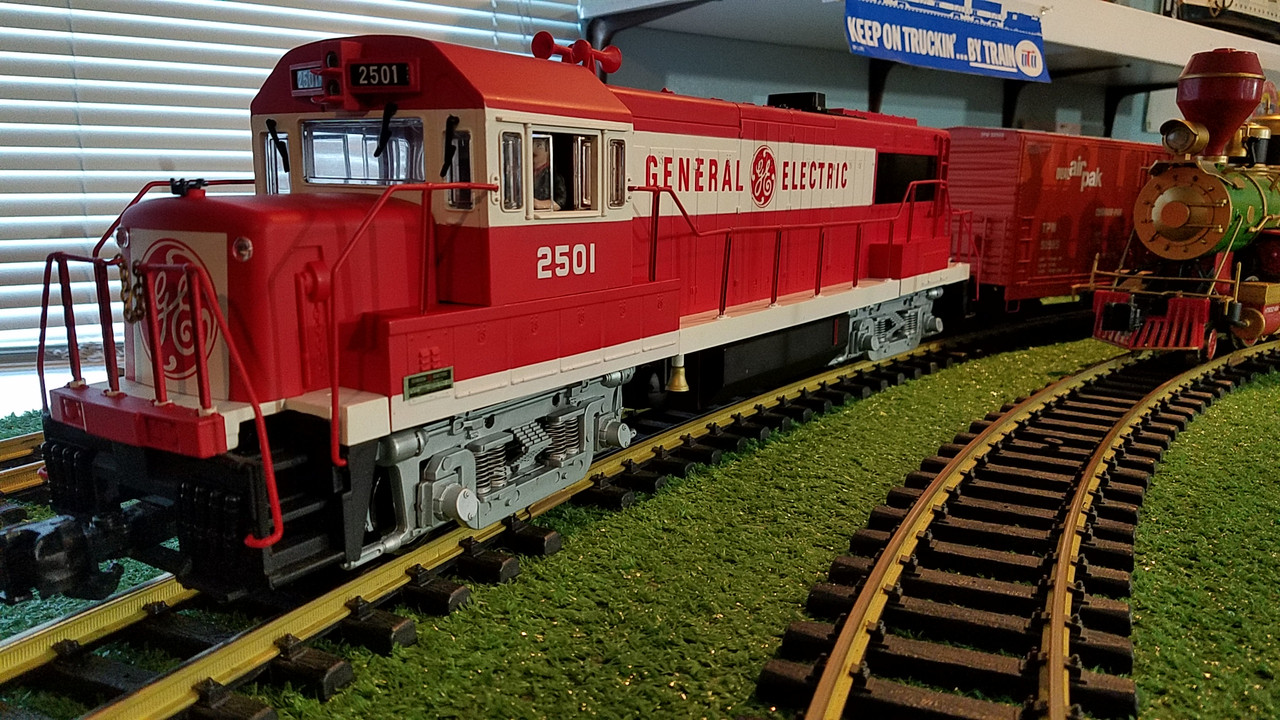
You can take a look at the photos that I have posted of both the Amtrak locomotive and the General Electric locomotive and decide for yourself. Both locomotives run very quiet and very powerful. As a matter of fact, I would go even one step further to say that there is a 18 to 22% power increase in both locomotives after the drives were installed. I was able to pull at least nine more cars then before with no hesitation. Of course, this all depends on it the weight of your locomotive, your curvature, number and weight of cars and grades.
I wasn’t disappointed in the results of the installation but with the cost, the immense amount of time it took, the motor blocks being wired in the wrong direction, the side frame modifications, Etc. I’m not sure I would want to do this again because it is an extremely large amount of work. However, if you have the funds, the time, the patients and the expertise to do the project, then it’s well worth it. I have always liked the U-25B locomotive and I personally think that is worth putting the time, money and effort into it.
Some folks may disagree with me on this but for everyone that really likes this locomotive, I don’t think you’d be disappointed with the results plus with adequate care and maintenance, you probably will never have to work on it again . I am far from an expert but I learn by trial and error and like I said before, there may be other posts out there about this but I’m not sure what they covered and didn’t. Regardless, I thought this would be an interesting conversation for a the large-scale community and I hope it is because I’m under the assumption that there are a lot of you out there that own these engines.
I think Bachmann is still selling these drives for those that want to take on this project and I believe they will fit other locomotives as well, like the RS3 and I’m not sure but maybe even the GP-30, if I got that right.
Of course, I’m not sure if the mounting would be exactly the same on other locomotives because I don’t own any of those locomotives. I do know that it took me over 7 hours to do both locomotives. Yeah, I know, I’m a little slow but I like to make sure I’m doing things right and besides they run and pull like a champ now which made it worth it to me. Unfortunately, when wiring the drives, I conveniently managed to break a couple of wires up inside the body which required me to disassemble the entire locomotive body, cab and frame parts to fix it. That doesn’t happen too often though.
If anybody’s has any comments about this subject, feel free to post them here. If all of the pictures will not load on the first post, then I will add them on the reply section so that eventually they will all be there.
One other thing, I can’t remember where but there was a post that I read somewhere that showed how to glue brass sleeves over the old original plastic axle/gear sleeves but with the lack of space available in that area of the drive, I couldn’t see how this would work but maybe I’m wrong. Maybe there is a way to fix them and I haven’t seen that post either but I don’t know if I would trust that idea anyway. It works great on USA Trains’ axles but I’m not sure about these. Either way, I hope this post finds interest with someone and that the photos of the new Bachmann drive, if not seen before, are of some use to someone, especially if they are involved in a project like this.
Thanks!
Ken ISKOT