Large Scale Central

Bachmann Fn3 stirrup steps

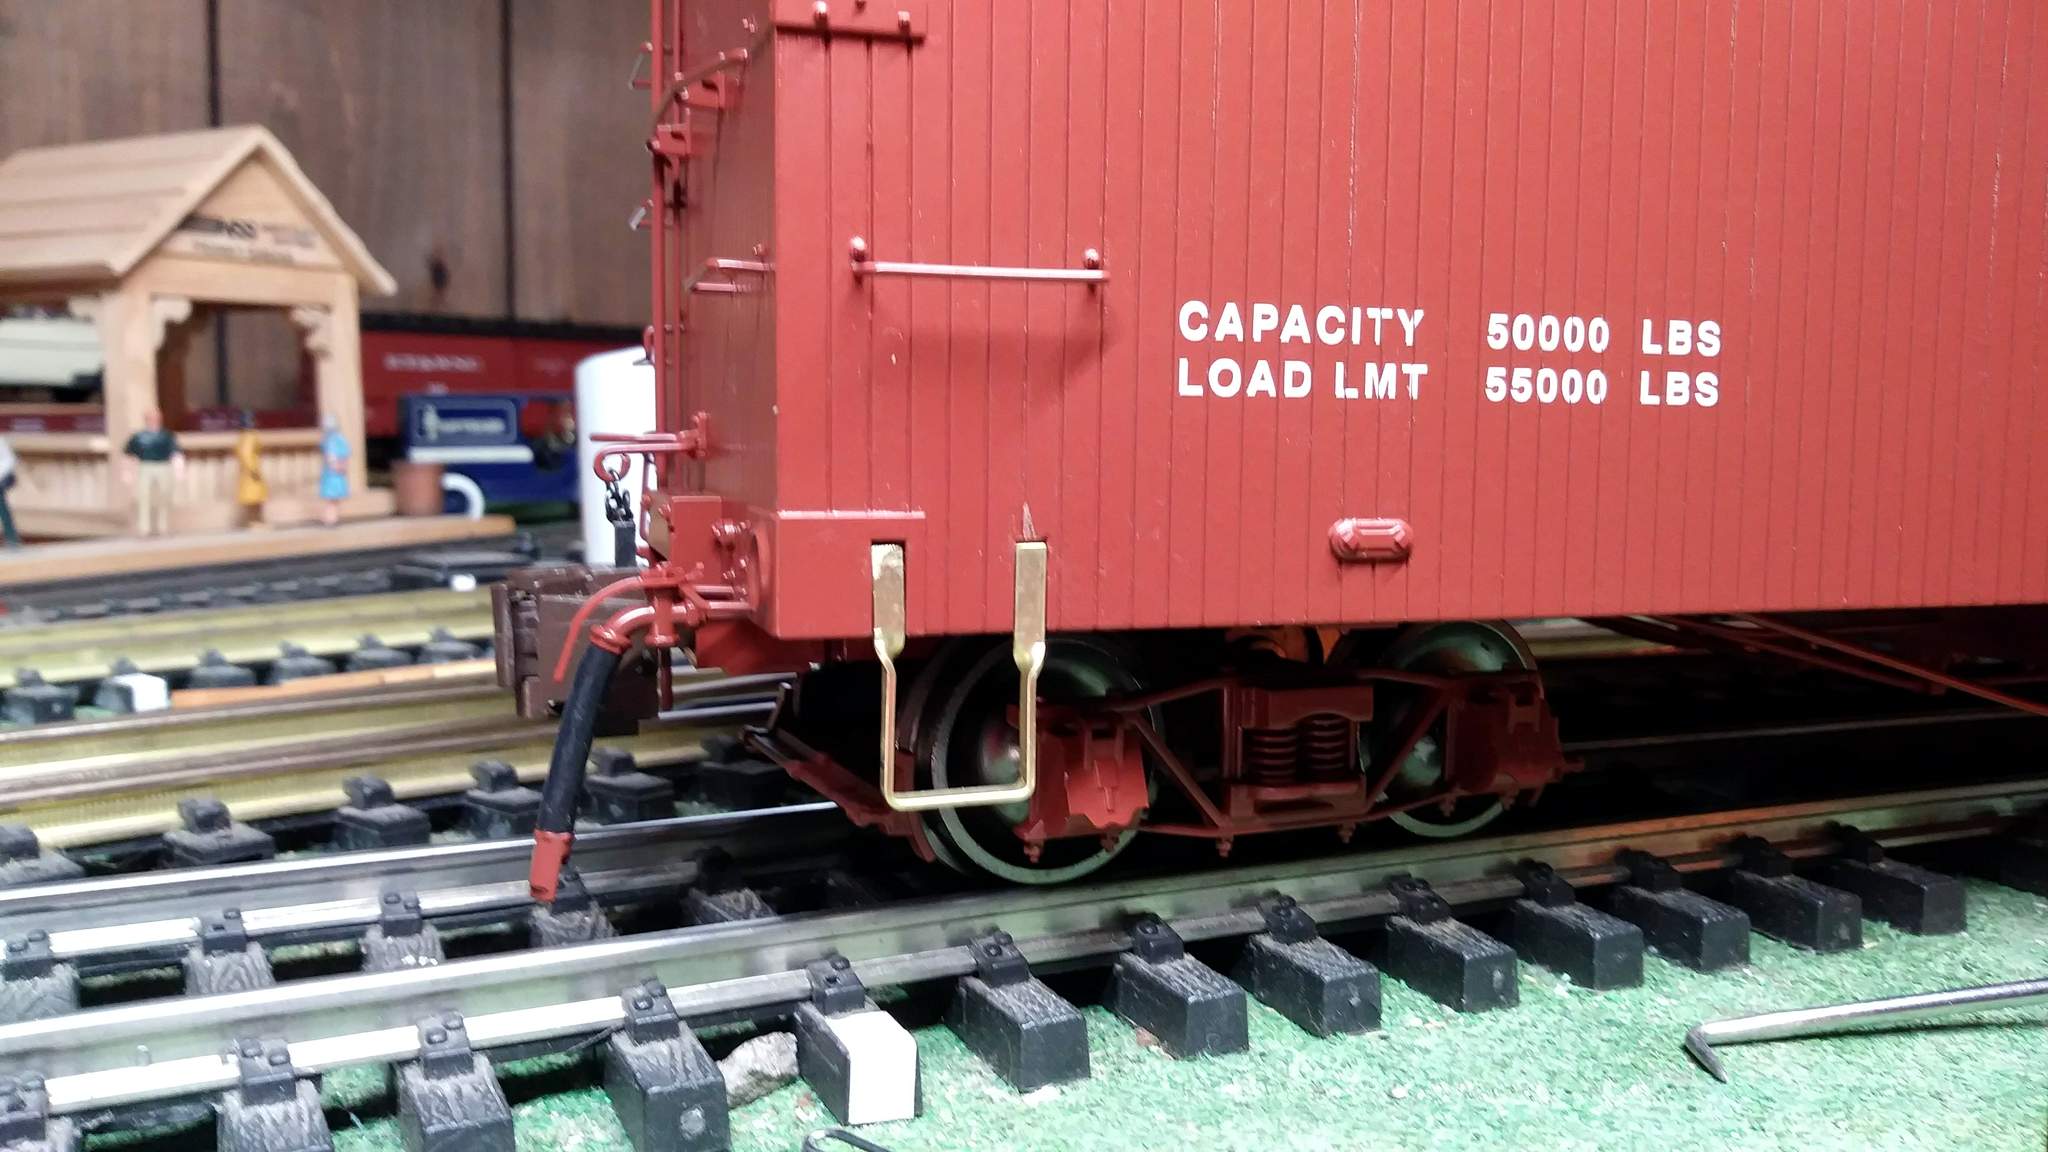
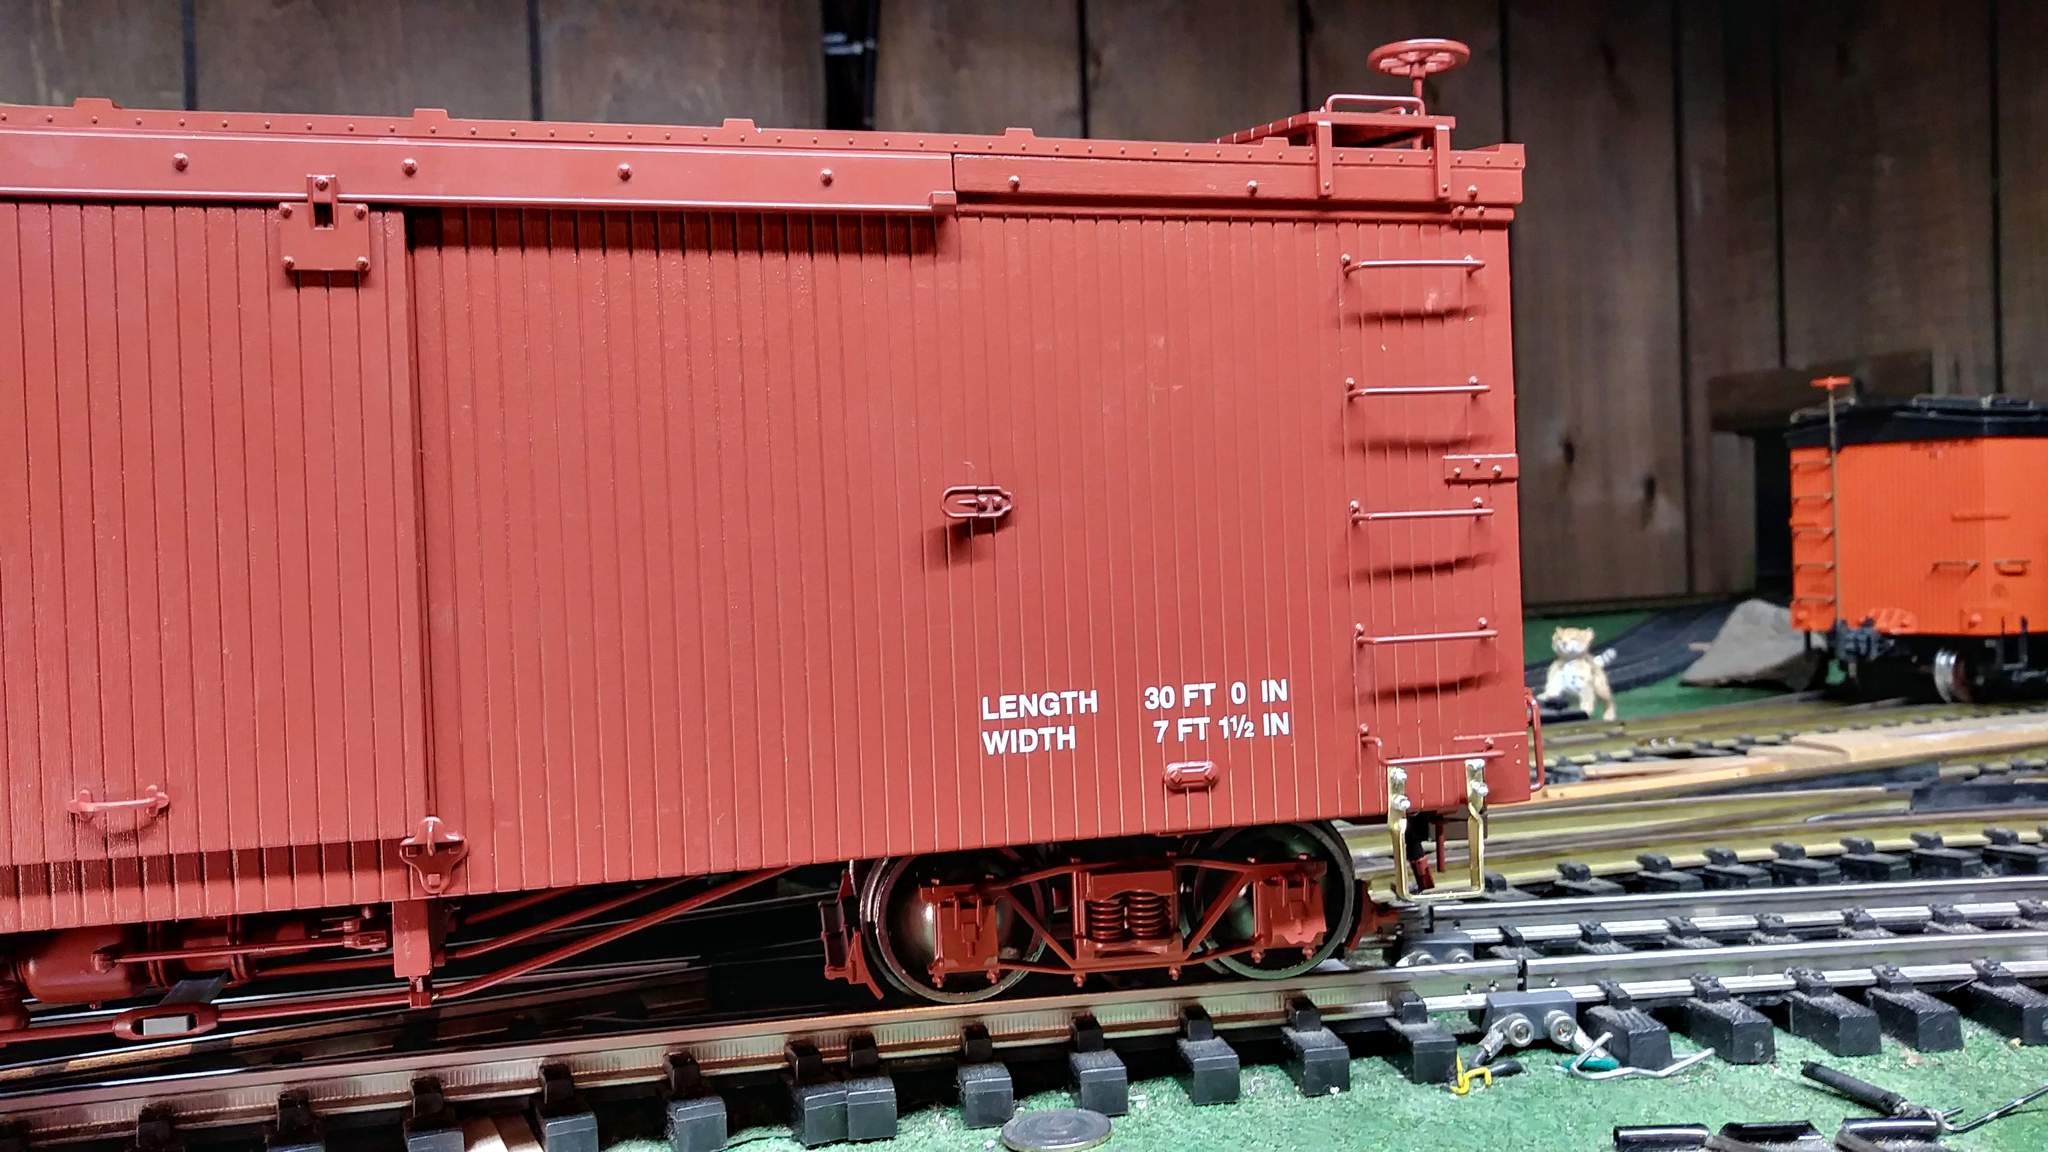
Just picked up a basically NOS Bachmann Fn3 Murphy Roof box car. It had a rough trip here from FL. Two of the stirrup steps are busted off, both doors and door stops off and one coupler shank shattered The doors and stops go back on with little effort and I have spare couplers so that is a quick fix, but the steps I’m undecided on.

I could check with Bachmann to see if they have any, but white metal steps are just going to break again.

I could seek out and buy some brass steps.

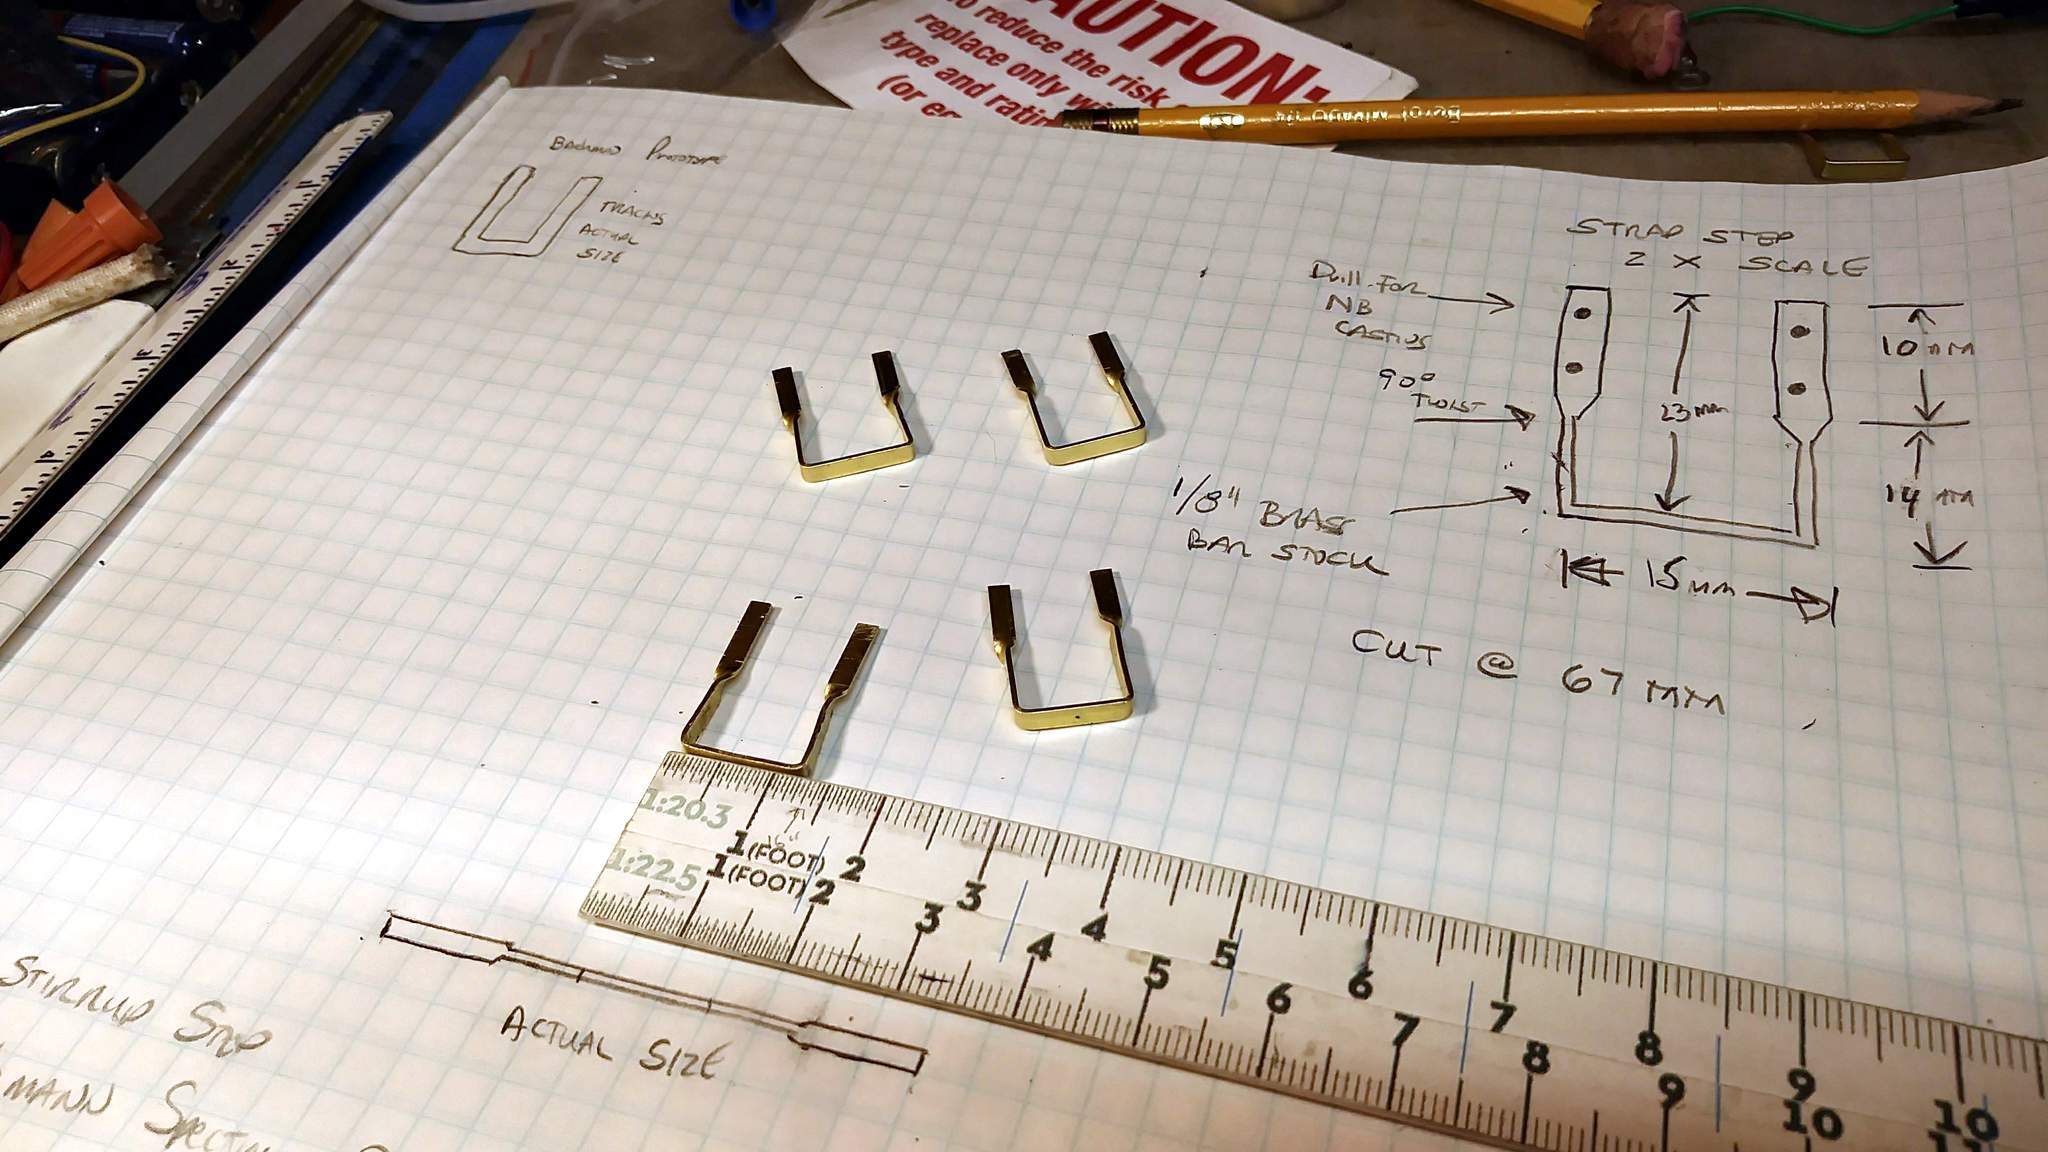
I could buy some strip brass and fabricate a set using Bruce’s technique from many moos ago.

What have you done?

EDIT to fix spelling before I get a PM from Fred.

The shattering is a manufacturing defect from back when they were newly made. Bachmann doesn’t have them in stock anymore. Ozark Miniatures has steps it’s what I’ve used they work.

Jason

I was duly warned on by Kevin Strong on the Facebook sale listing. He noted some early trucks were brittle, but the trucks seem OK. With careful handling I managed to snap a turnbuckle and the end of a queens post. Repaired that with JB Weld and a little brass. Managed to get the two unbroken steps off without damage. I’m leaning toward DIY.

So, I found some brass bar stock from an unfinished project and it’s the right size. Bent up one step by eye with no jig and no measurements just to see if I like the look. With a little refinement I think this will do…

Looks good to me!

How or what type of bolt are you going to use the finish it off ?

Those look great, Jon!

I used #2 x 3/8 Inch Miniature Lag Screws (hex headed!) to hold mine in place (I don’t trust glue alone), but I notice that Micromark no longer sells these. You might be able to get some small hex headed nuts and bolts…somewhere.(https://www.largescalecentral.com/externals/tinymce/plugins/emoticons/img/smiley-embarassed.gif)

Bruce Chandler said:

Those look great, Jon!

I used #2 x 3/8 Inch Miniature Lag Screws (hex headed!) to hold mine in place (I don’t trust glue alone), but I notice that Micromark no longer sells these. You might be able to get some small hex headed nuts and bolts…somewhere.(https://www.largescalecentral.com/externals/tinymce/plugins/emoticons/img/smiley-embarassed.gif)

There’s a guy at Cabin Fever who sells a variety of small nuts and bolts for very high $$ - Microfasteners. I have a variety of #1-72, #0-80 and even some #00-90 nuts, bolts and washers.

https://www.microfasteners.com/home.php?cat=575

I also have a quantity of metric 0.8mm, 1mm and 1.2mm brass bolts that I bought years ago from a guy who fixes Lionel and other gauge 0 stuff. They are an excellent choice, and readily available on eBay, etc. I bought taps from NWSL so I can thread the holes and make a real joint.

Sean said:

How or what type of bolt are you going to use the finish it off ?

Going through my nut/bolt/washer casting collection this evening to see what I have on hand. Worst case just a brass escutcheon pin, but I think the head will be too big.

Jon,

Escutheon pins will work just fine…

Unless you’re into EXTREME closeups…

At normal viewing, the escutheon pins really are NOT noticeable and they hold the step VERY nicely…

When I added stirrups on my car mover, I used brass rod and rounded the ends to simulate rivets, I drilled slightly undersized for a tight press fit. I had used I beam and had a small foot print between the flanges.

I found enough Ozark #0030 hex nut and bolt in my parts bin to do the job. Now to decide if I build up a jig (oh where is that picture of yours Bruce?) or just bend 'em by hand. I only need 4.

Google Advanced Search to the rescue. Once I found that Bruce called them Strap Steps finding the link to his article was easy. Y’all can find it here https://www.largescalecentral.com/articles/113/Making-Strap-Steps

Yeah, strap, stirrup, whatever, eh?

Well, inspired by your frustration, I have now added my articles to my Master Index. (The articles are towards the bottom).

I figured since I was only going to make 4 I probably didn’t need the jig. Well, in retrospect the jig would have helped with consistency. I spent way more time than I should have, but finally have 4 steps that are acceptable and fit the molded spot on the Bachmann car. I still need to drill for the nut bolt casting and decide on a paint color. I might go with black and then detail the rest of the hardware on the car in black similar to EBT’s extant wood box car.

Here are some pics just for fun…

Hey, that works! Black hardware and unpainted wood roofwalk would be nice accents to car.

Looks mighty fine! Well done.

I think I am done until Monday evening when I can paint inside at work. I tried making a drilling jig, but it didn’t do to well. I ended up only using it to mark the hole locations. Once the steps were all drilled I drilled mating holes in the car. I will probably use E6000 to attach them permanently once painted.

In the mean time I weeded a set of vinyl logos and got them applied along with the car number.

Progress pics…

By experimentation with several Red Oxide primers available at Lowes I found that Krylon Automotive Rusty Metal Primer is nearly a perfect color match for Bachmann’s red oxide. The sheen is different (Bachmann is satin, primer is flat) but it’s close enough. Armed with this I painted the steps and NB castings with the Krylon primer at work last week. I was able to get them installed last night completing repairs to this car. C.V.S.Ry. #182 was placed into service today…

That makes a nice wrap-up to the job. Eh, just declare the sheen difference the result of there being more dust on the stirrups than on the car sides because the steps are down in the dust kicked up by the train’s movement.