Large Scale Central

Structure Lighting Project

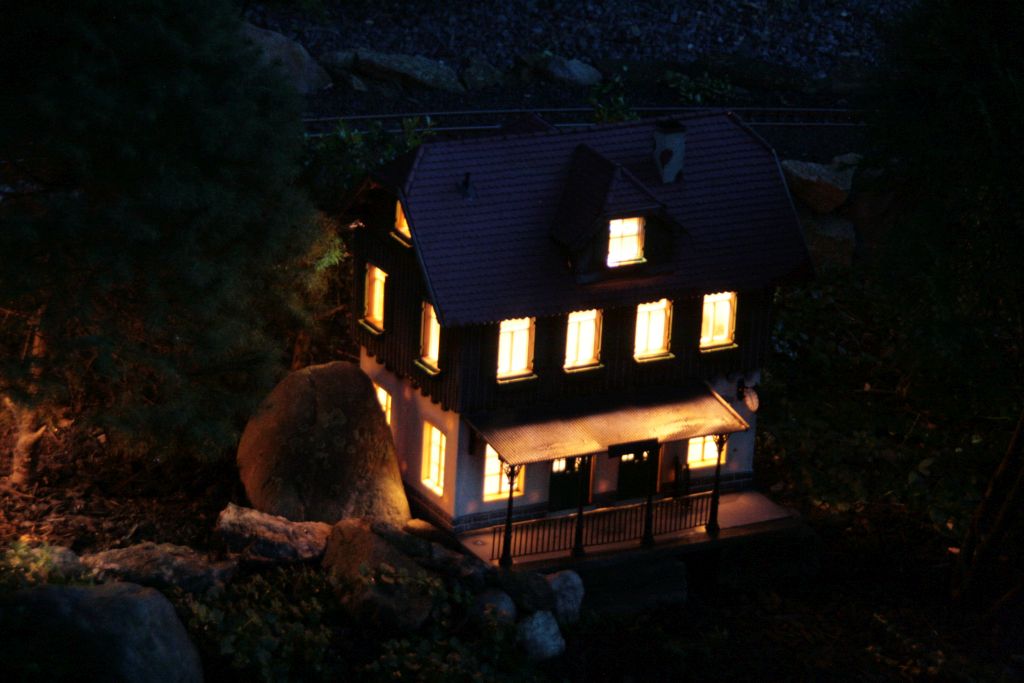
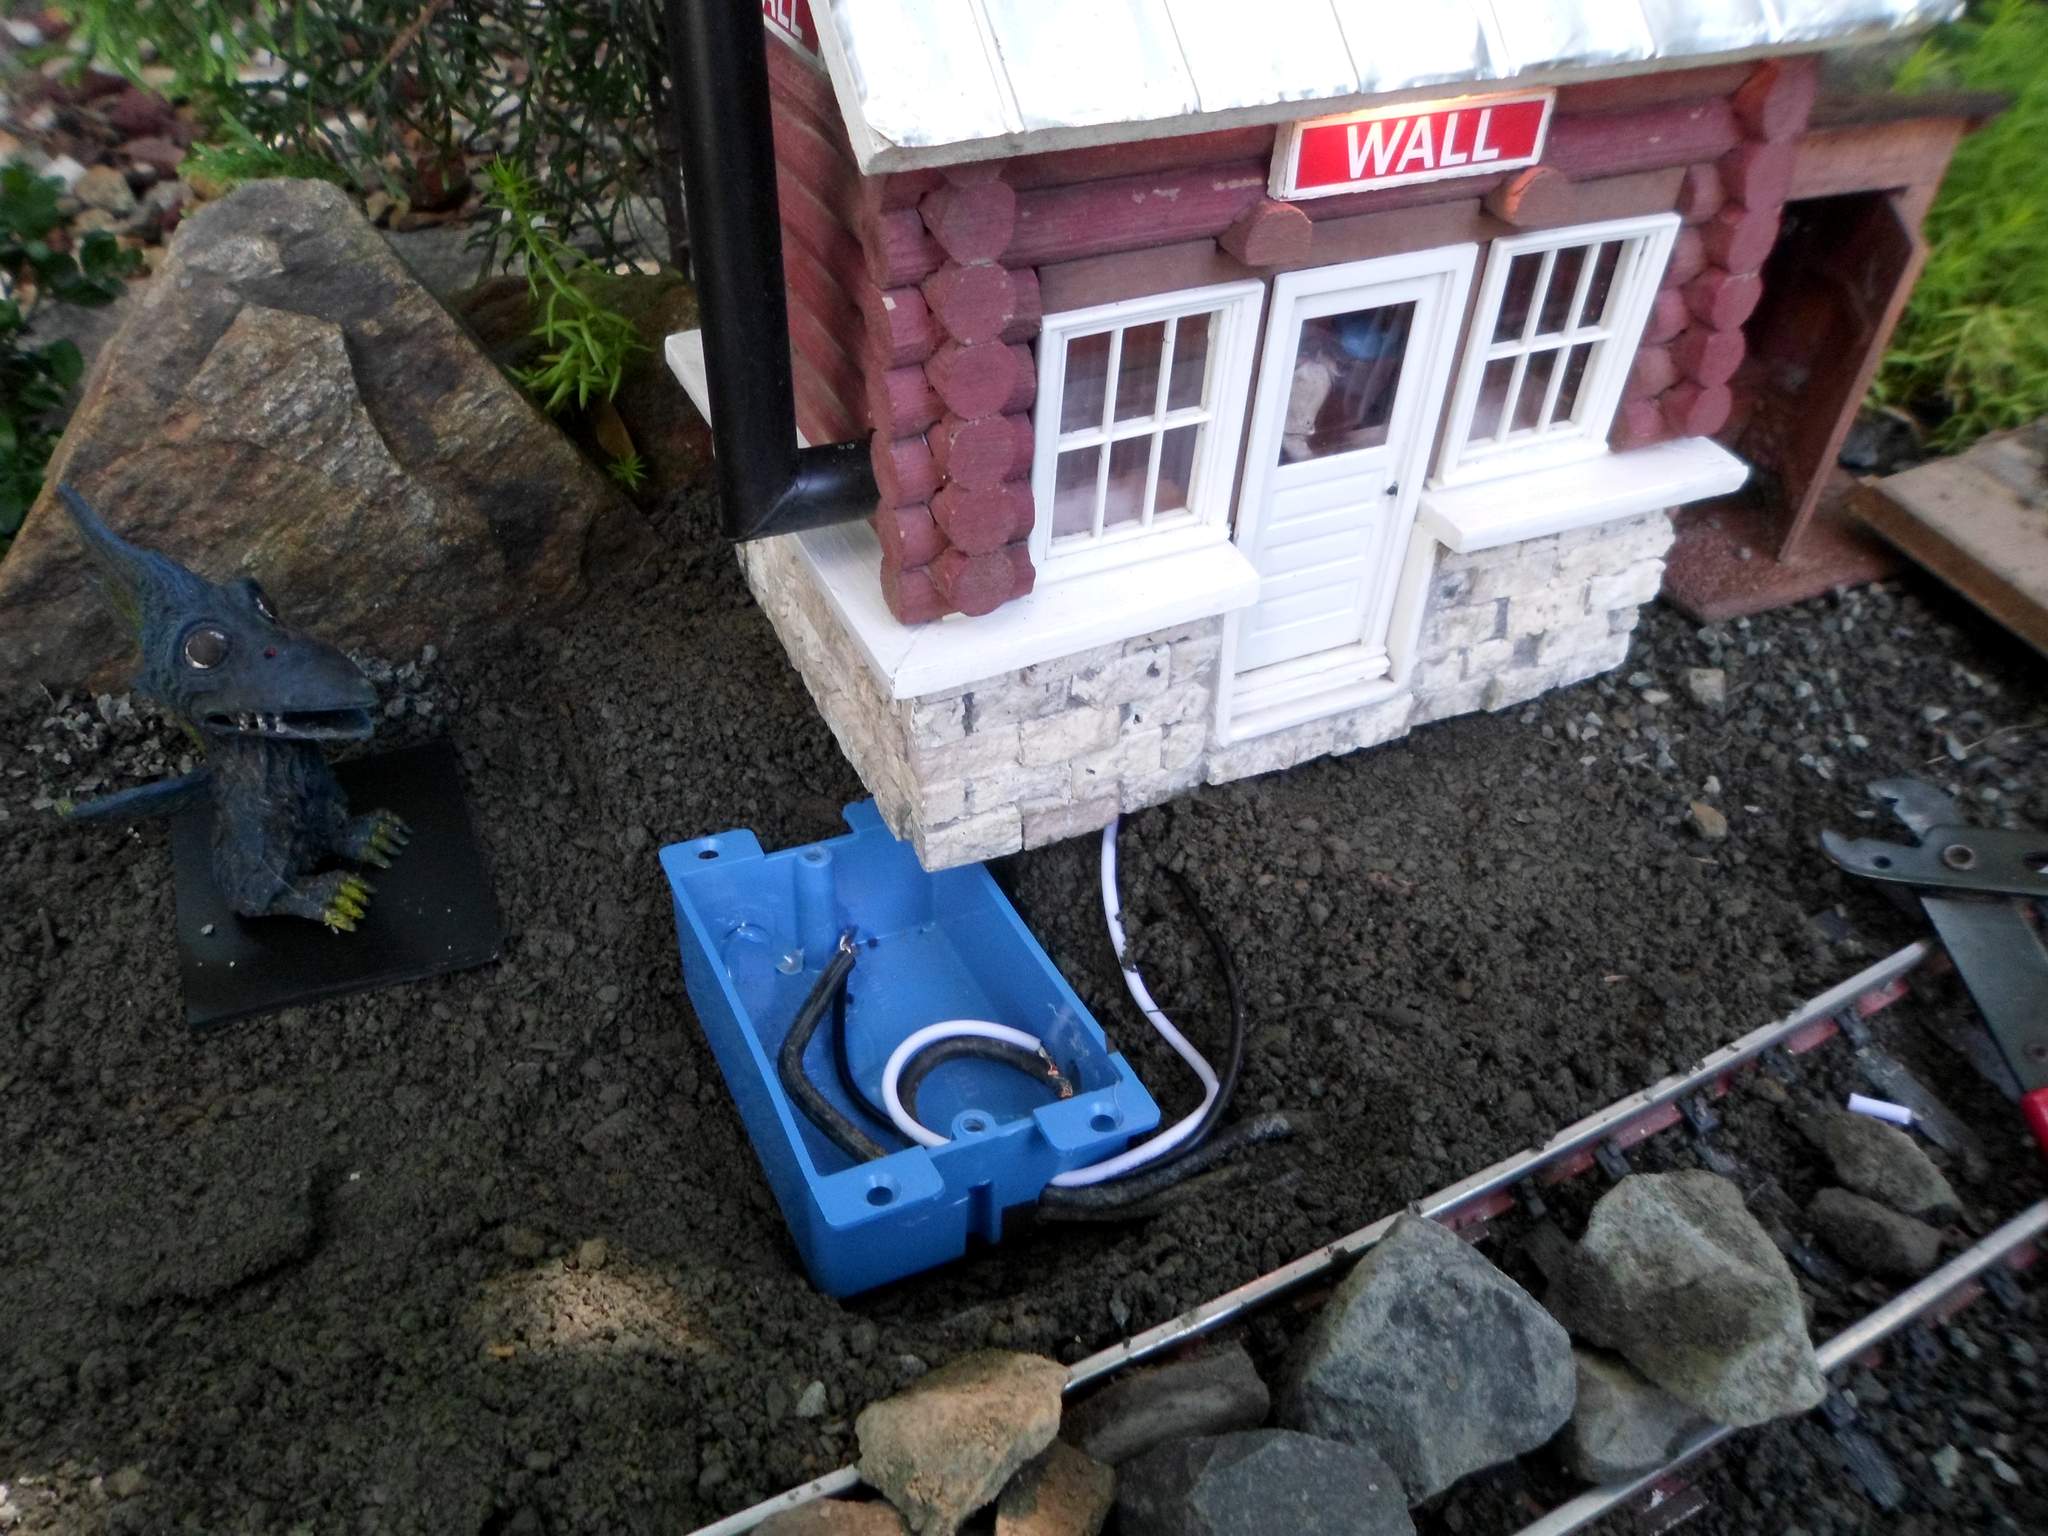
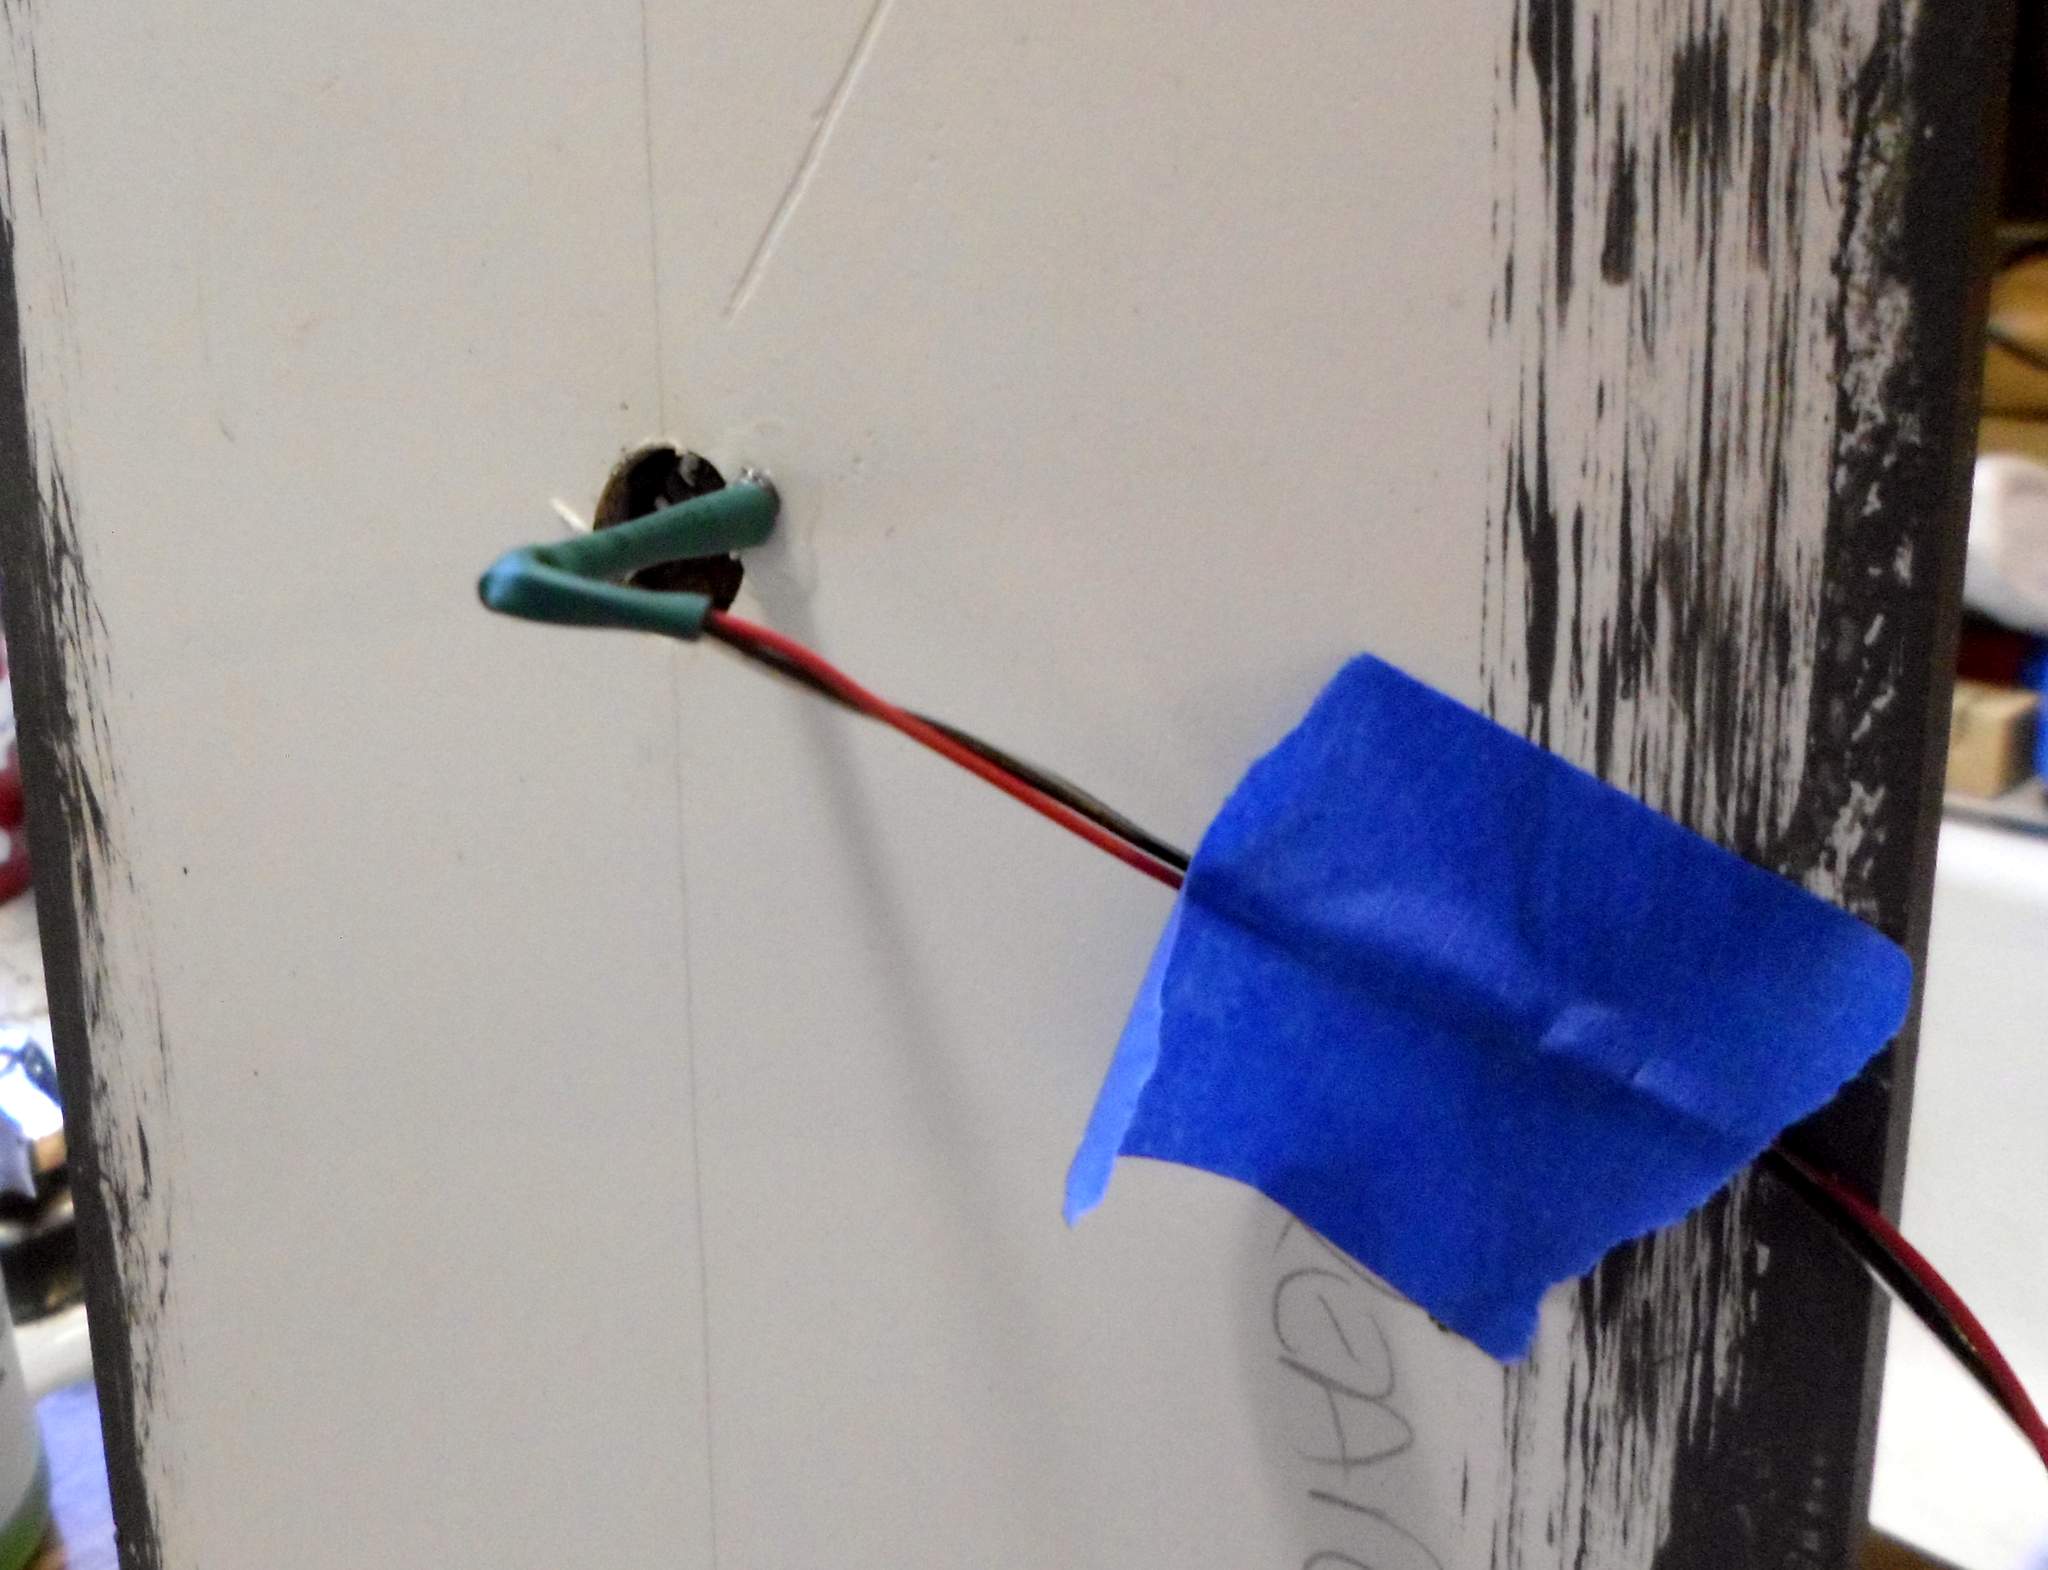
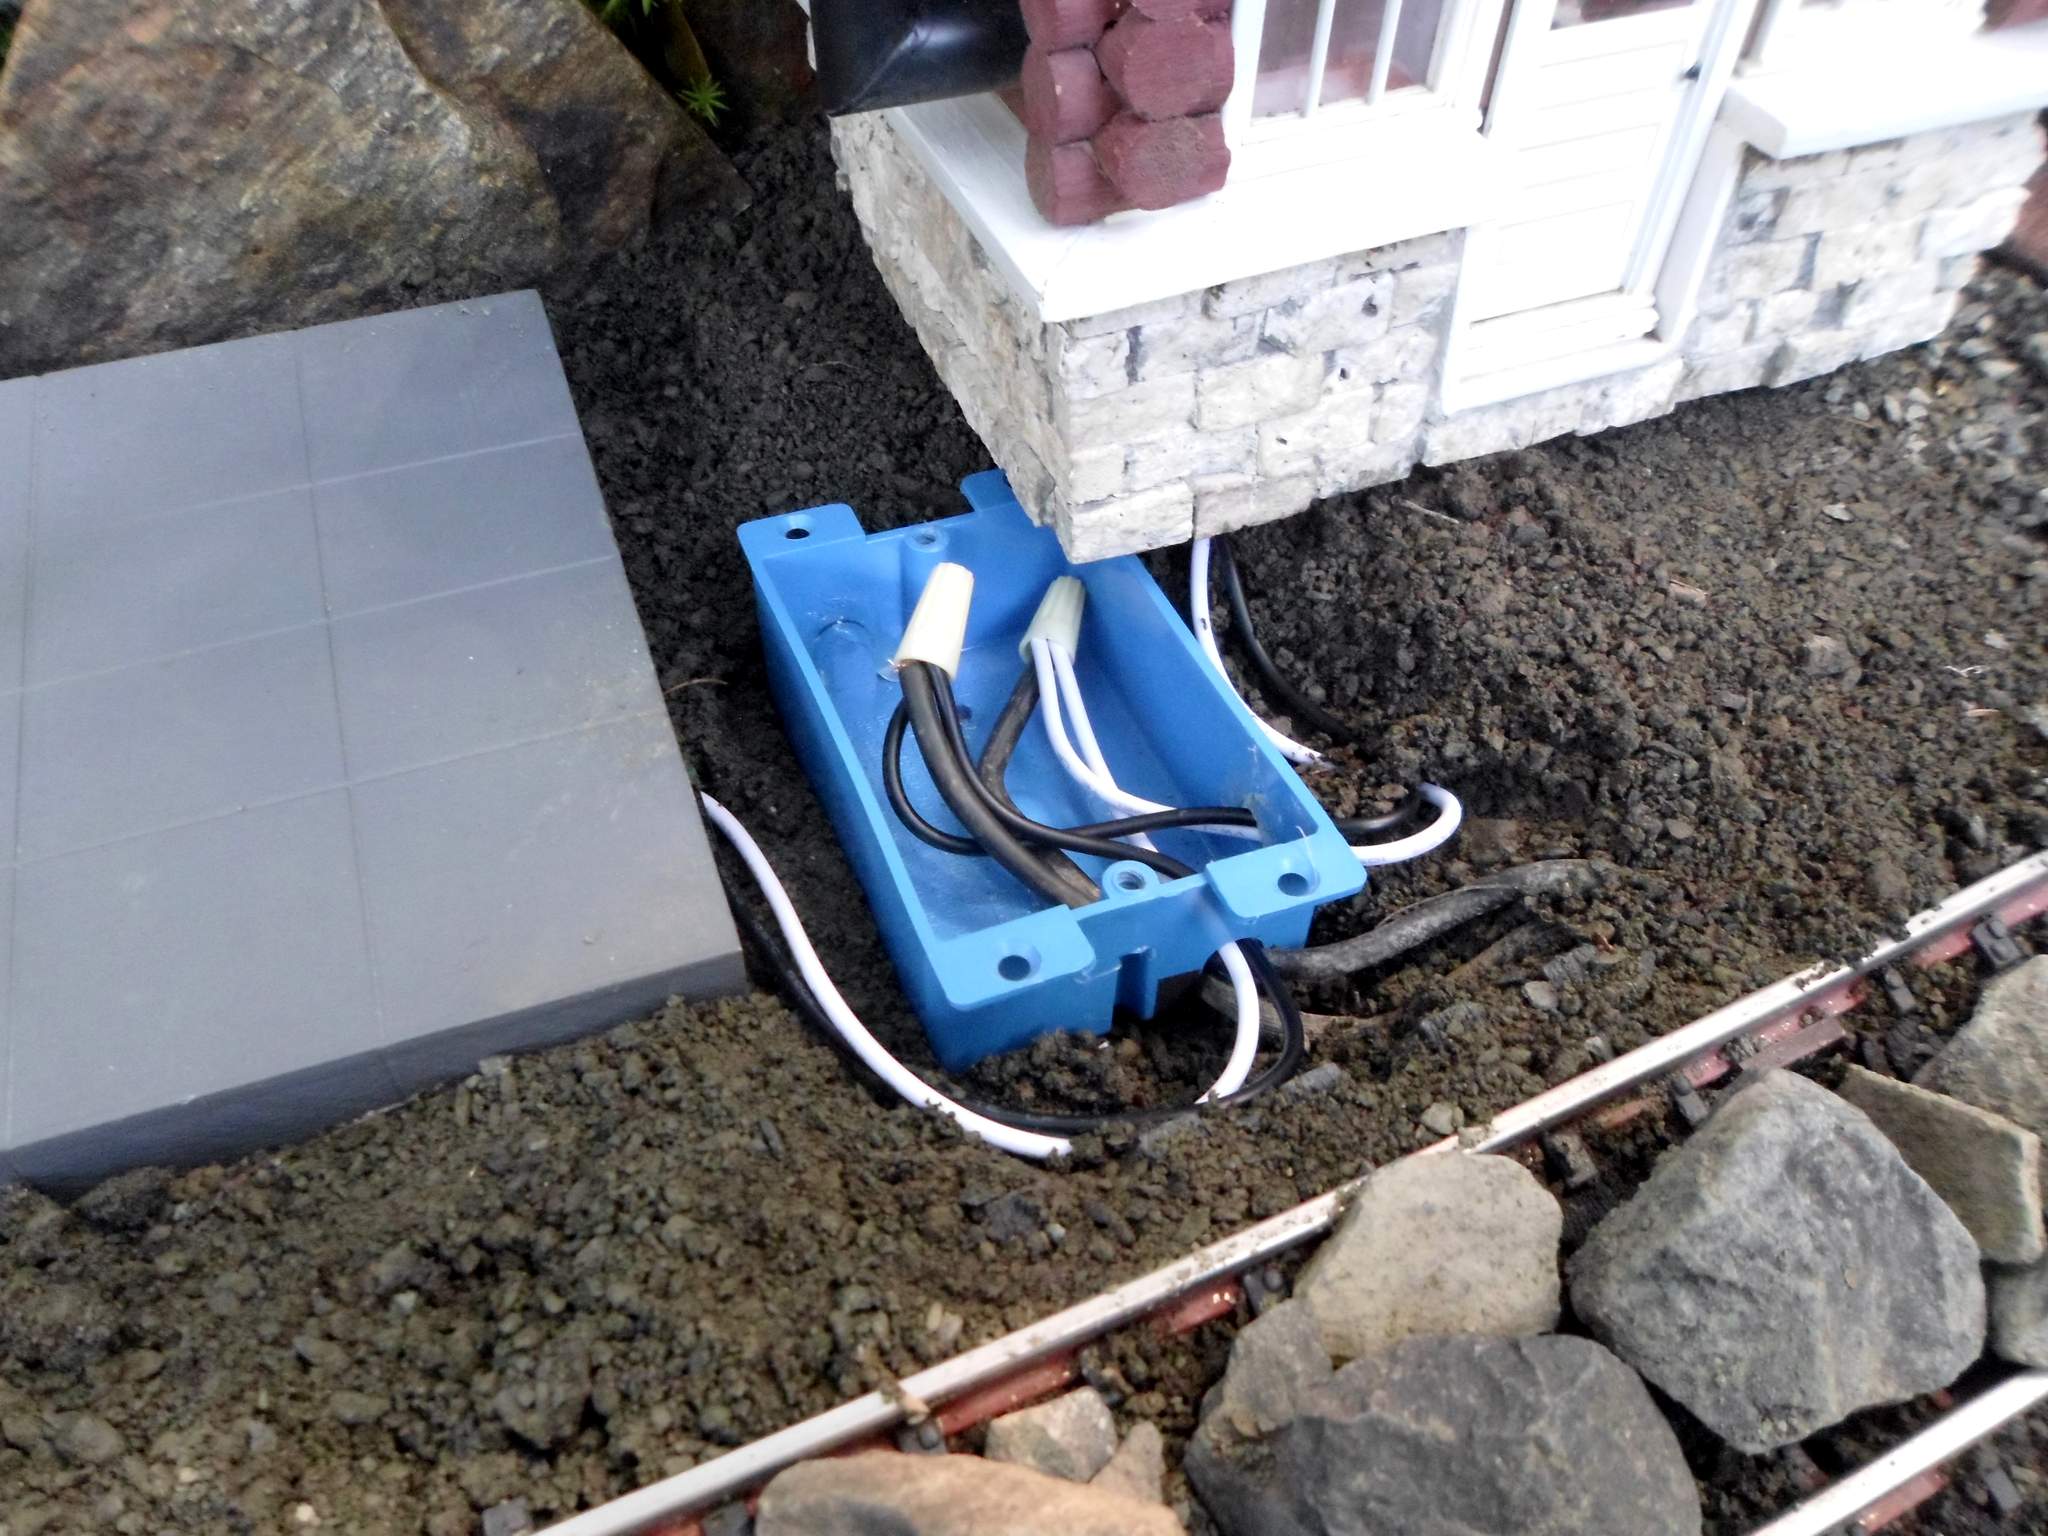
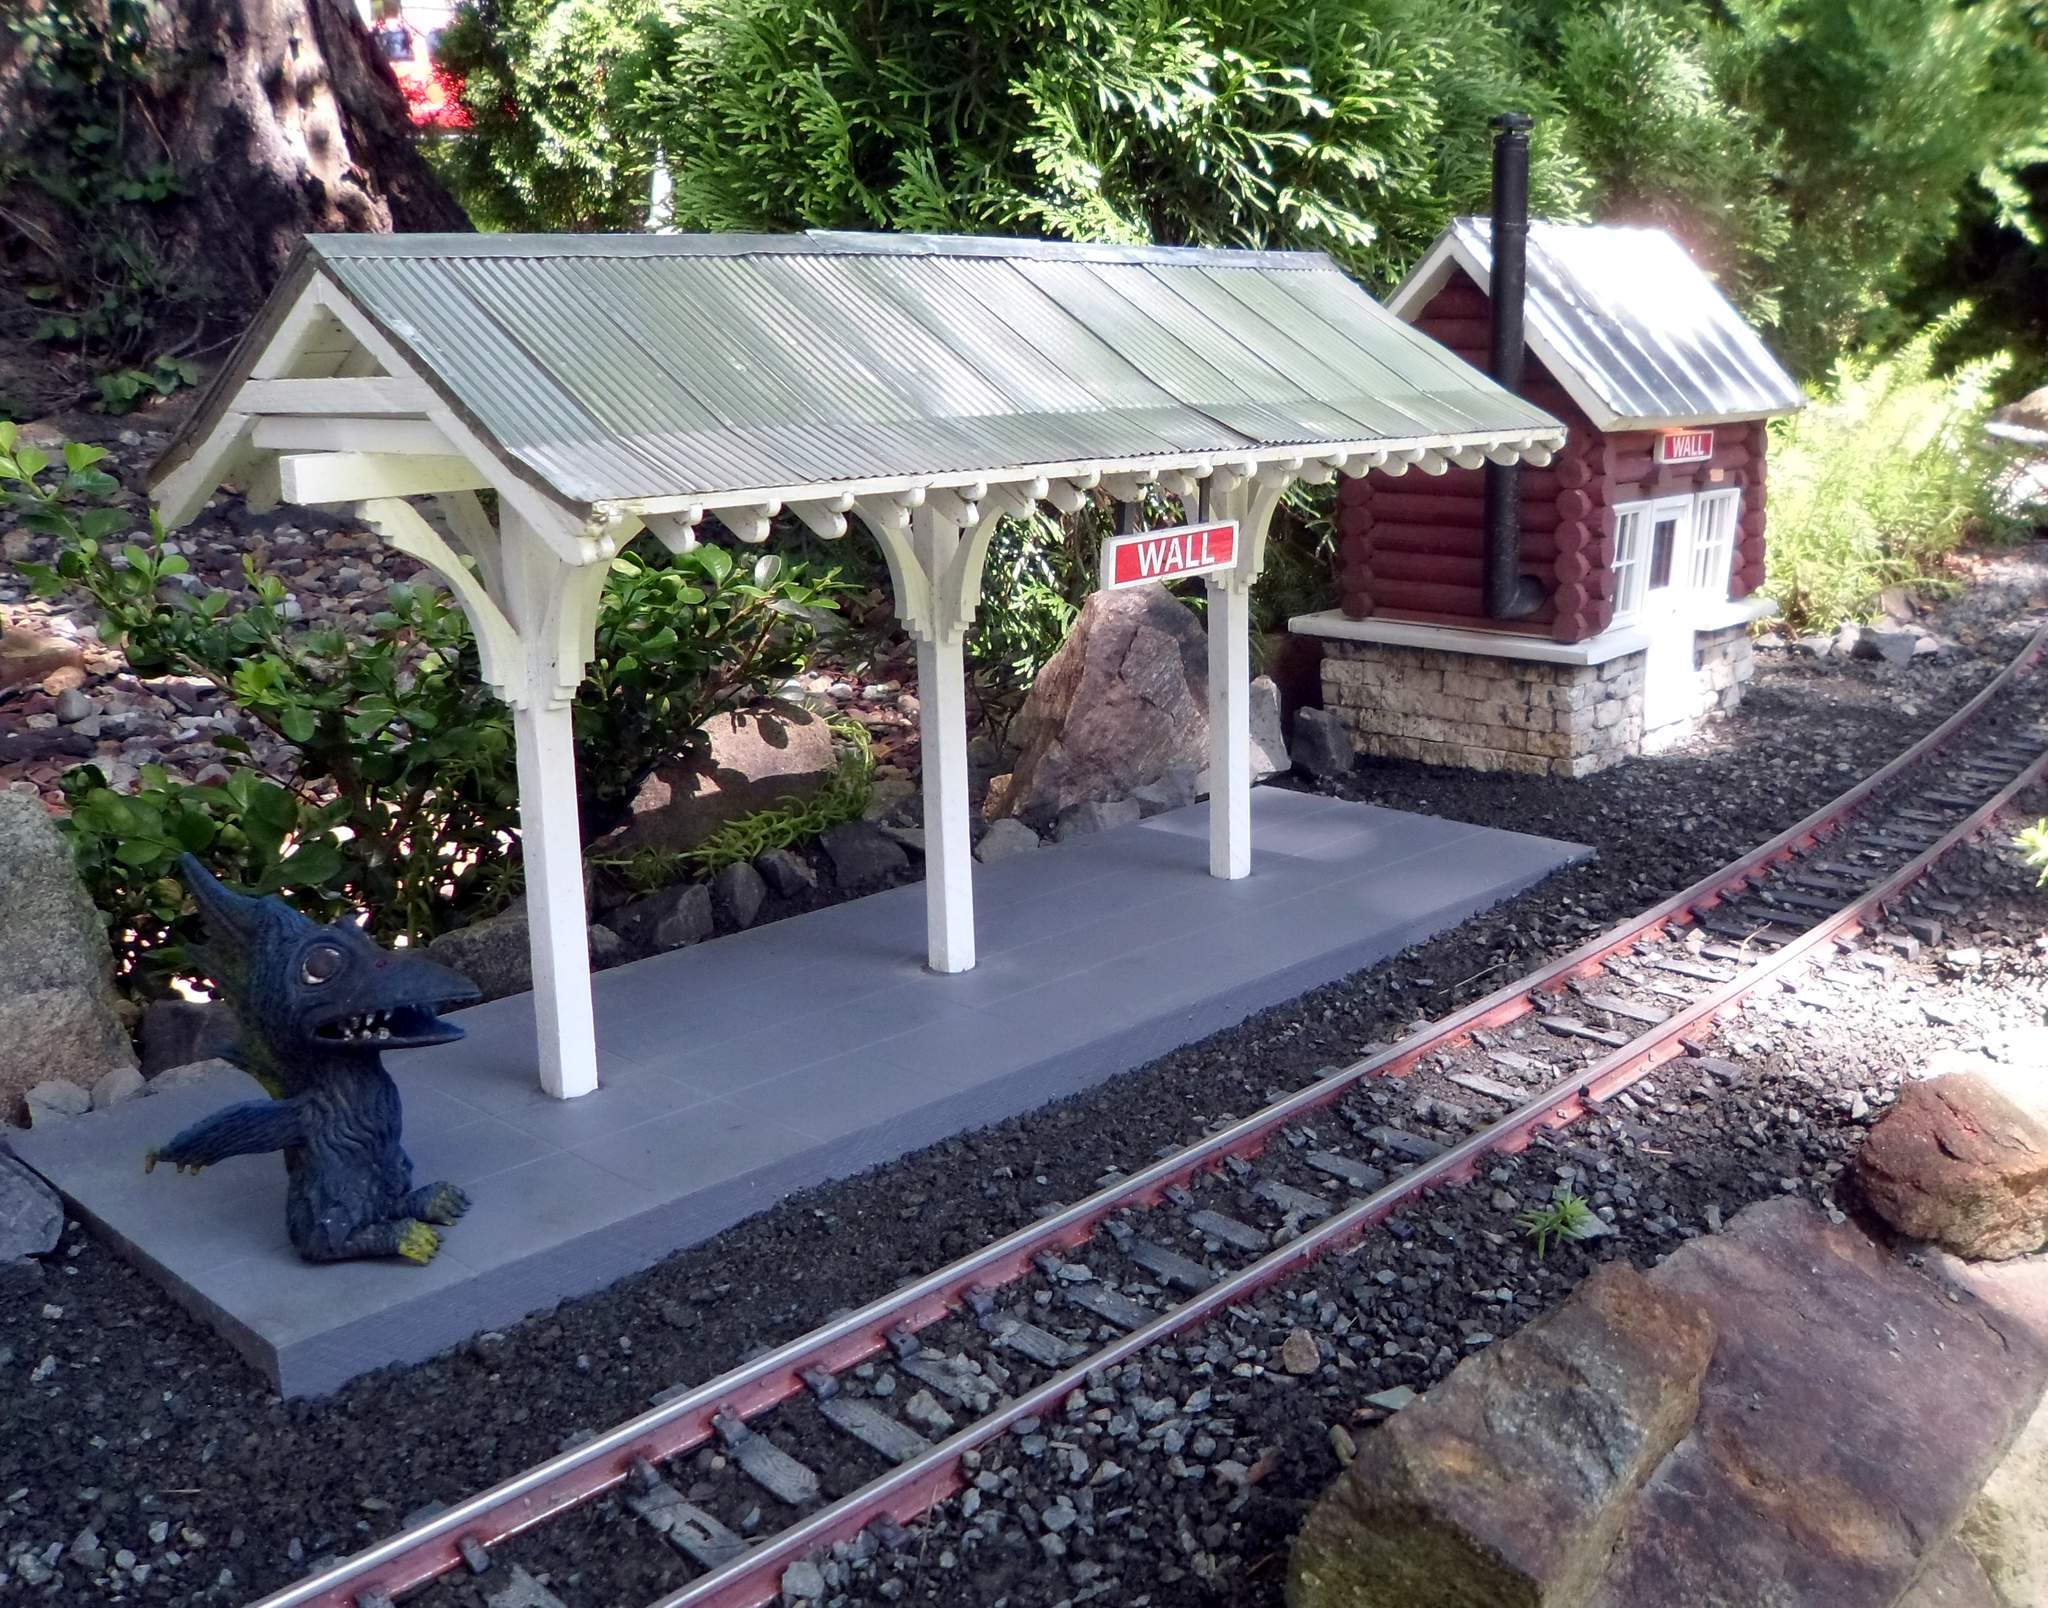
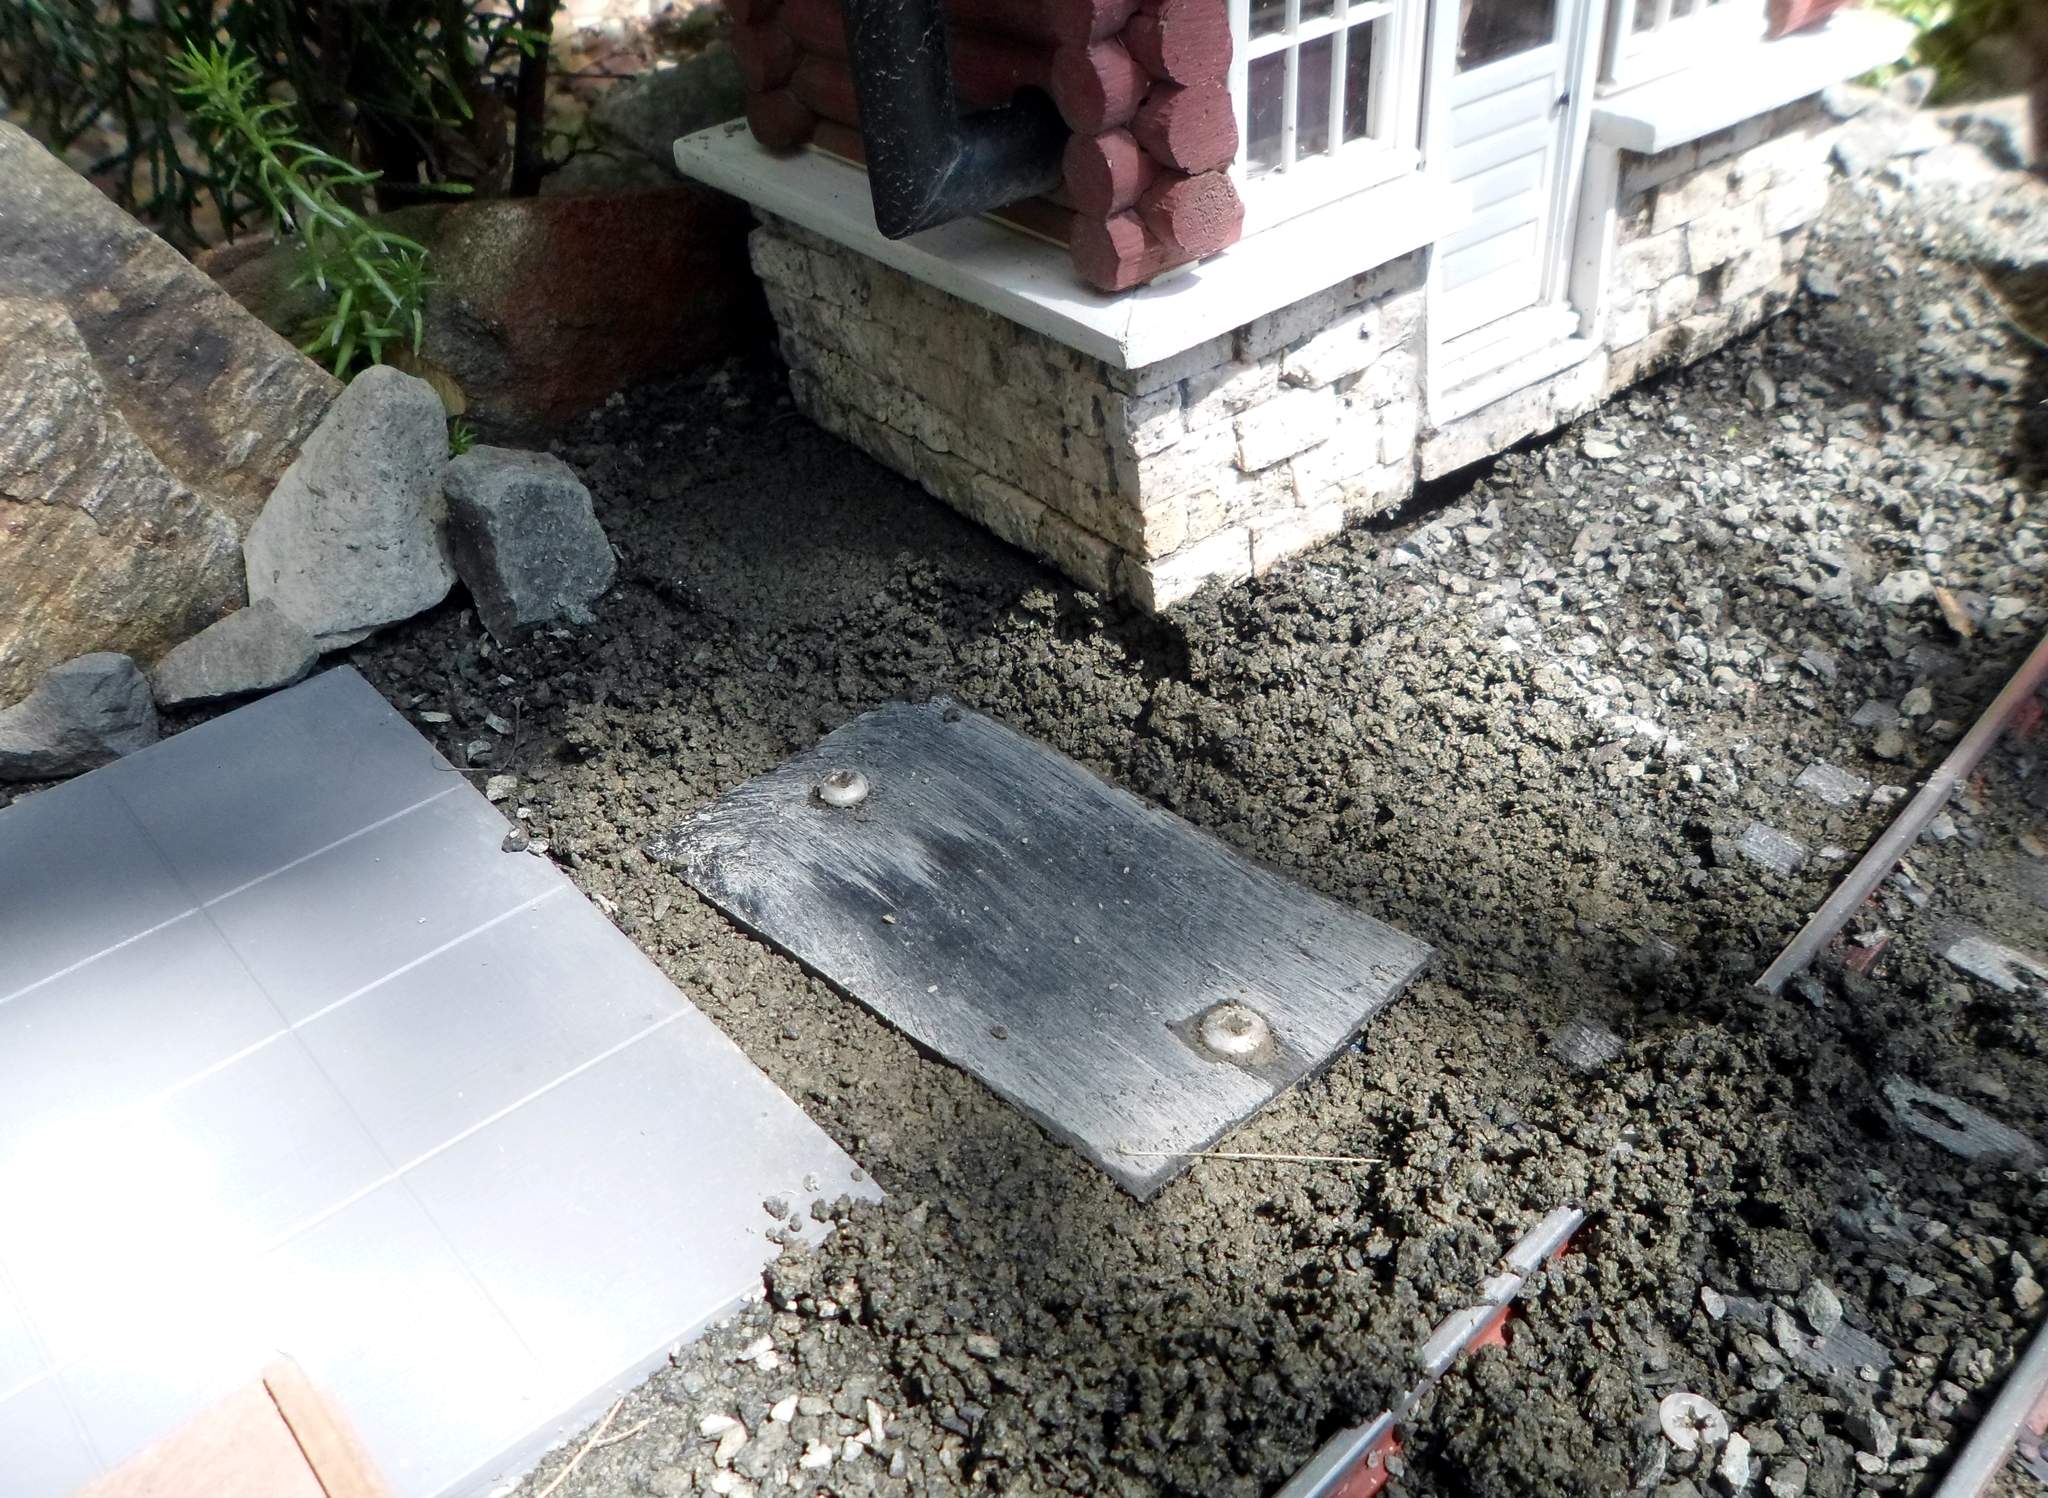
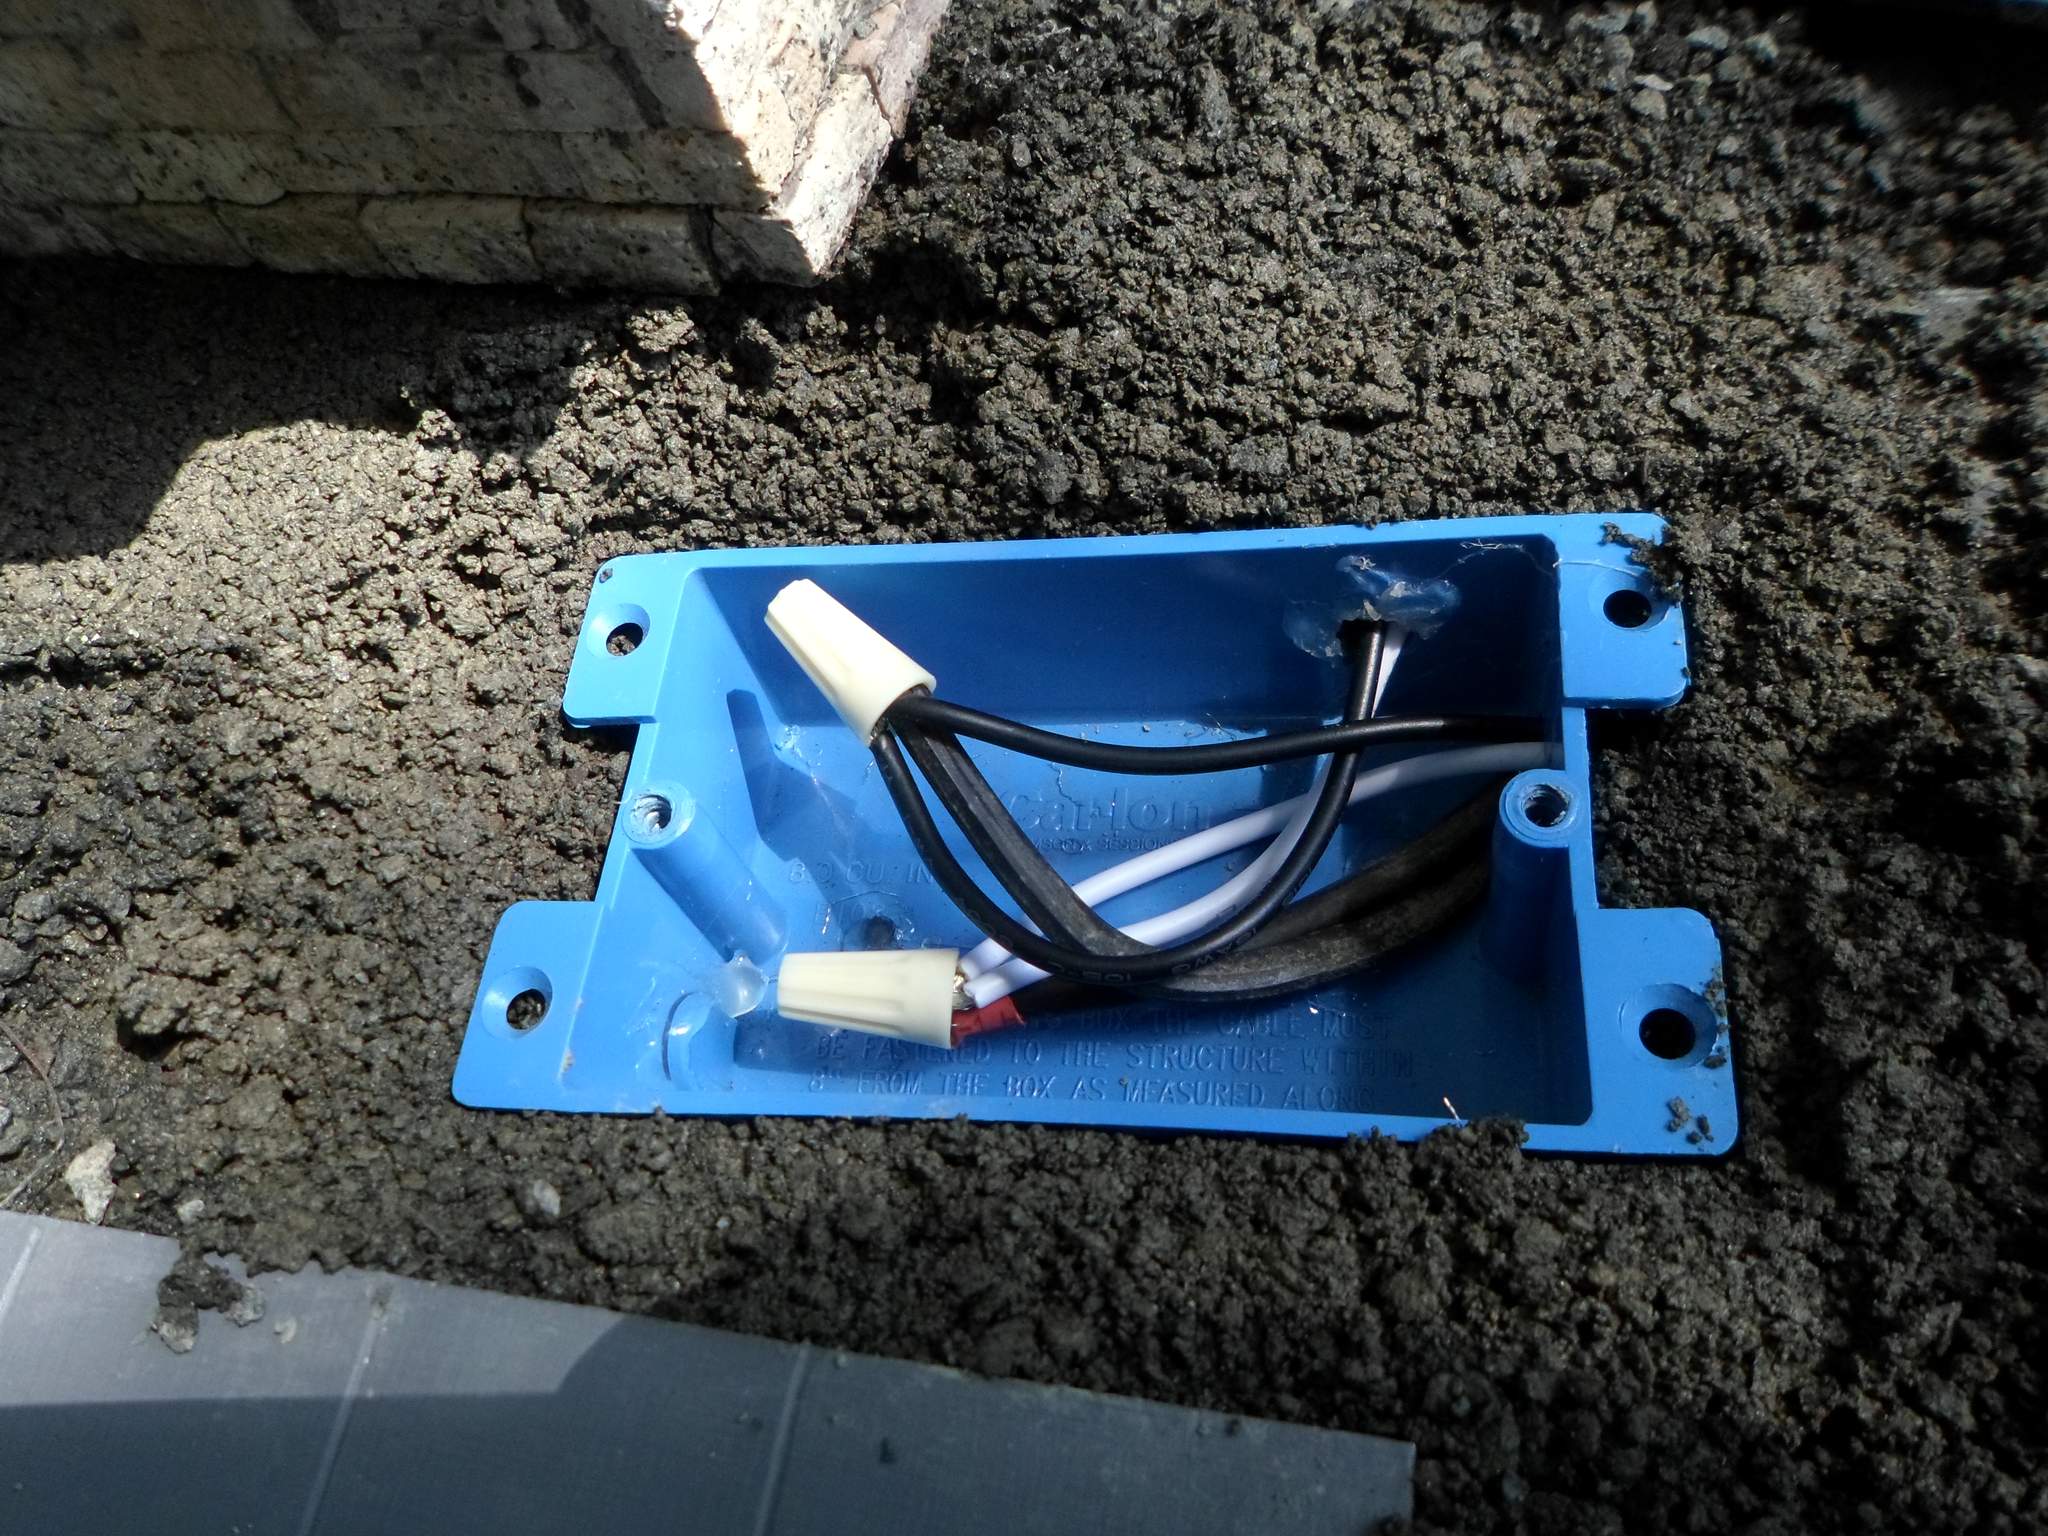
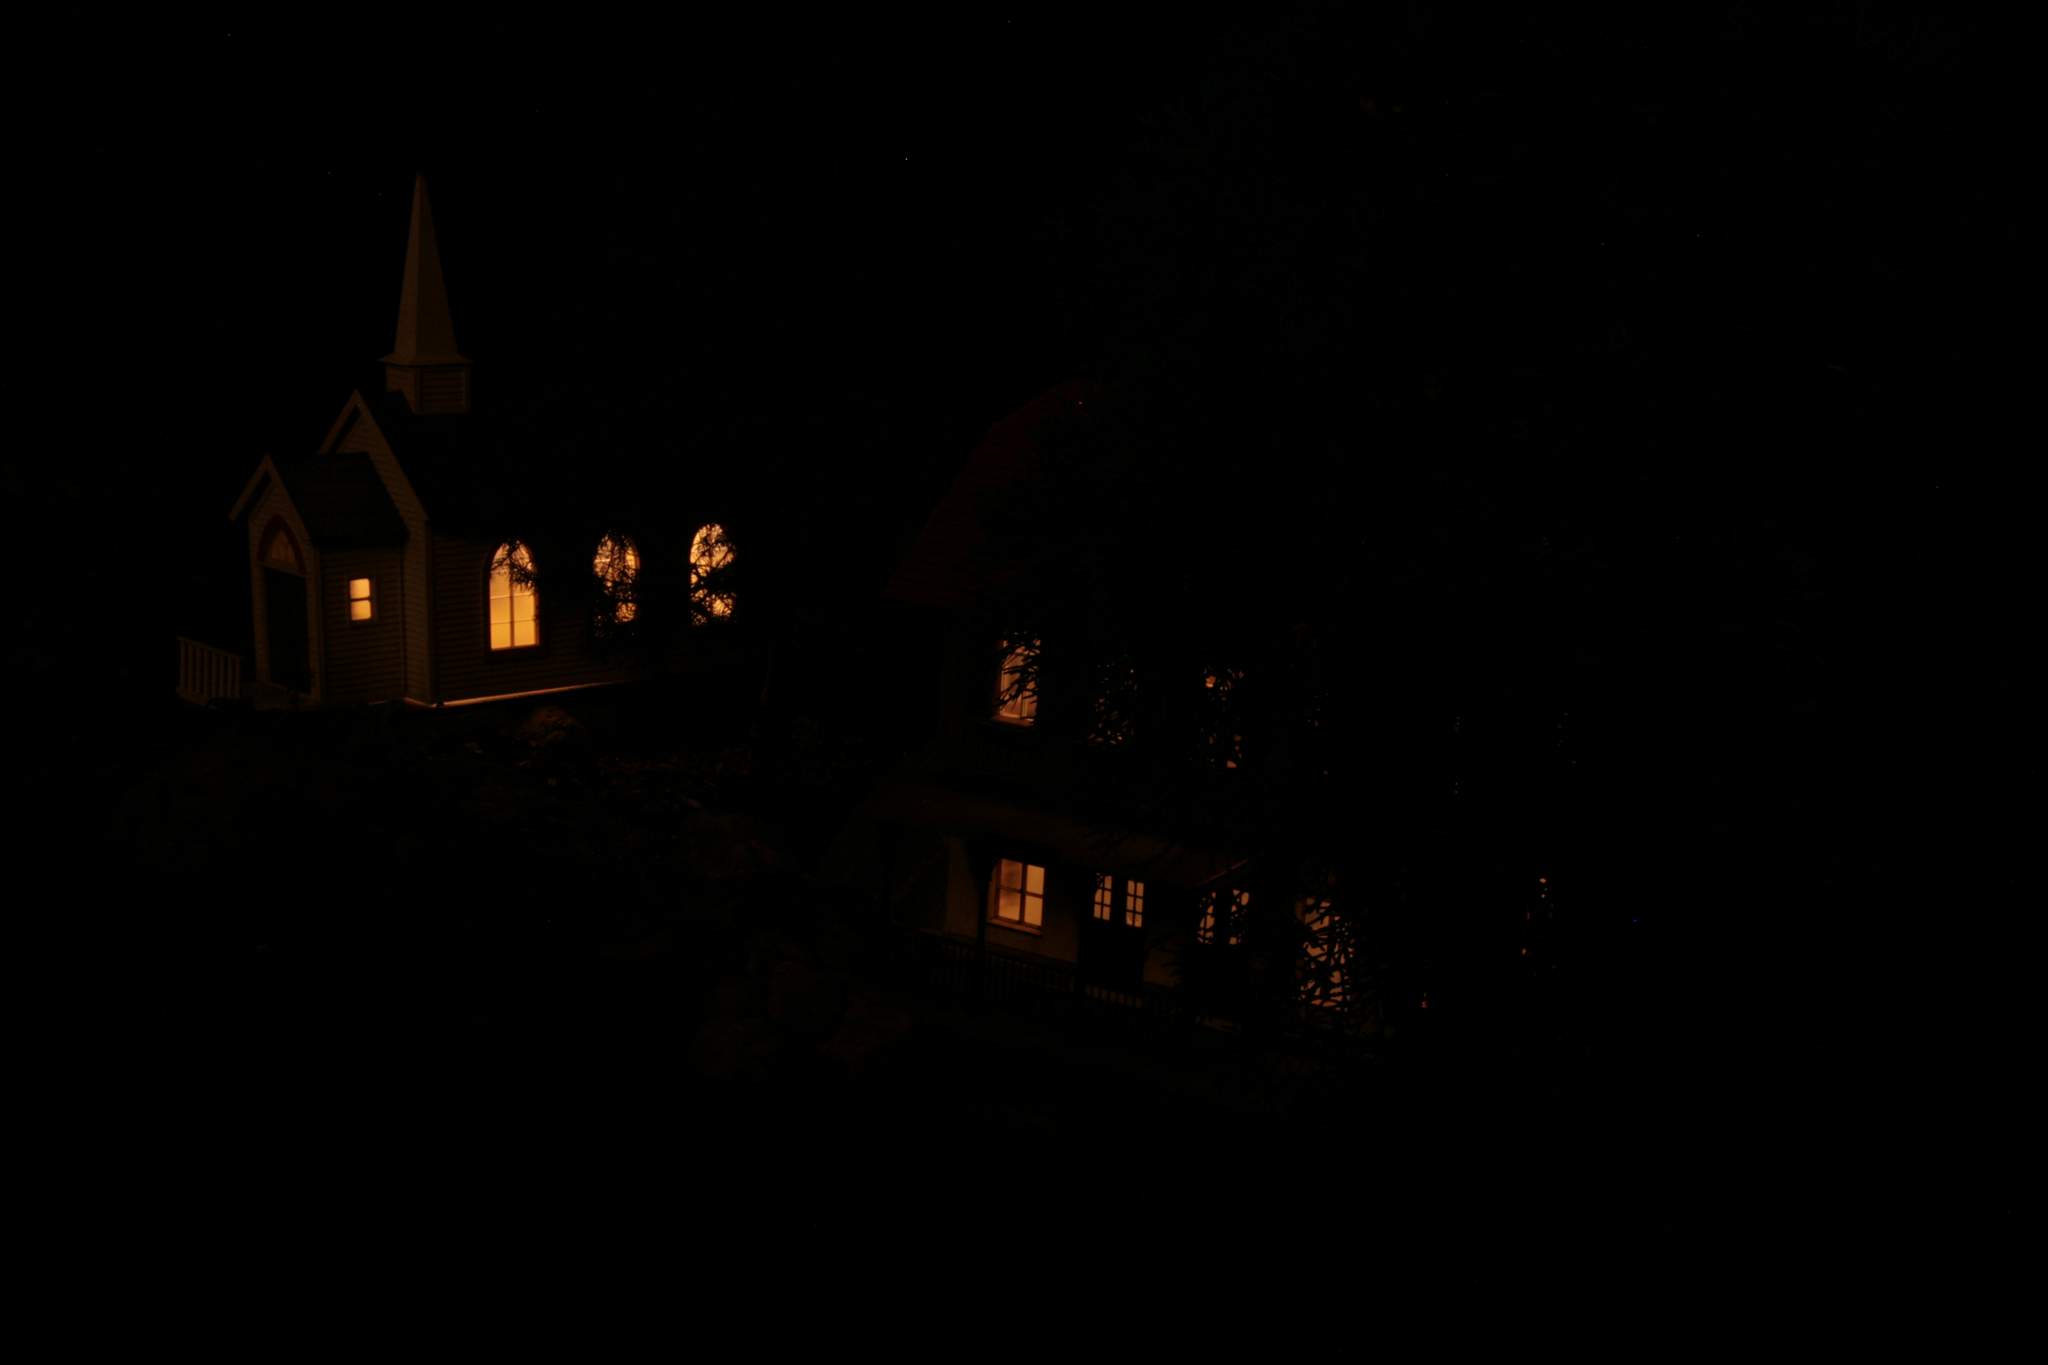
This project has been in the ‘want to do’ file for a few years. I had a couple of old Pola buildings outdoors that were good candidates. They needed cleaning and fixing up after spending over two years outside. This was the perfect opportunity to experiment with lighting with a $0 investment project. I have a bunch of sign LEDs that were salvaged from old signs. Holy carp; can you believe scrap signs have LEDs already? They do . They don’t take much 12V power to run and I have a variety of supplies I can use. I was once wired for track power, so what better power buss than the track ? Old broken Hillman clamps were cleaned up utilized as connectors wherever power is needed using Malibu wire & lugs from removed block switches.

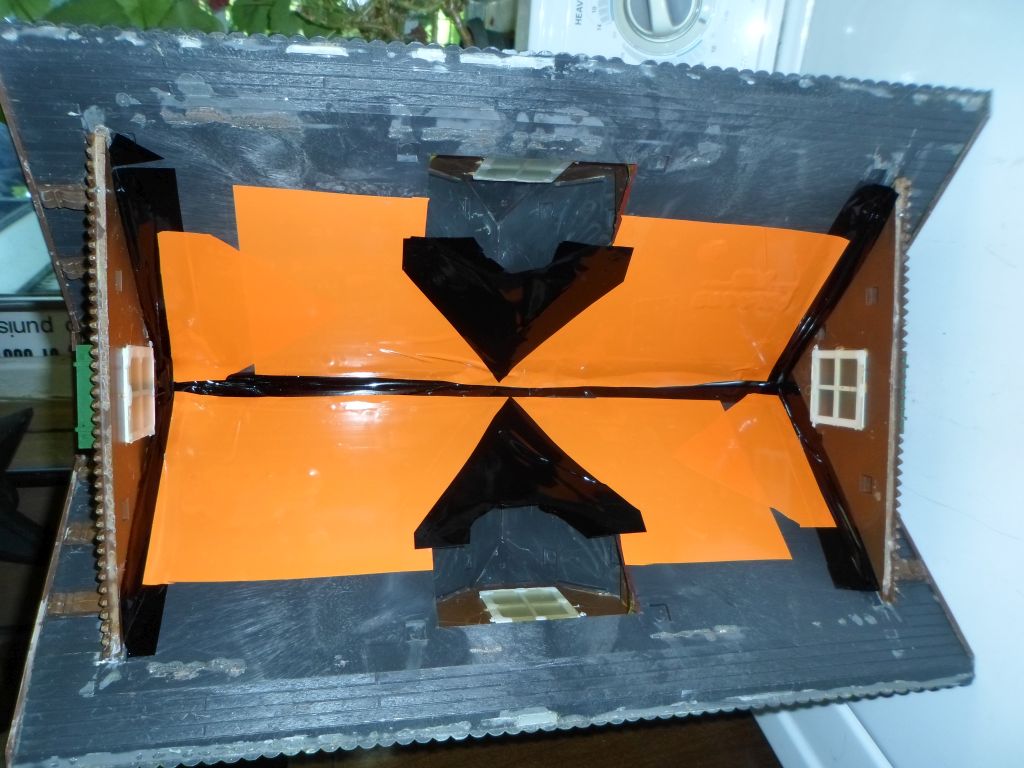
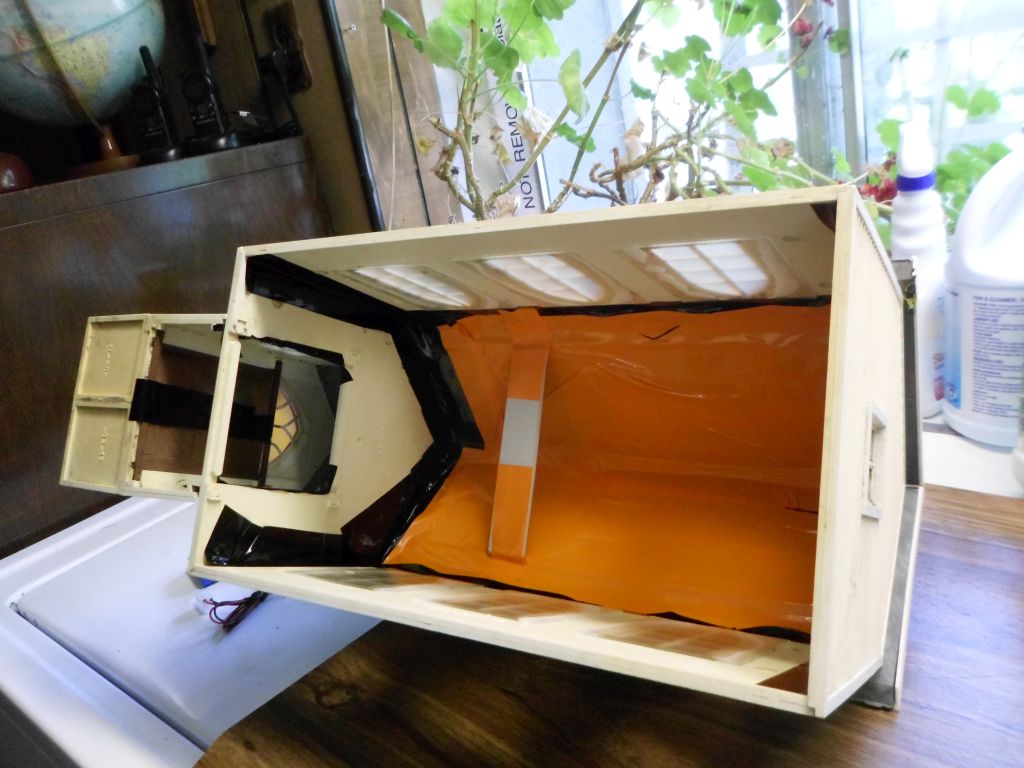
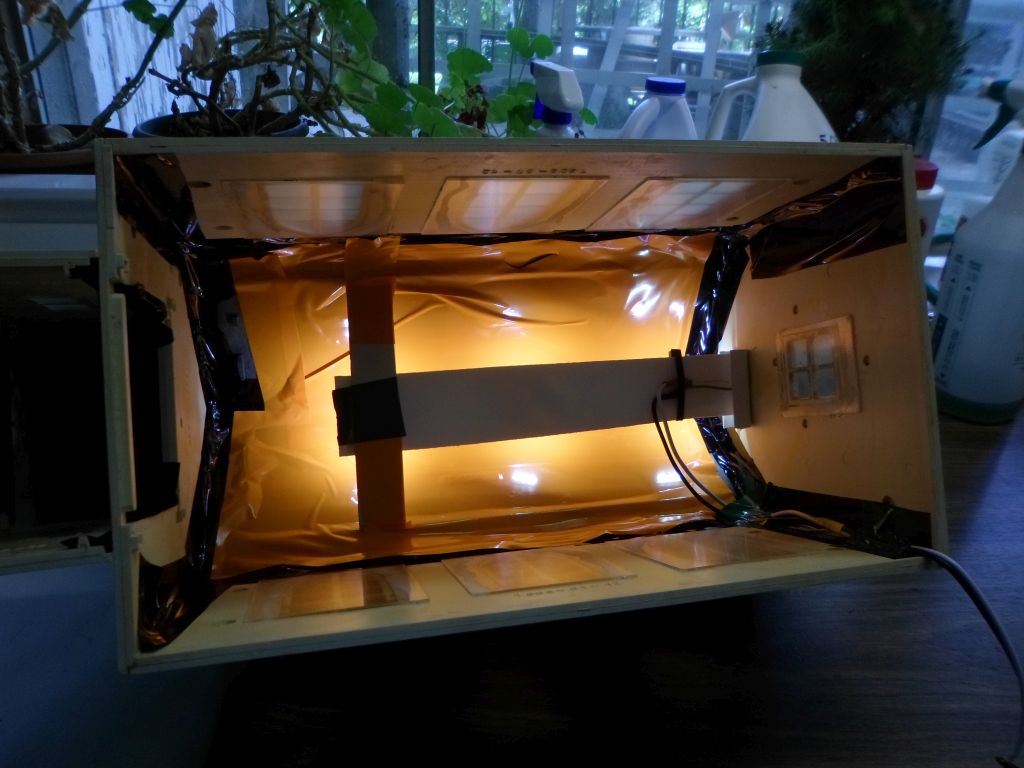
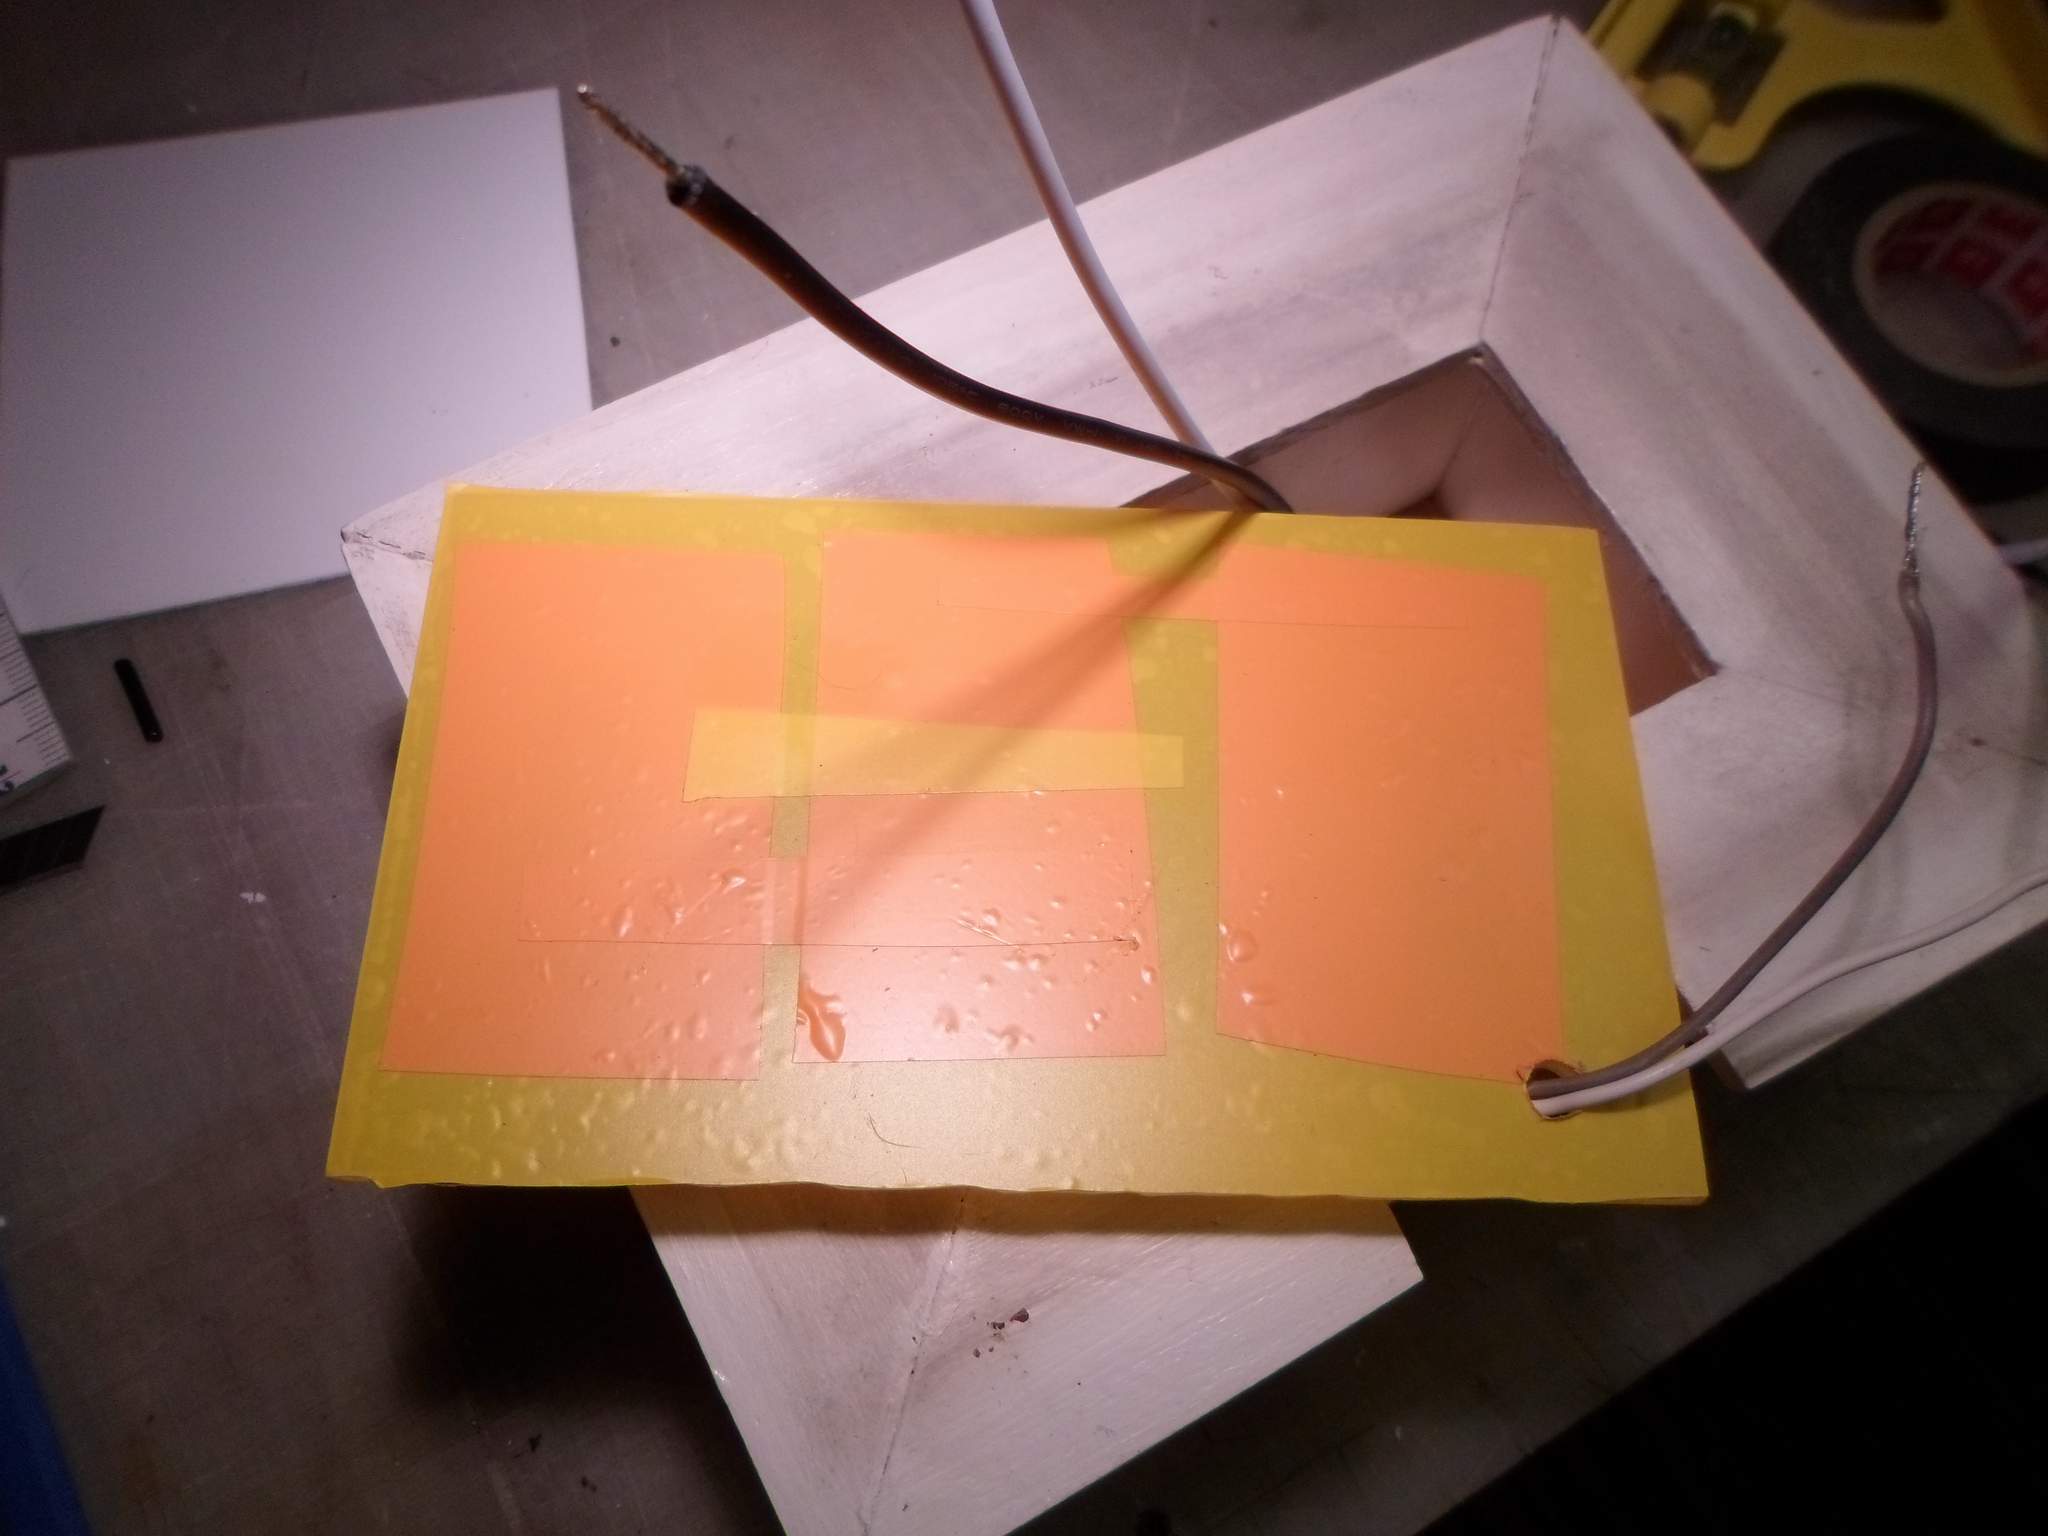
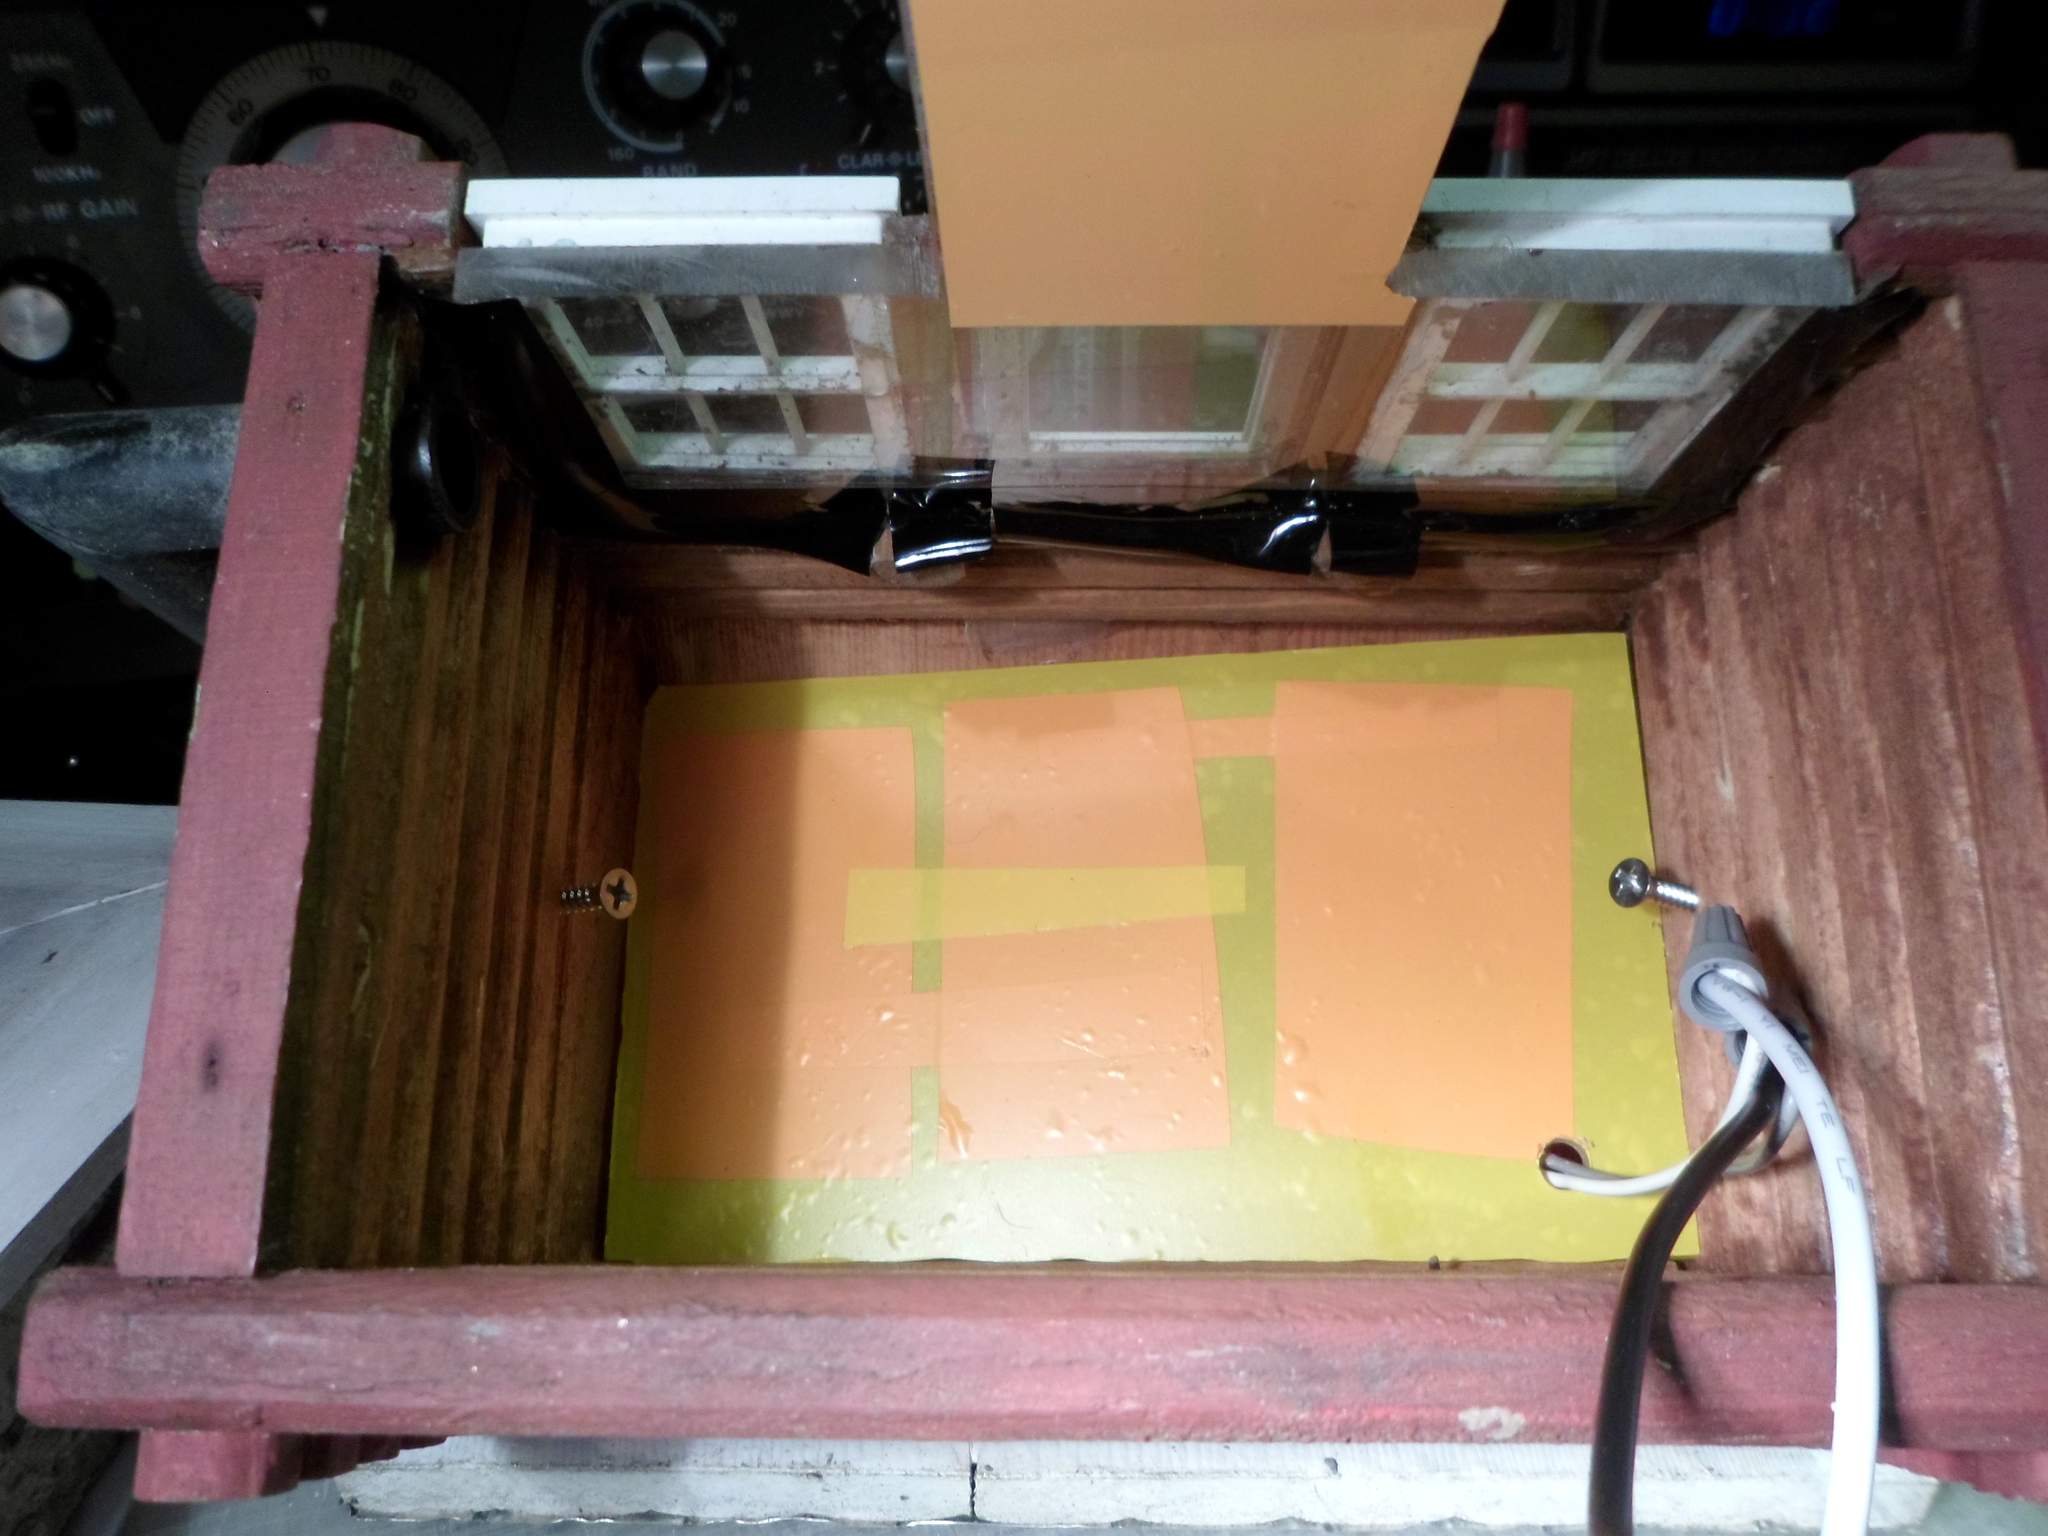
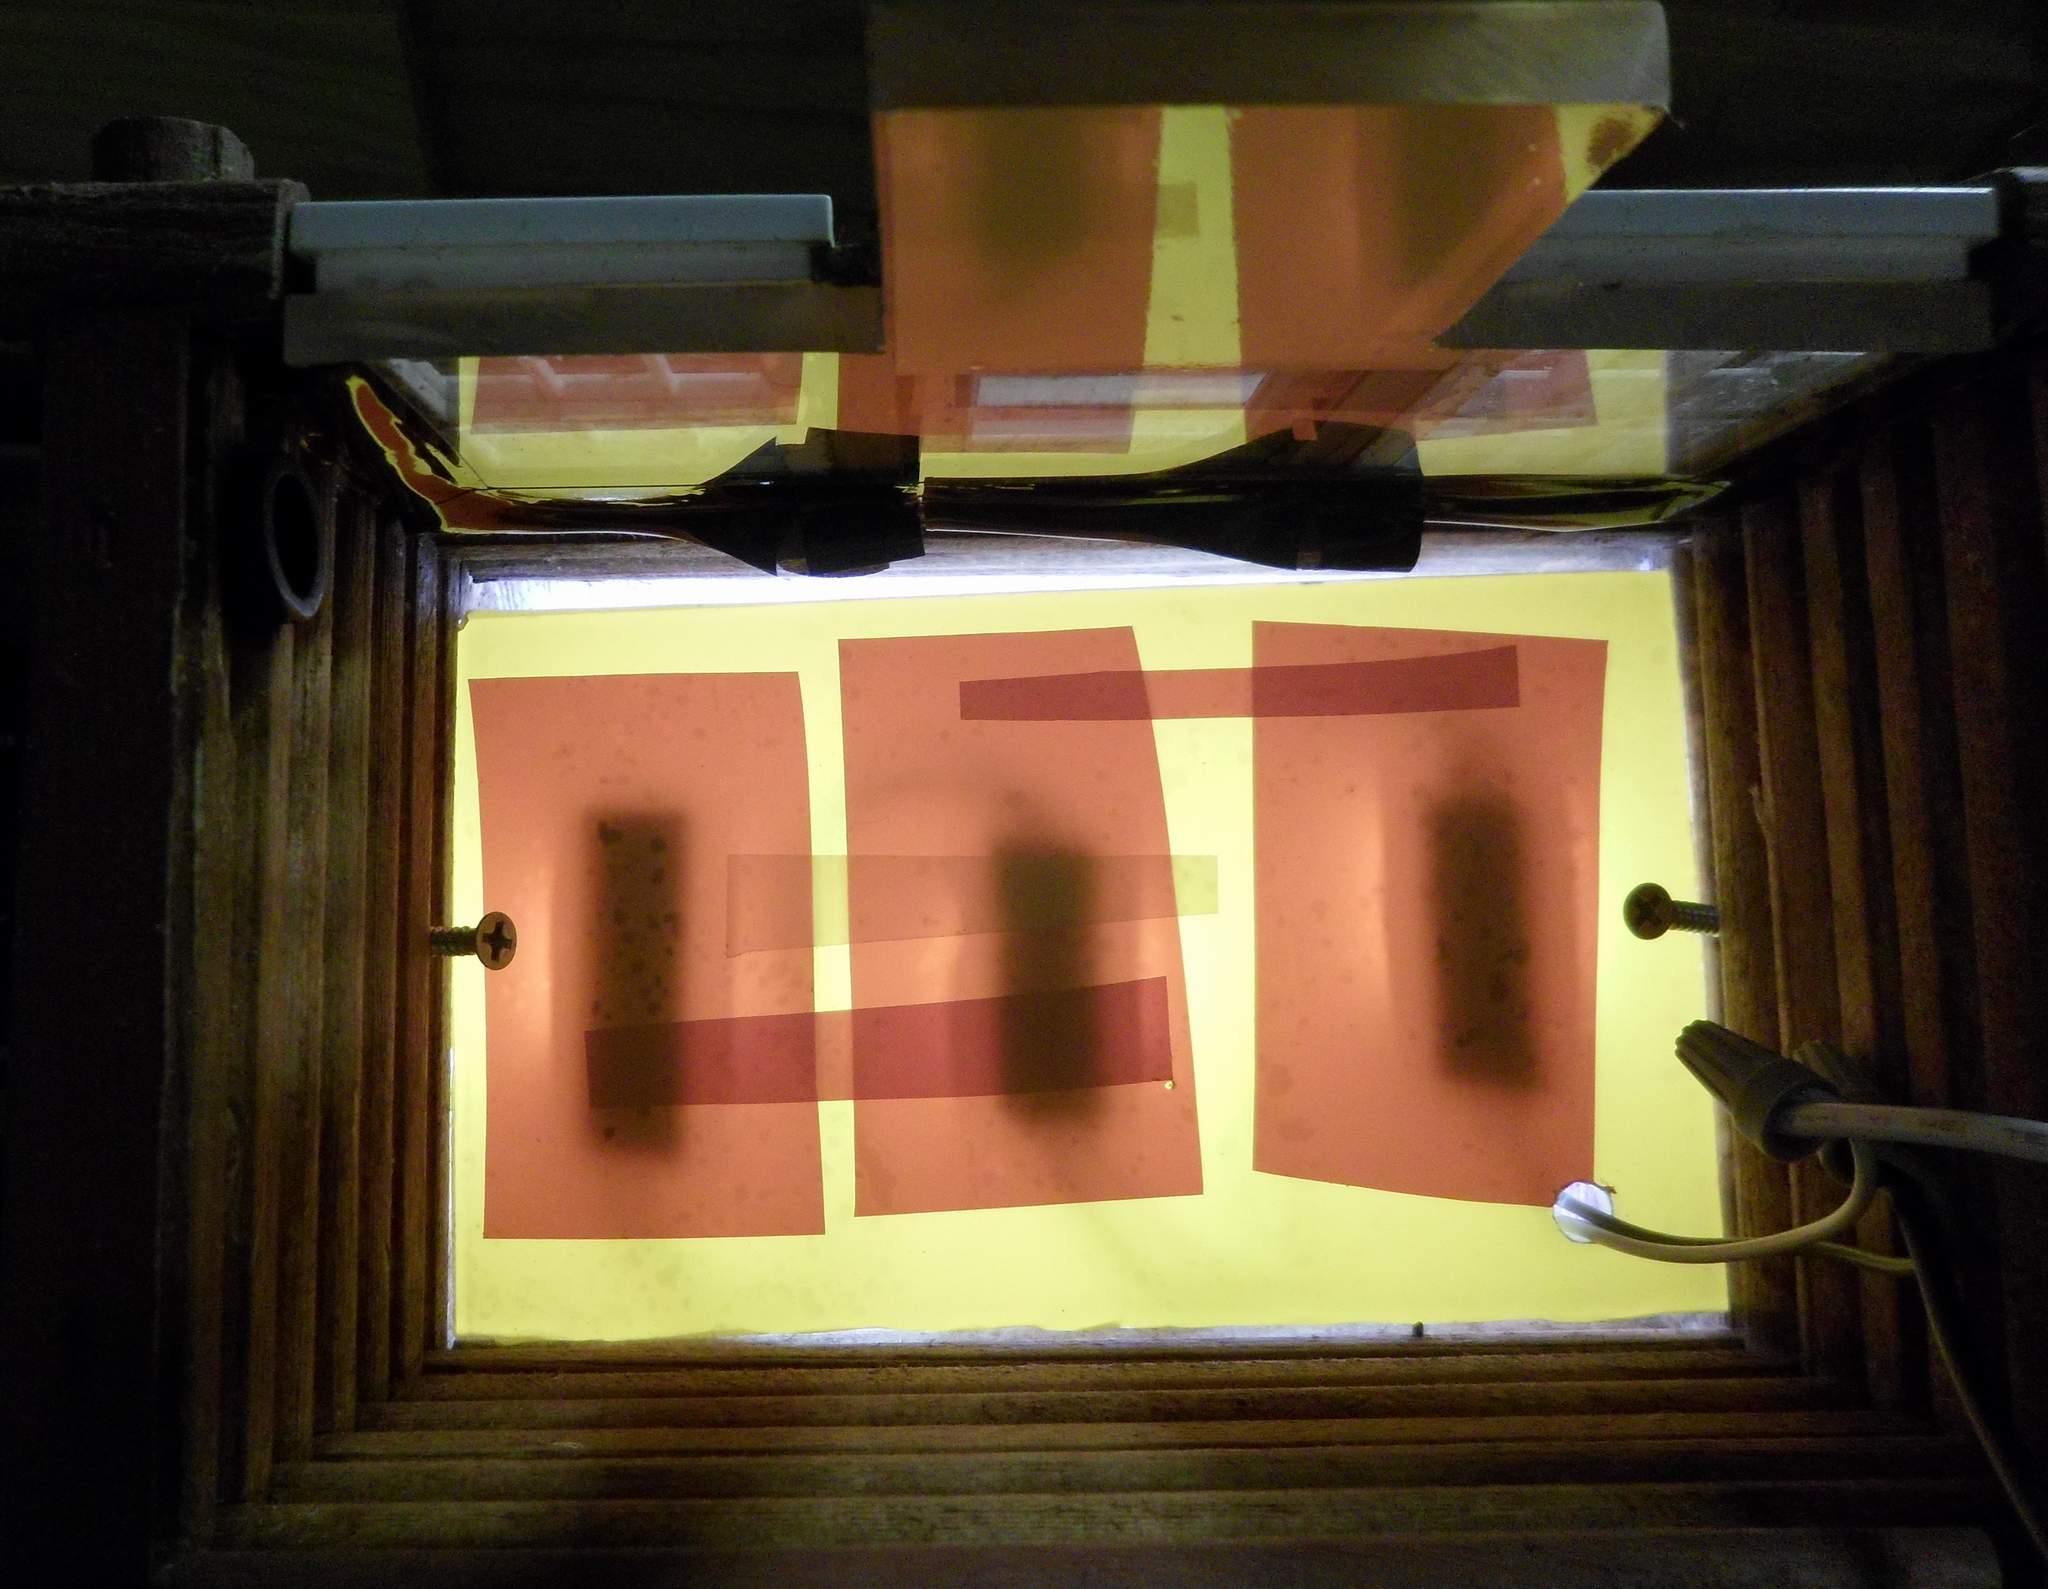
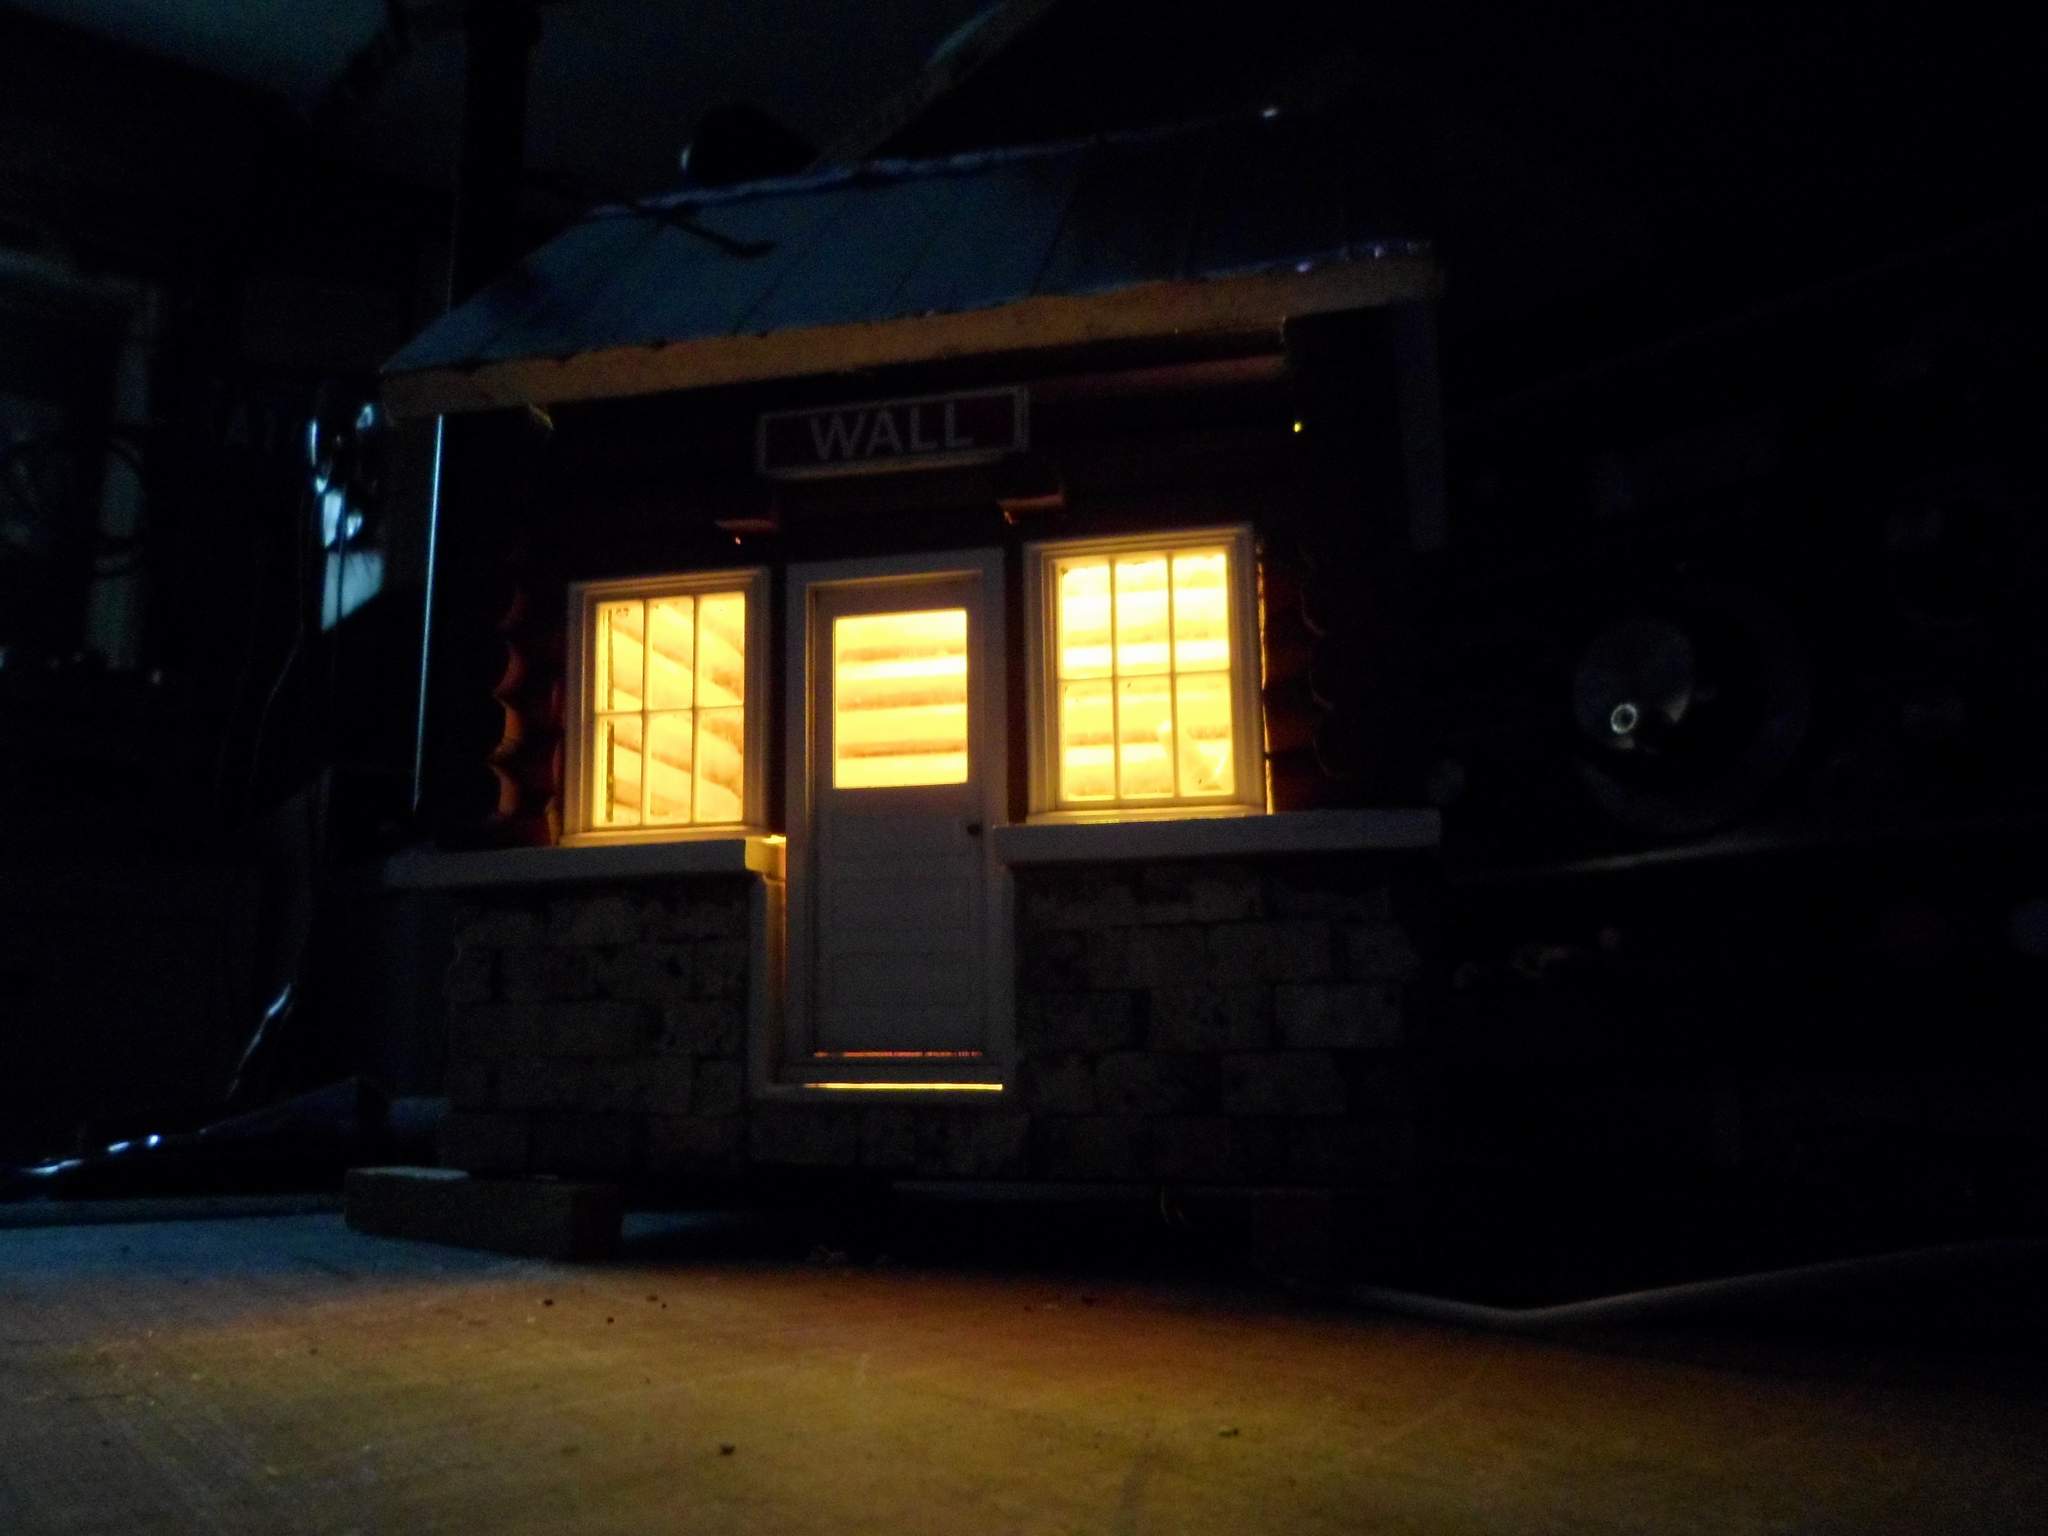
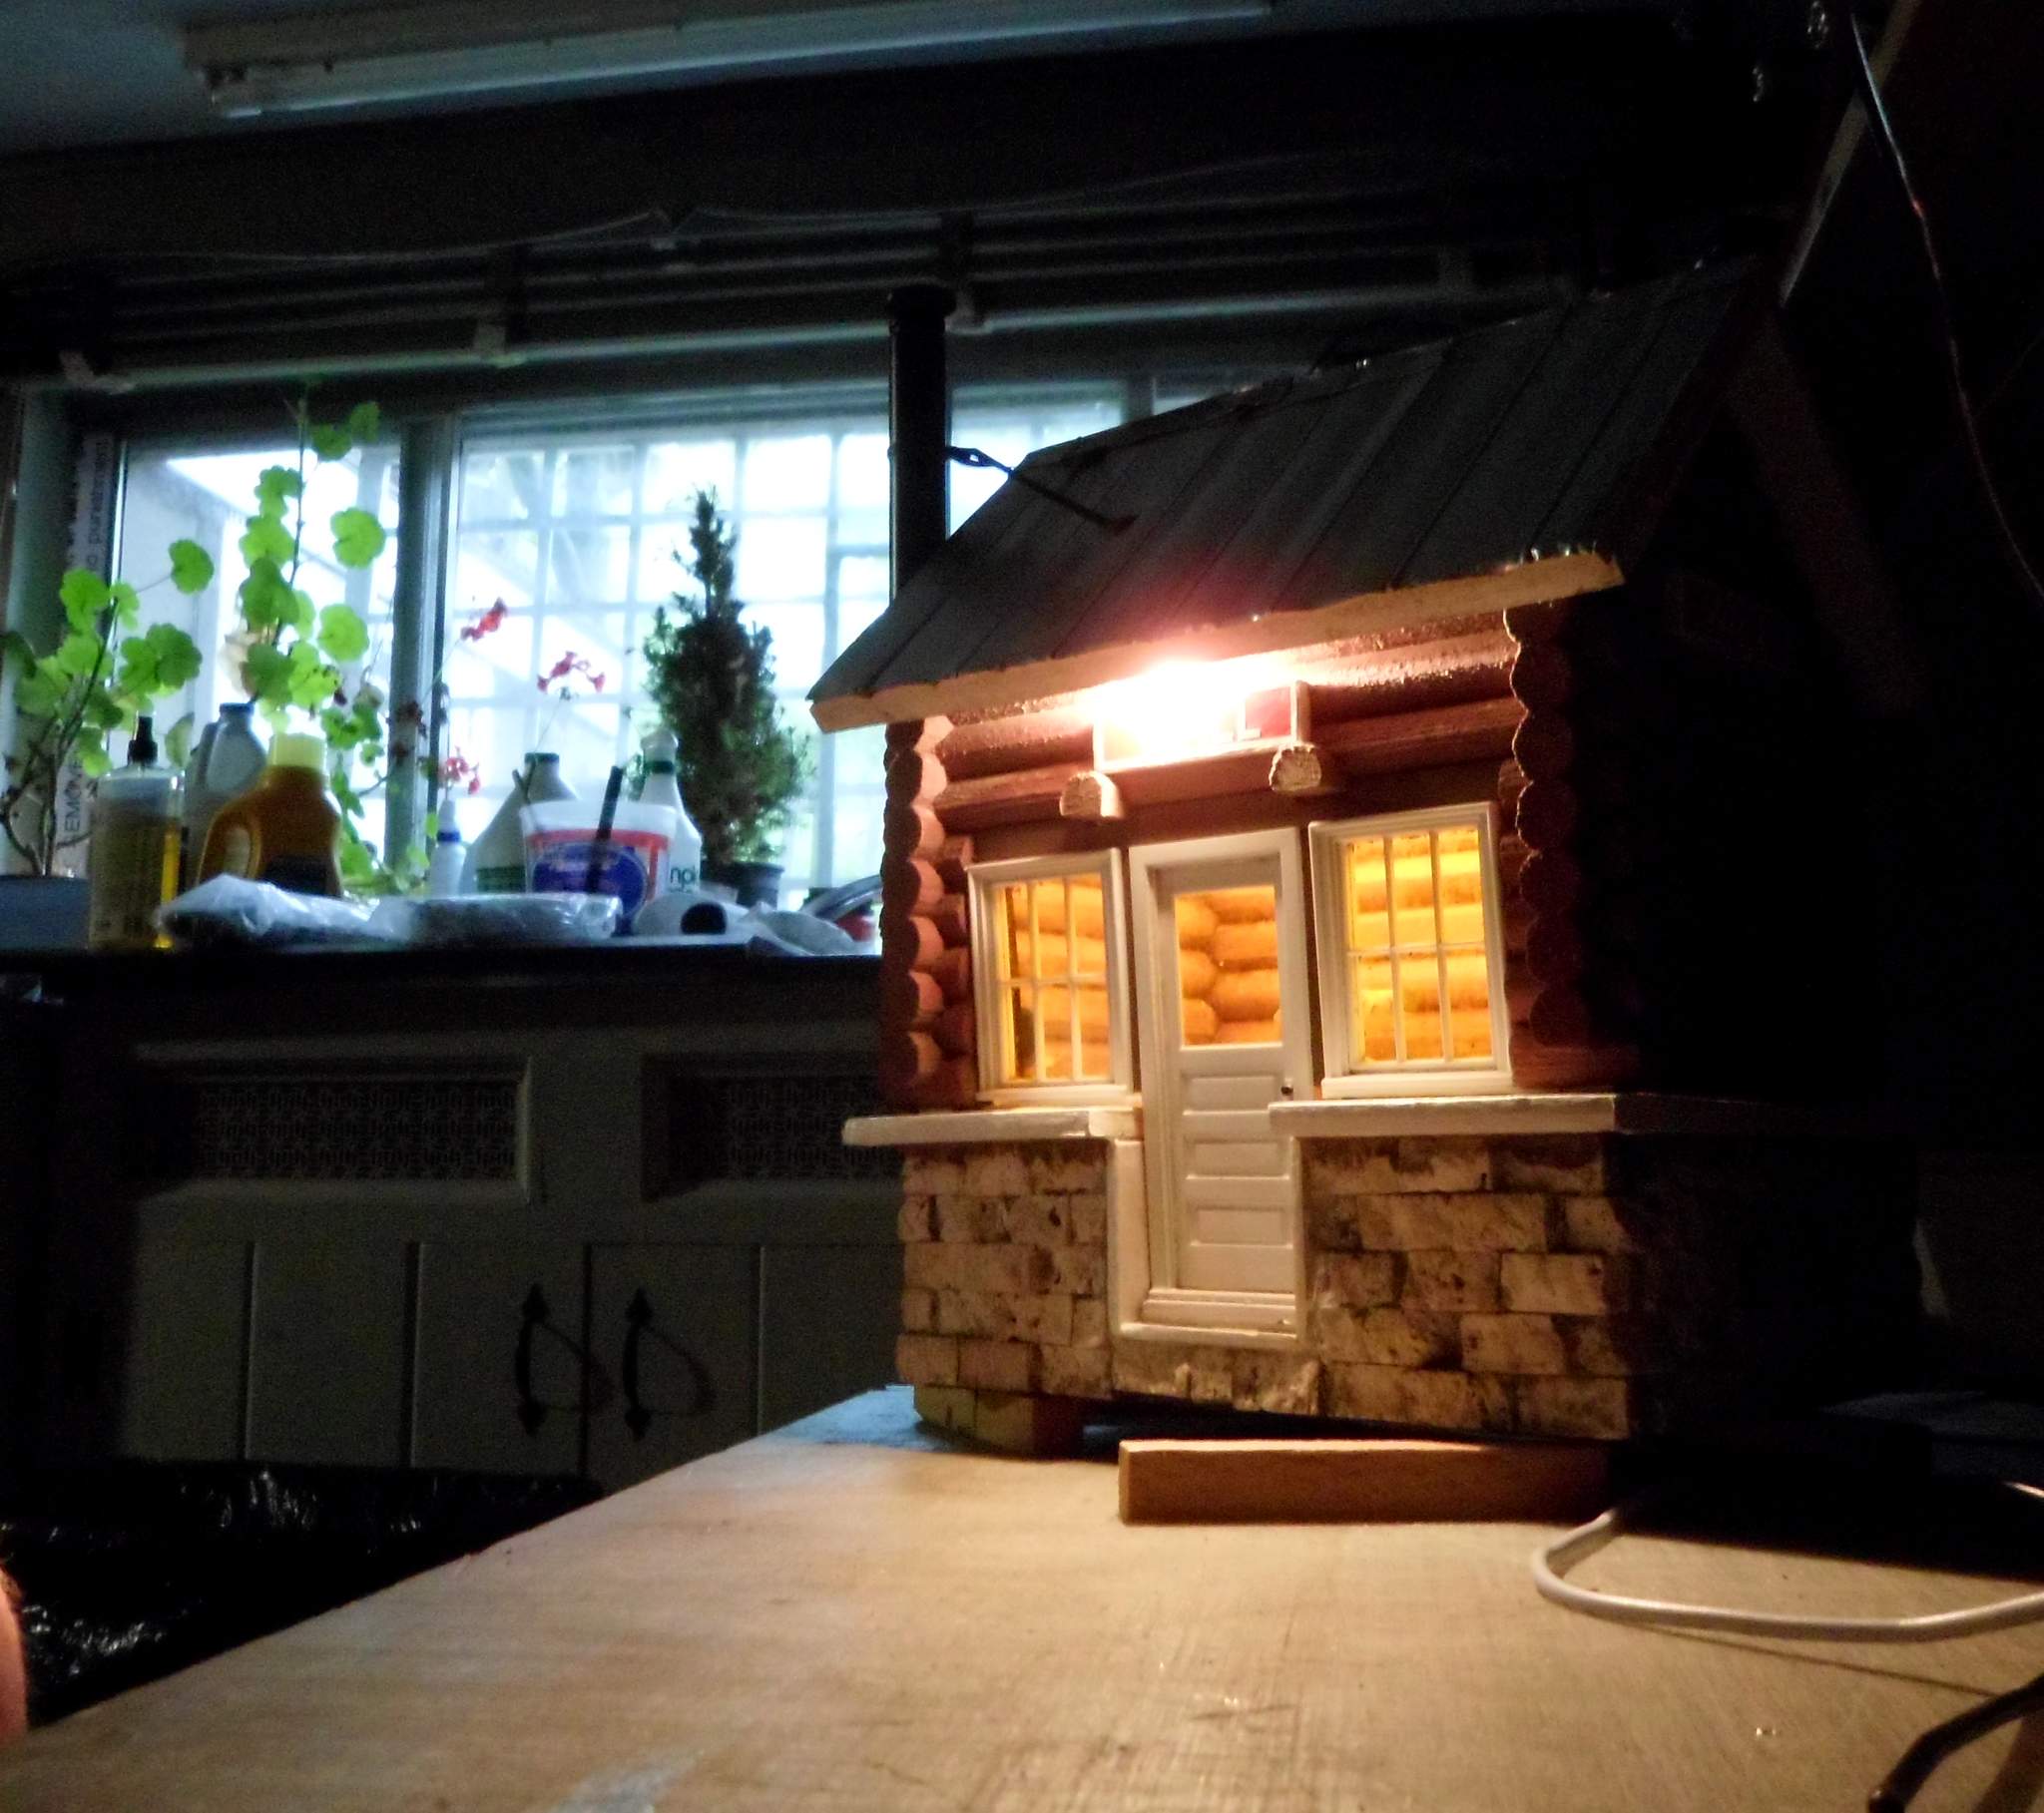
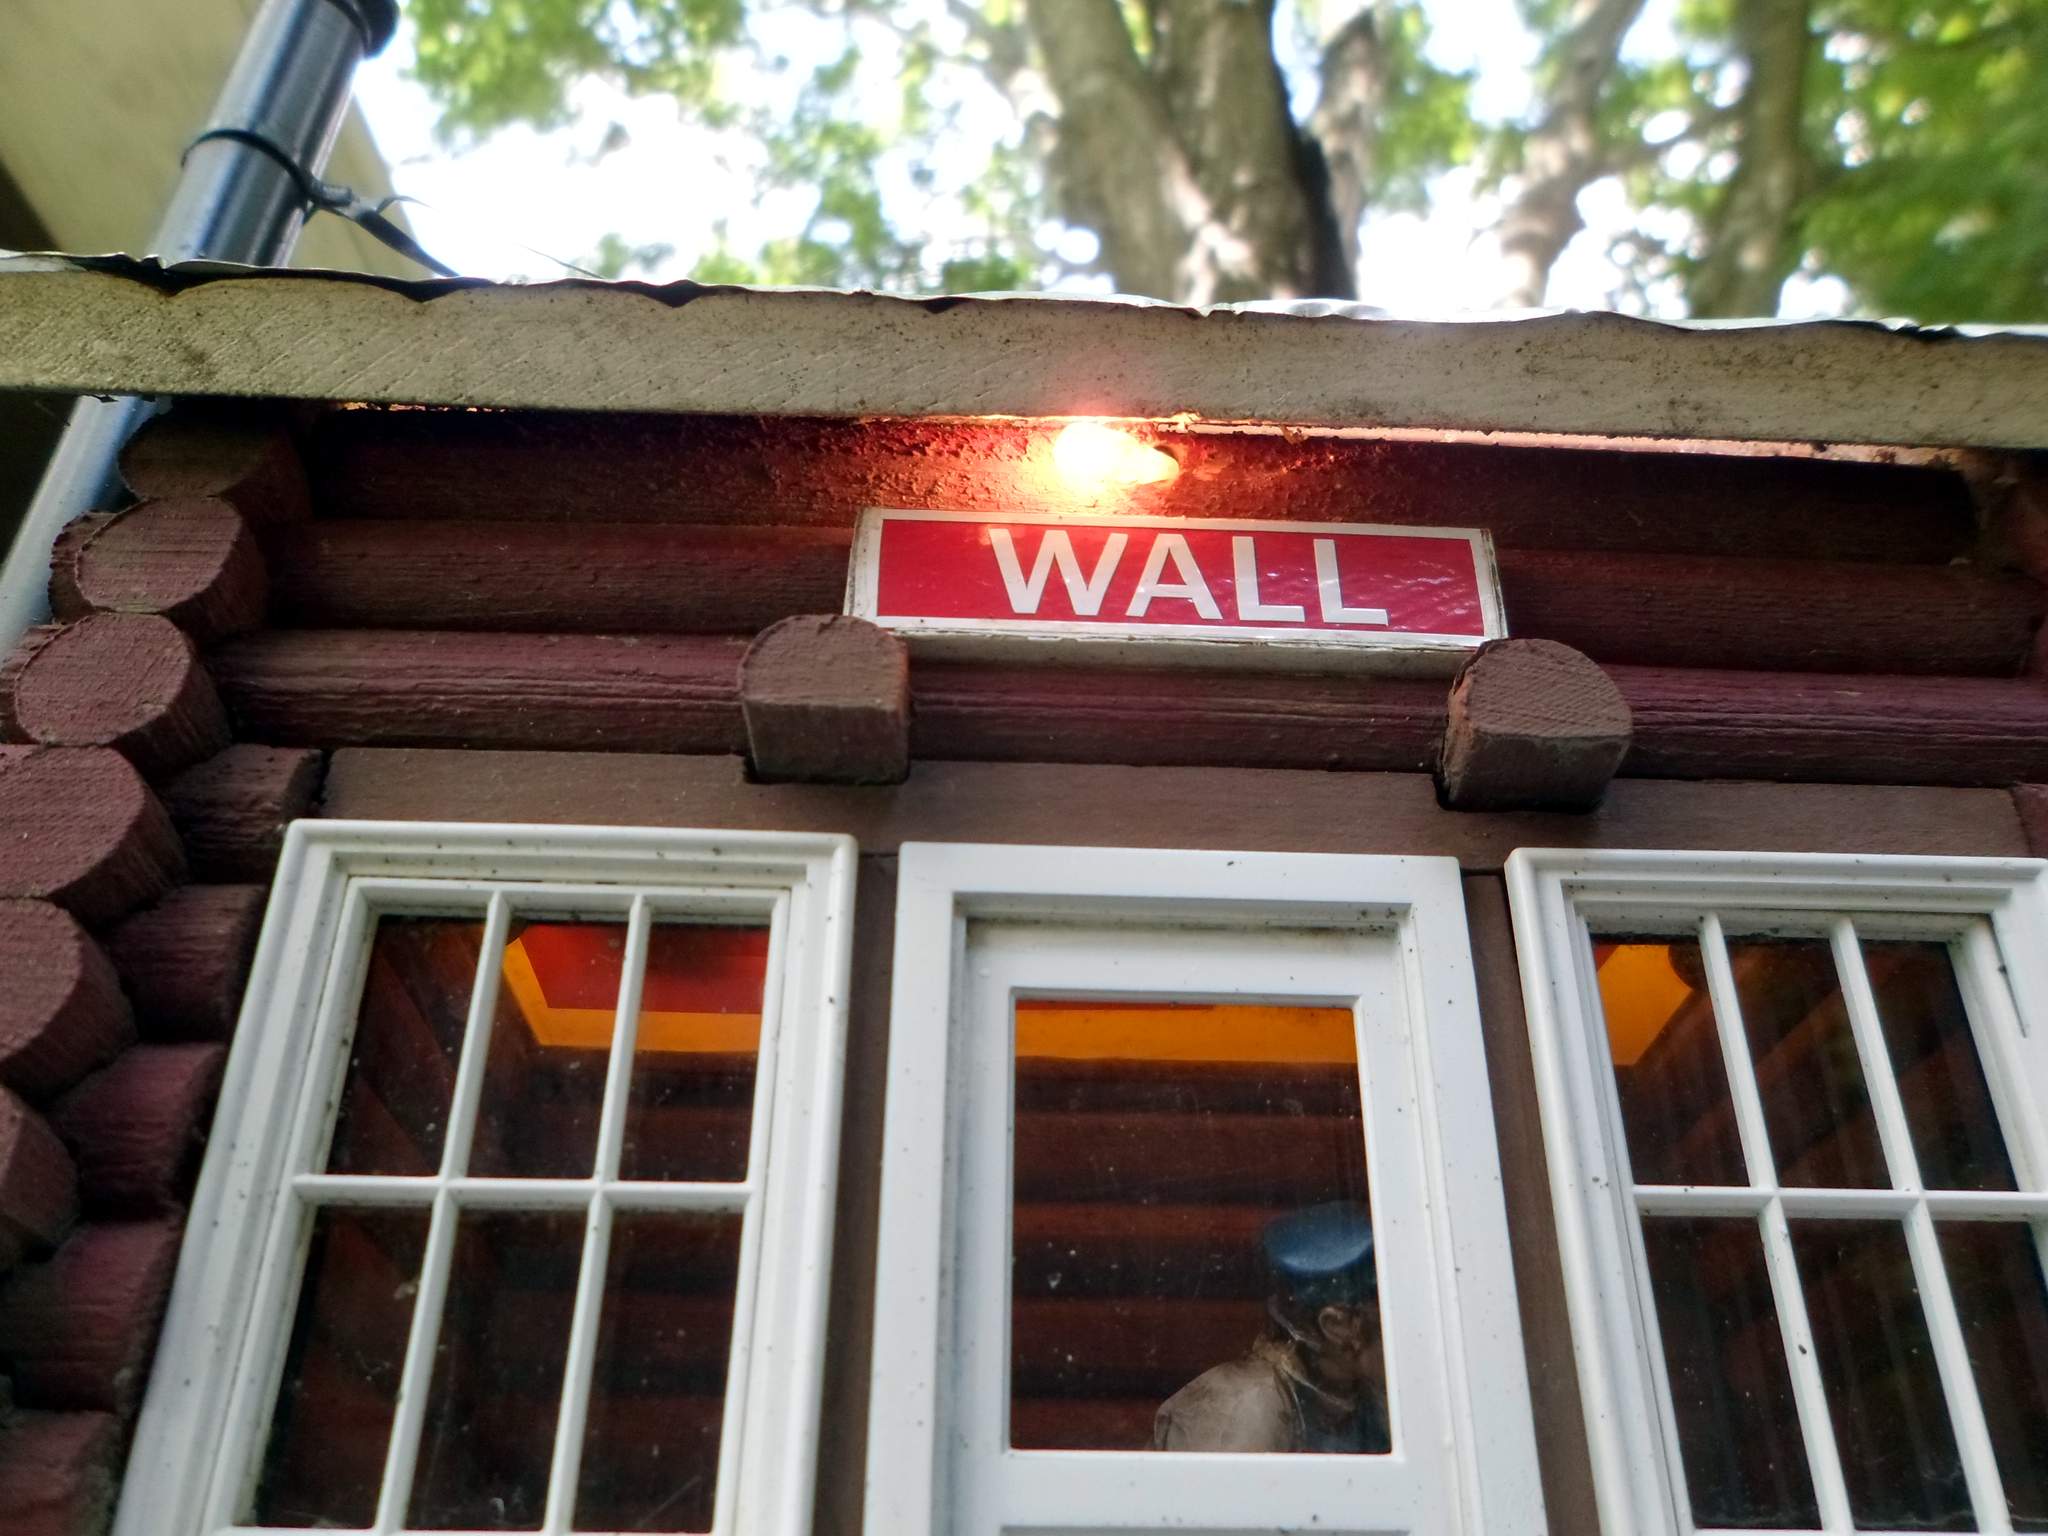
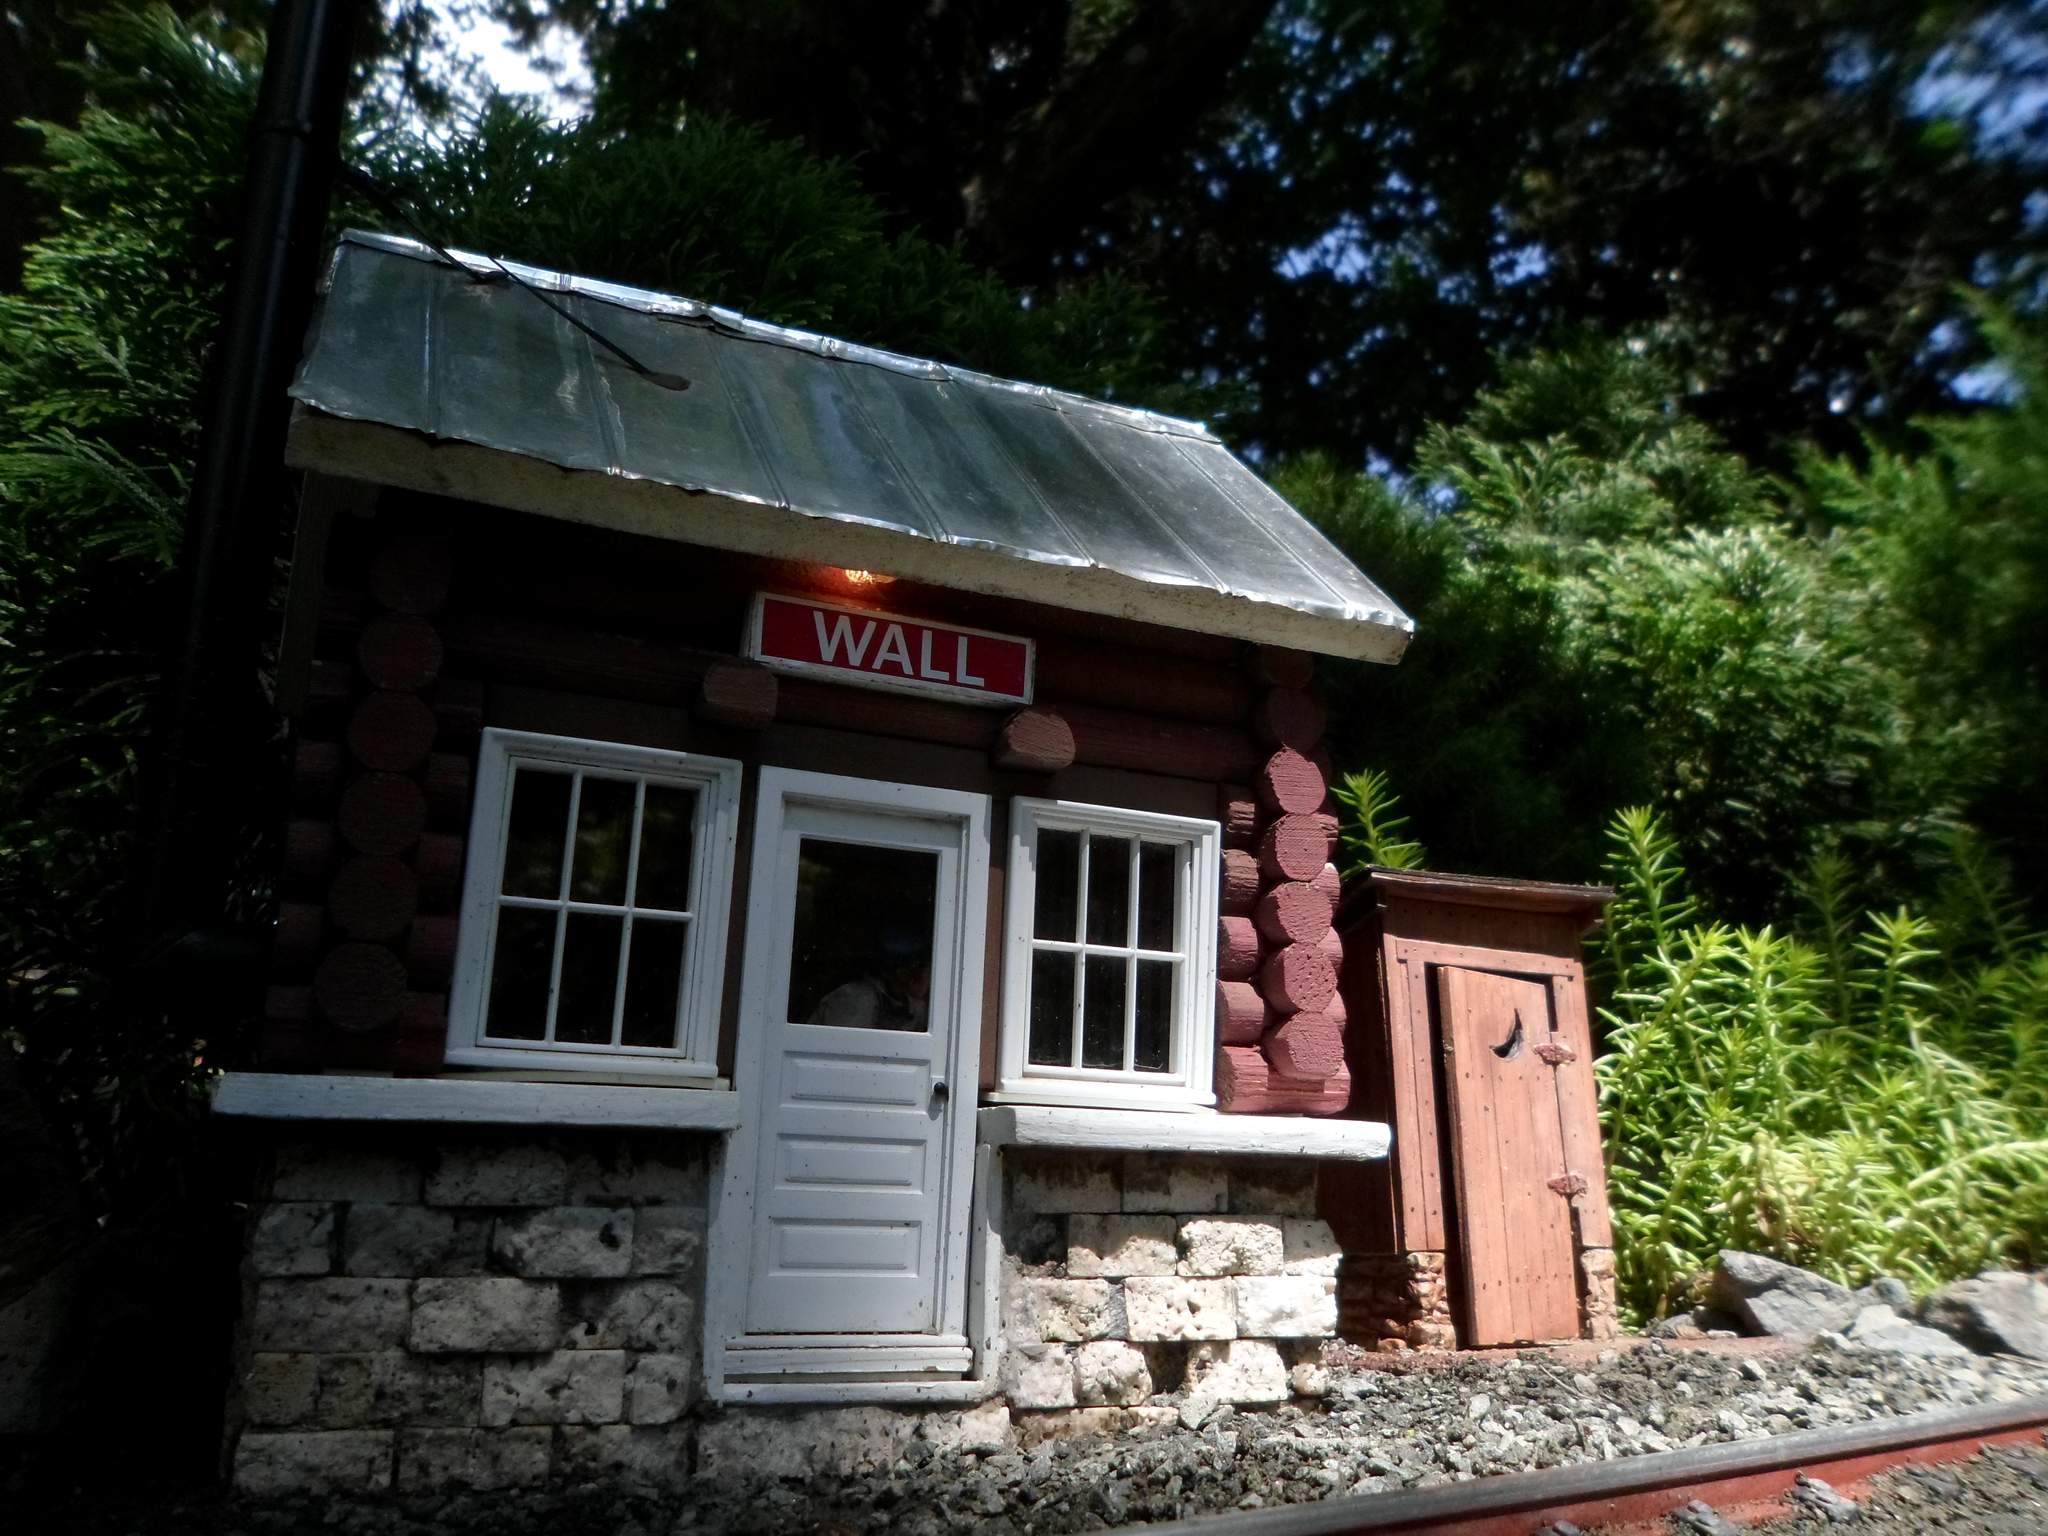
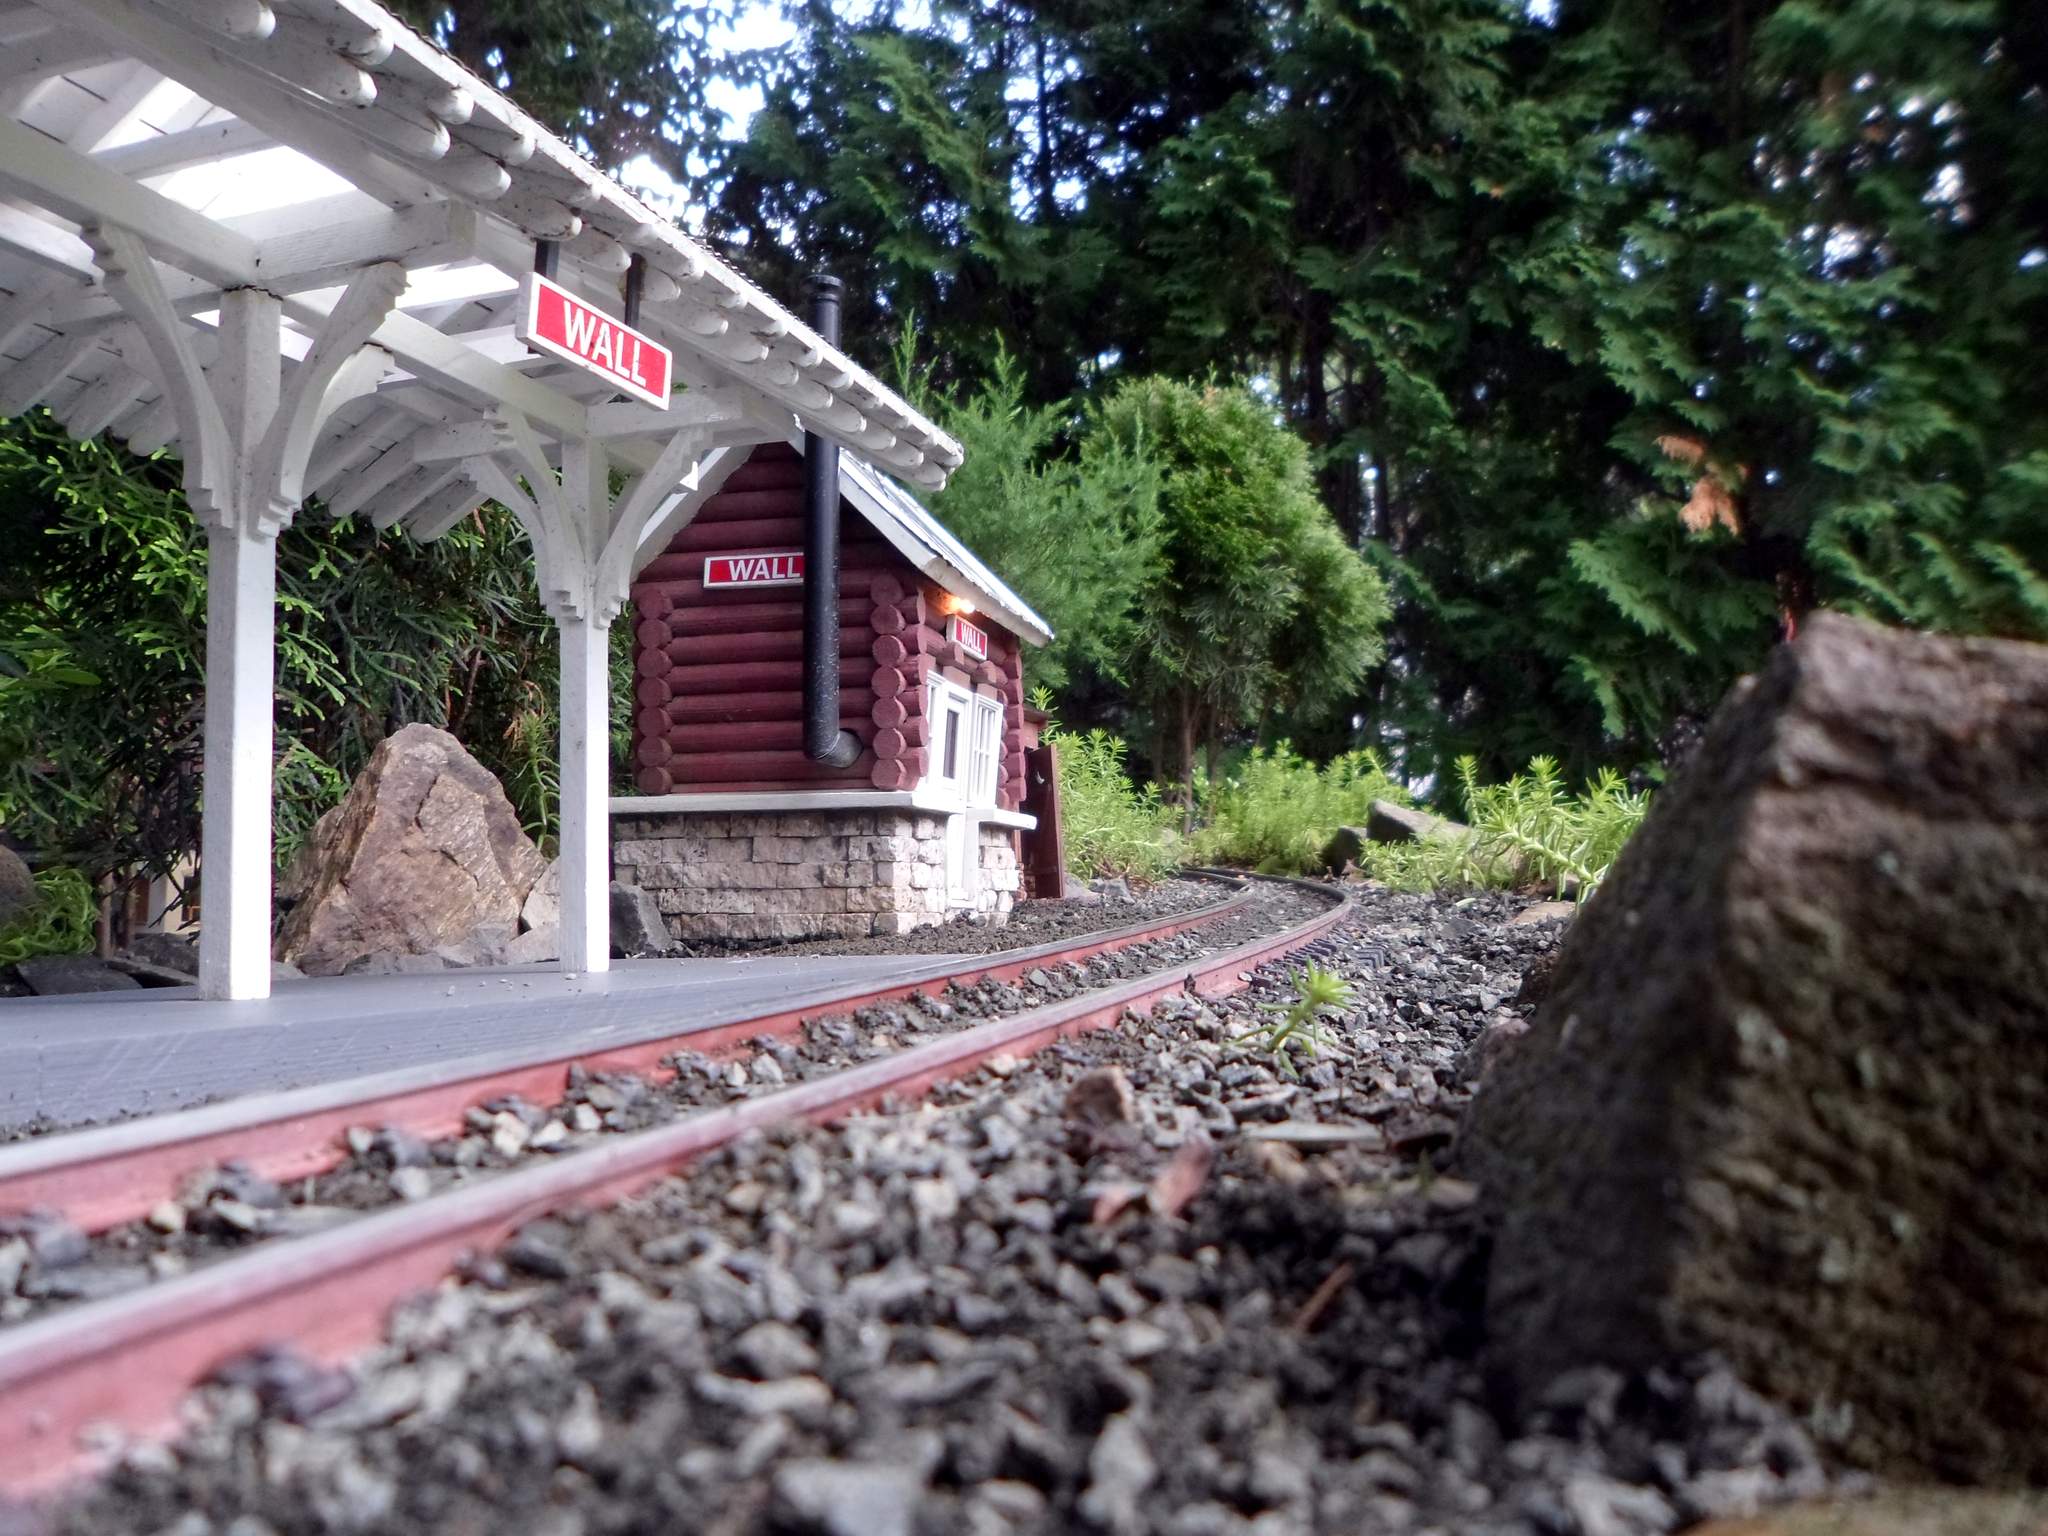
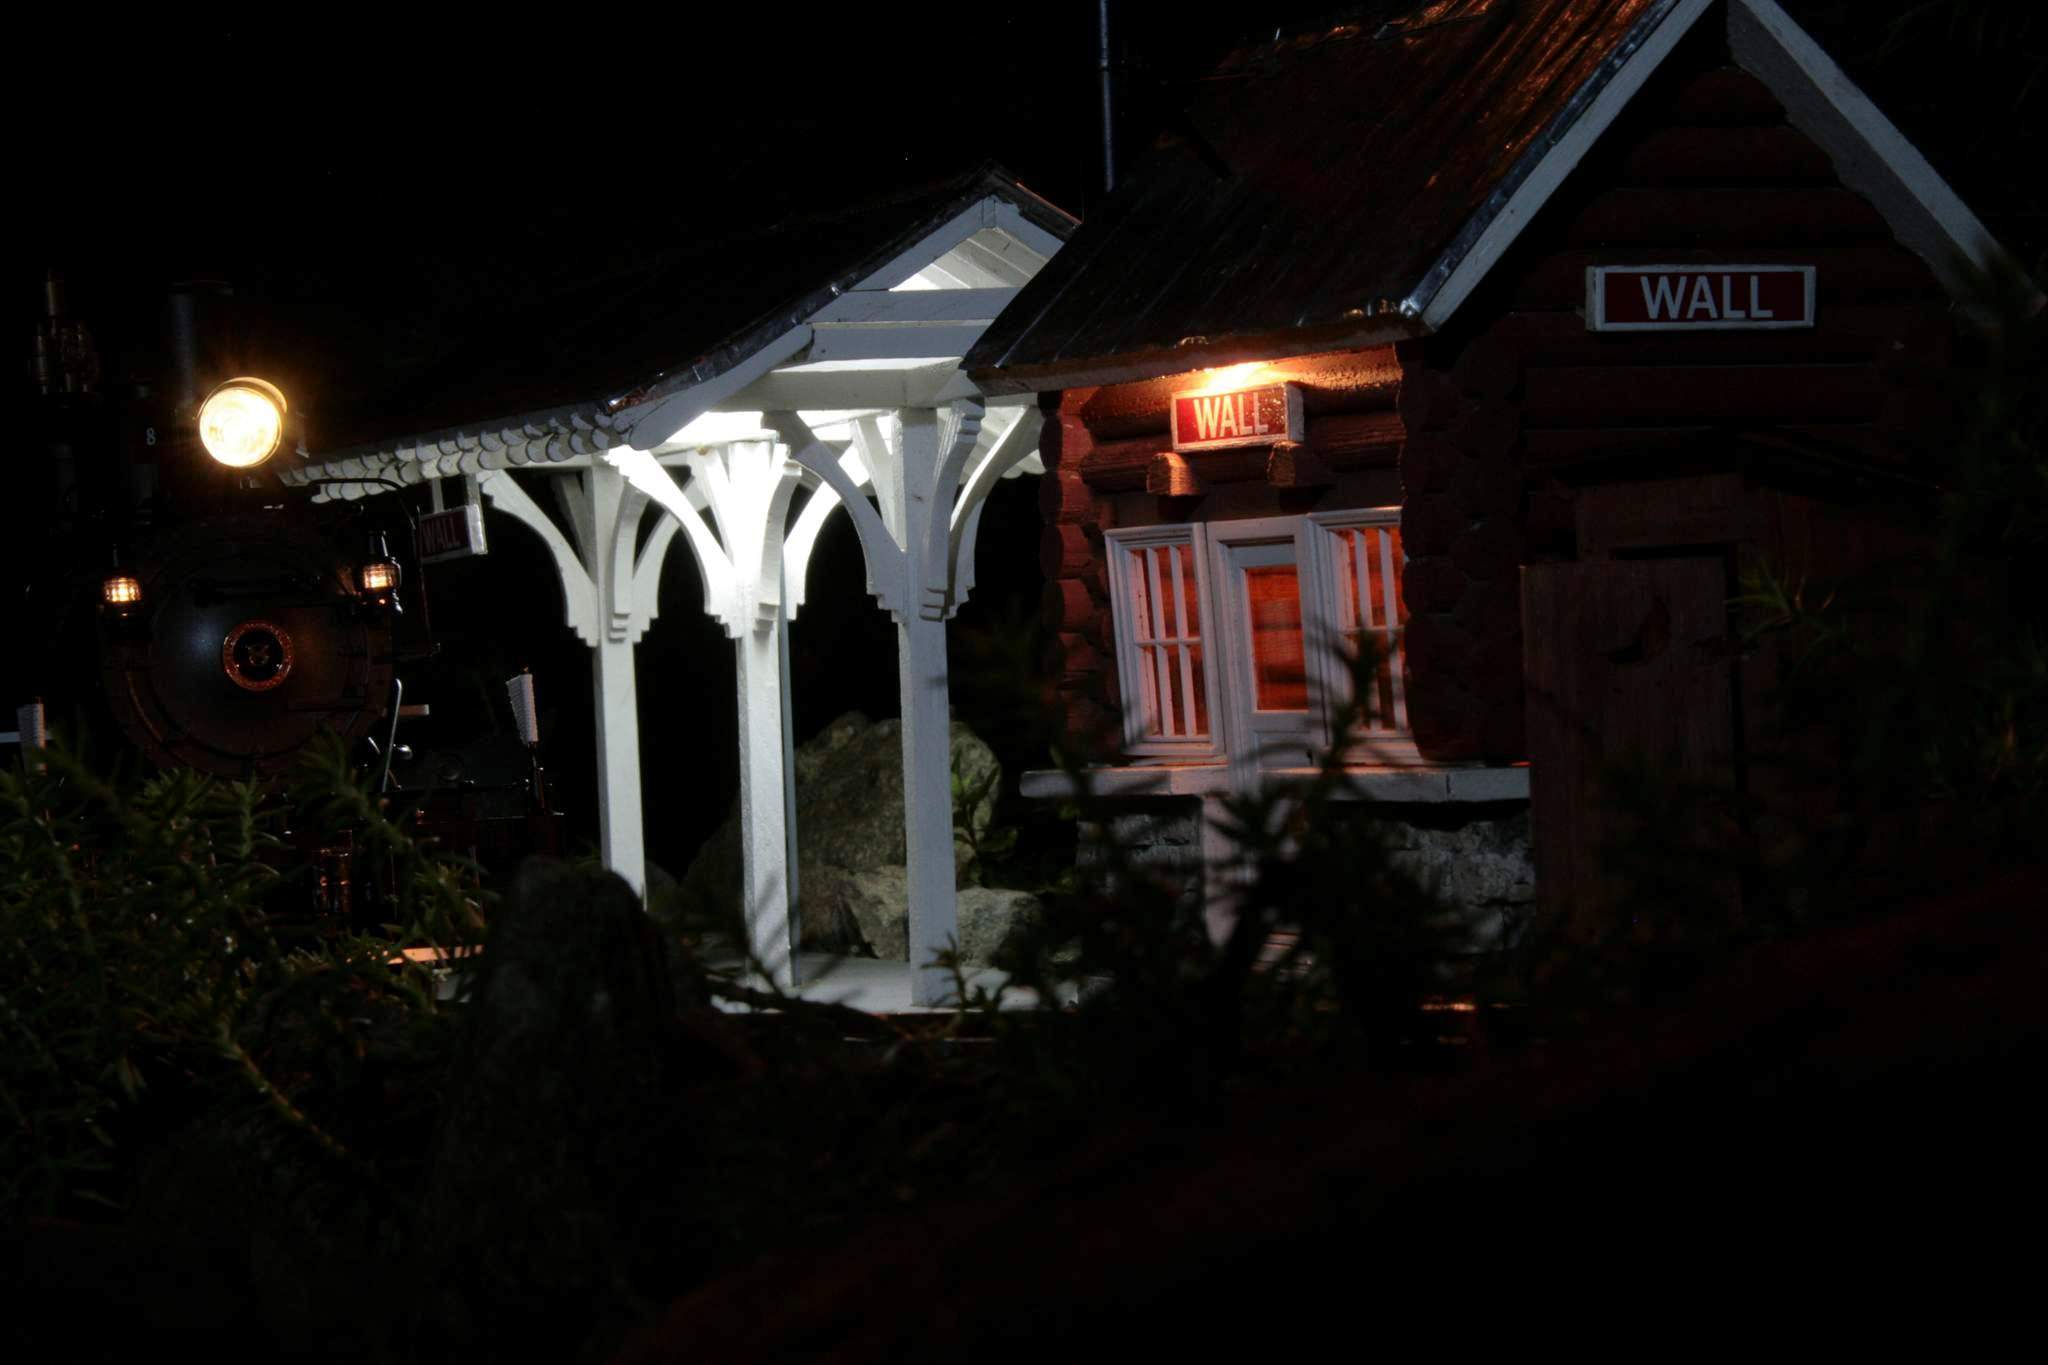
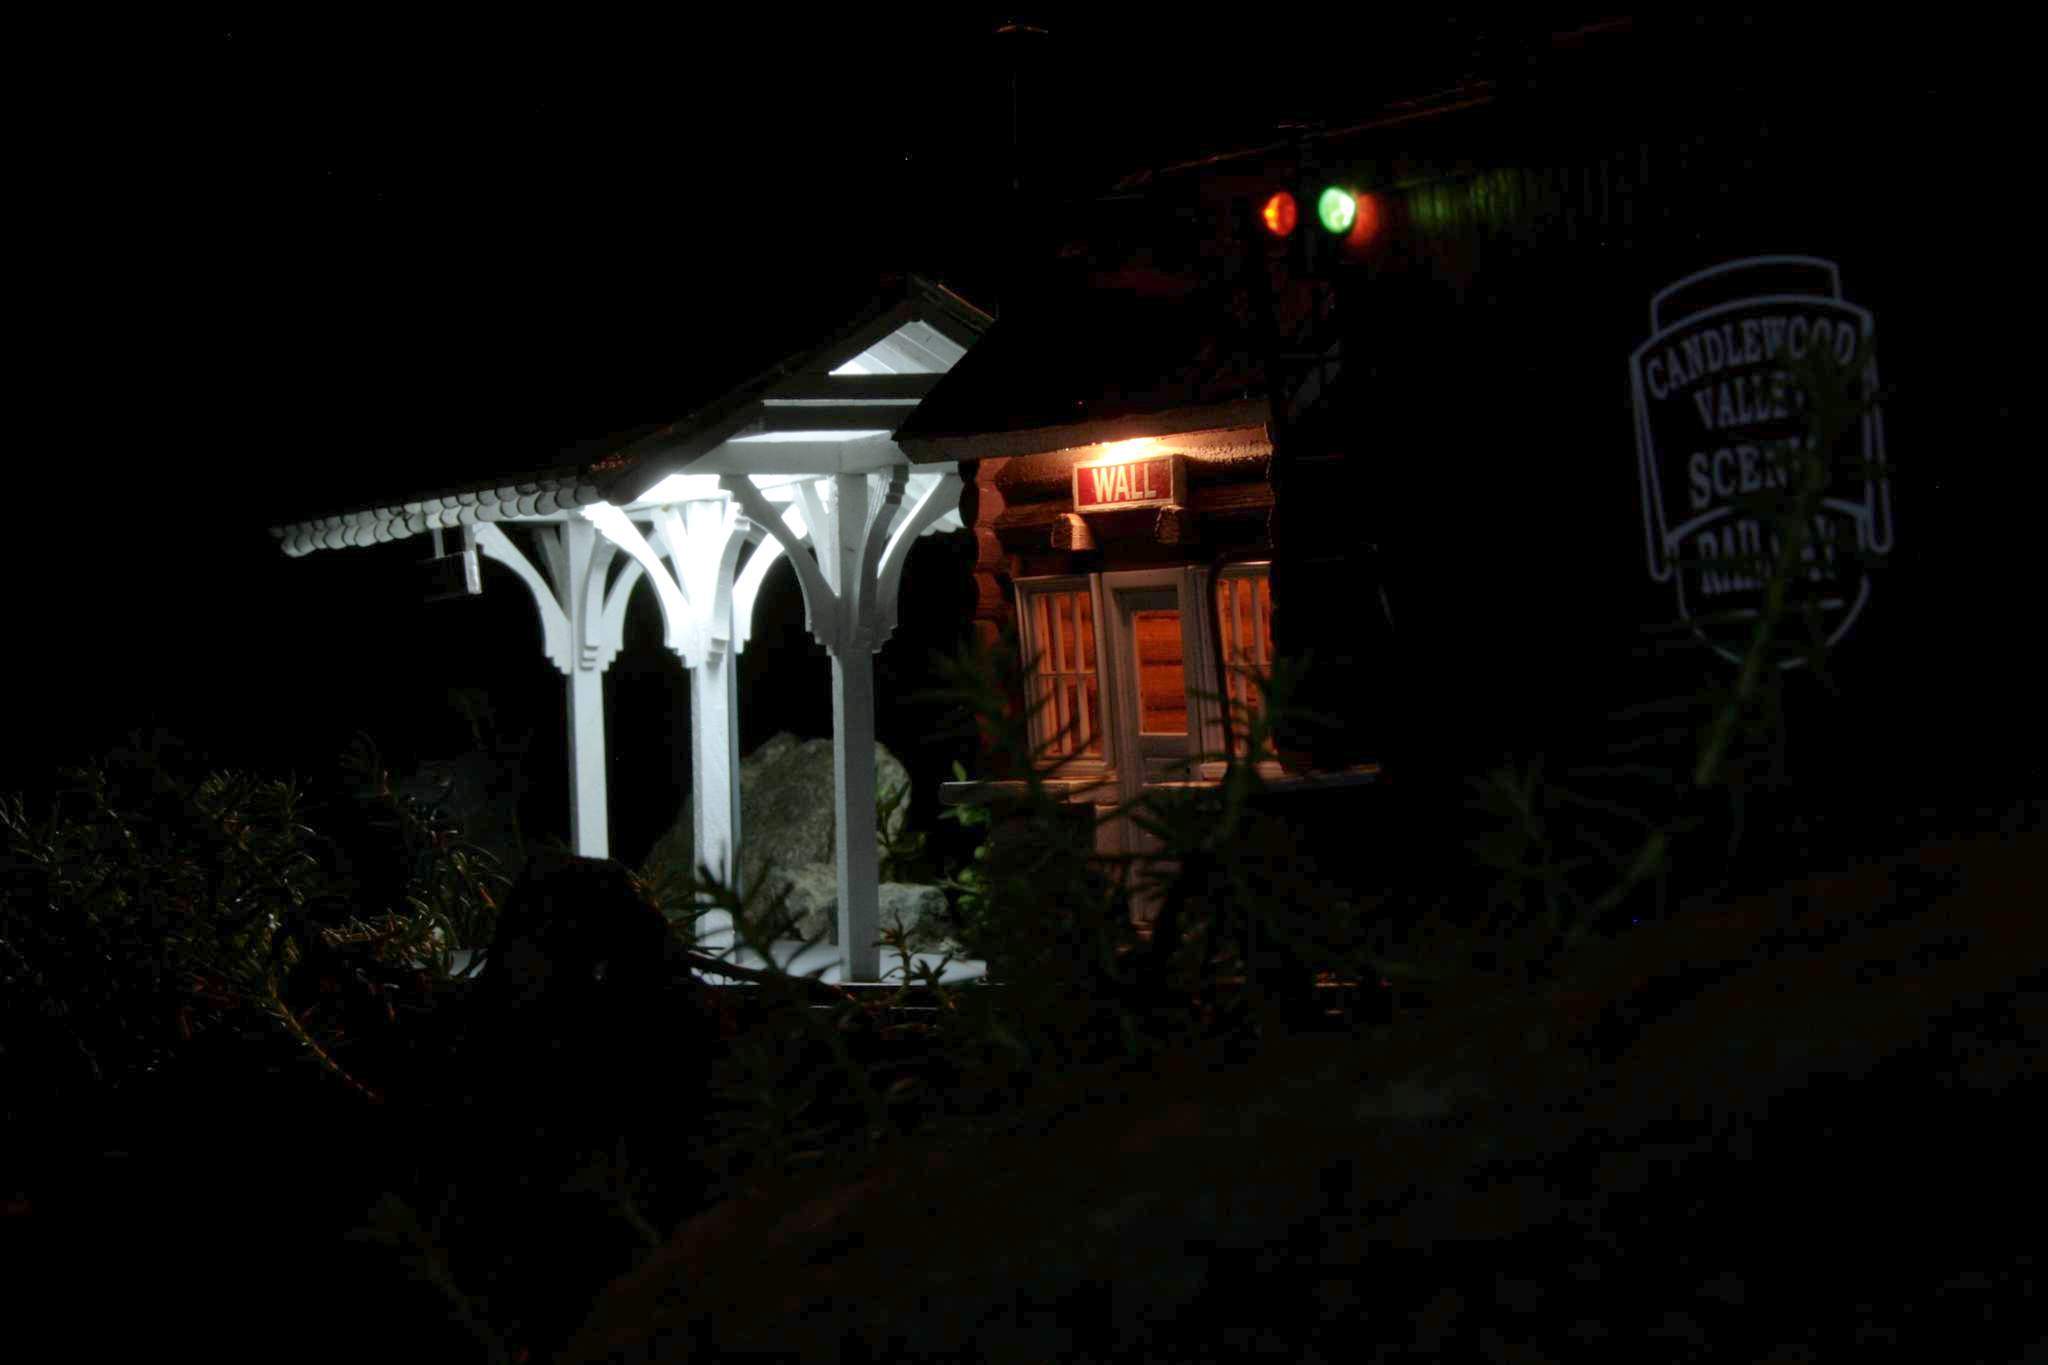
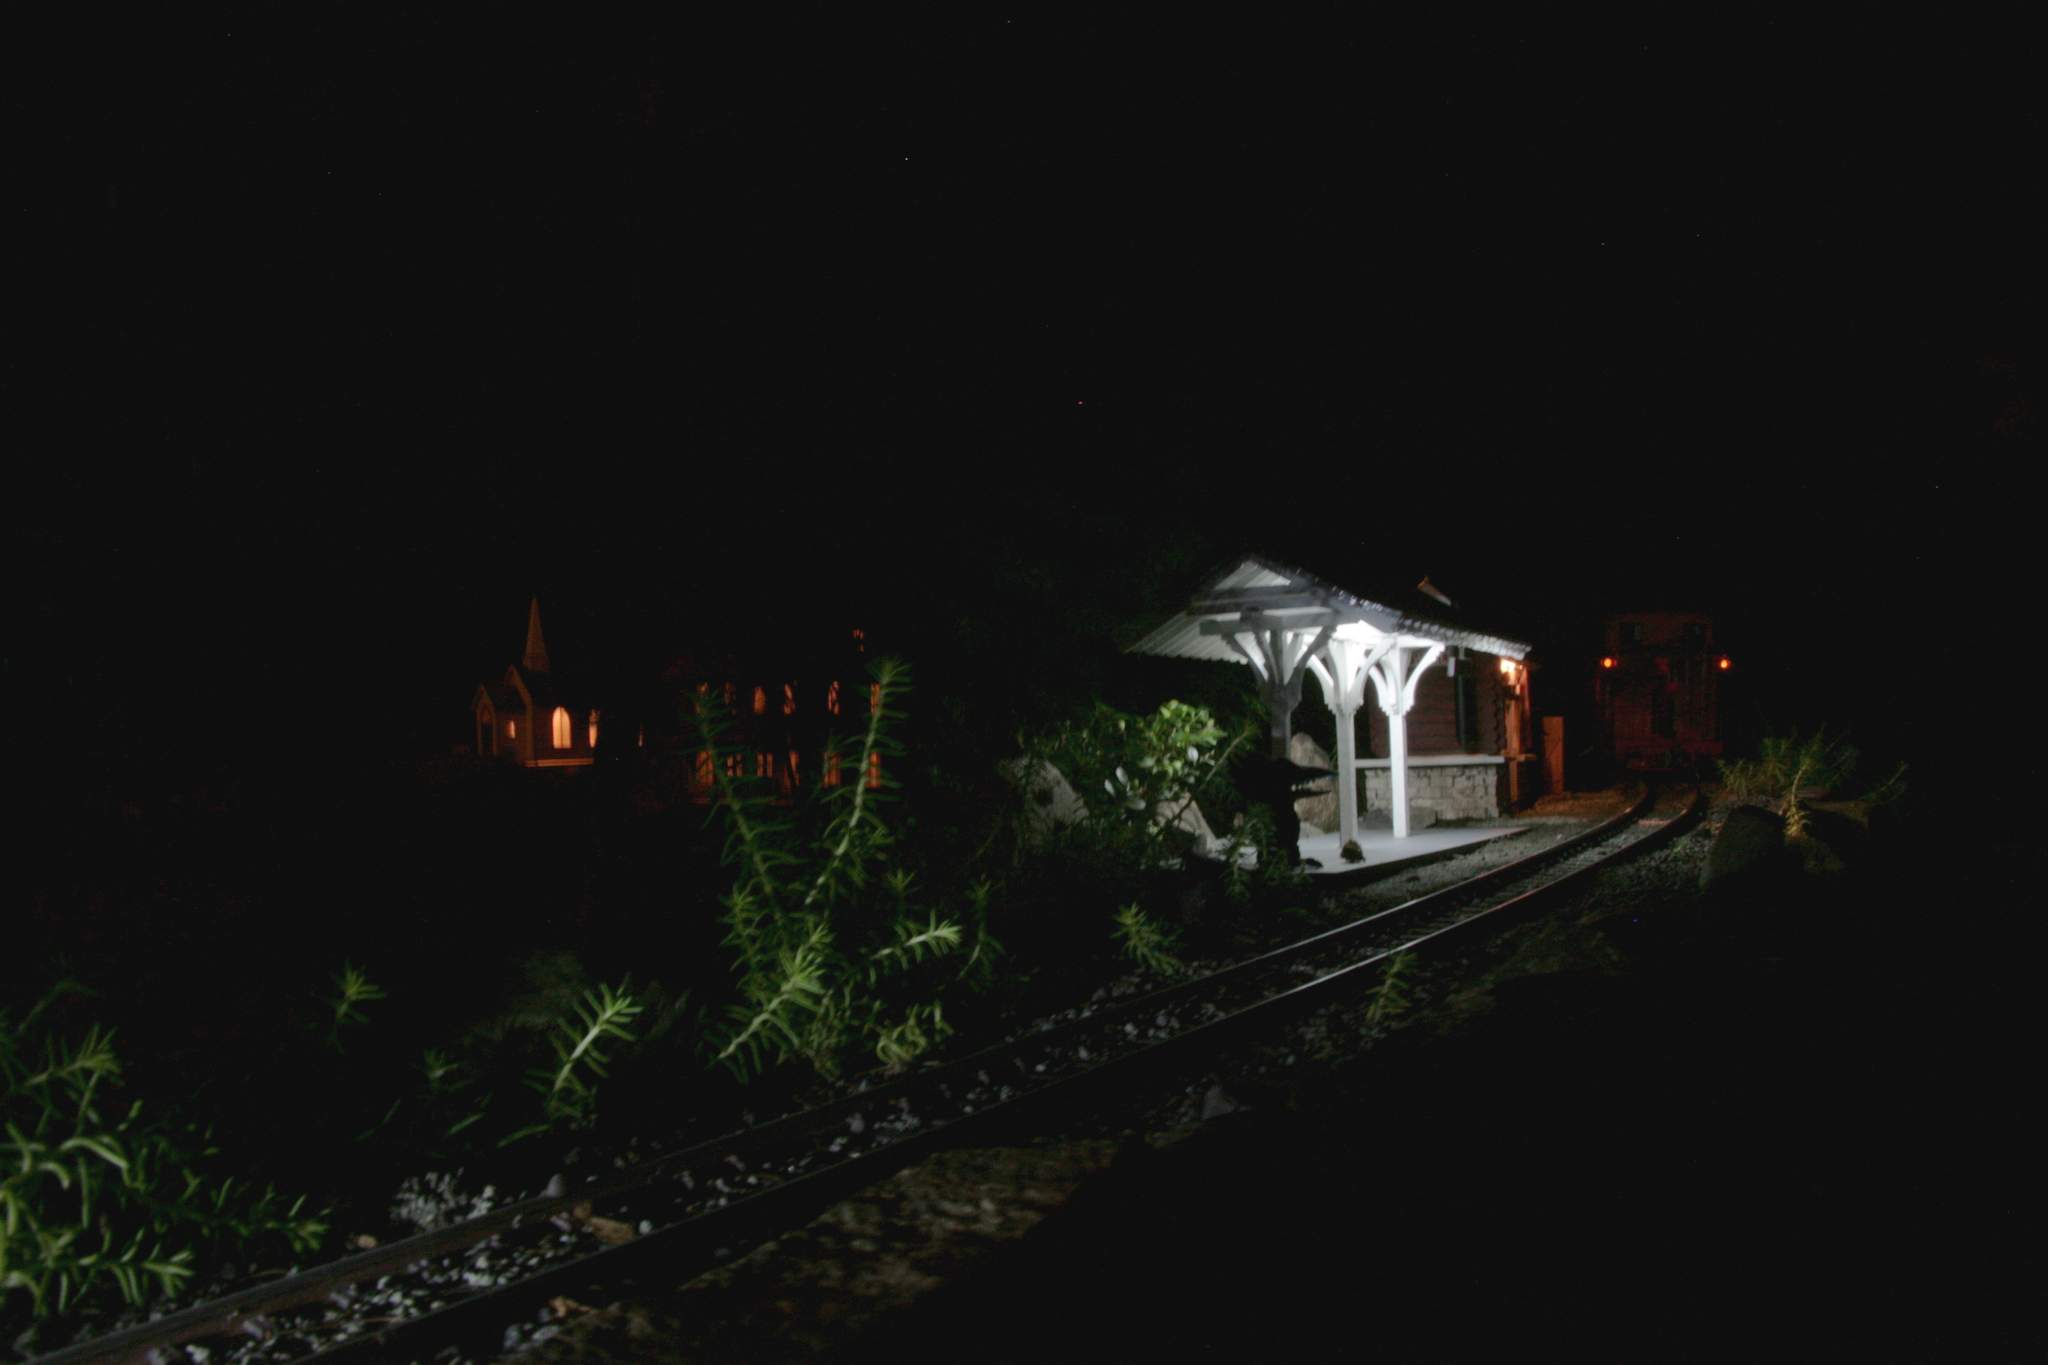
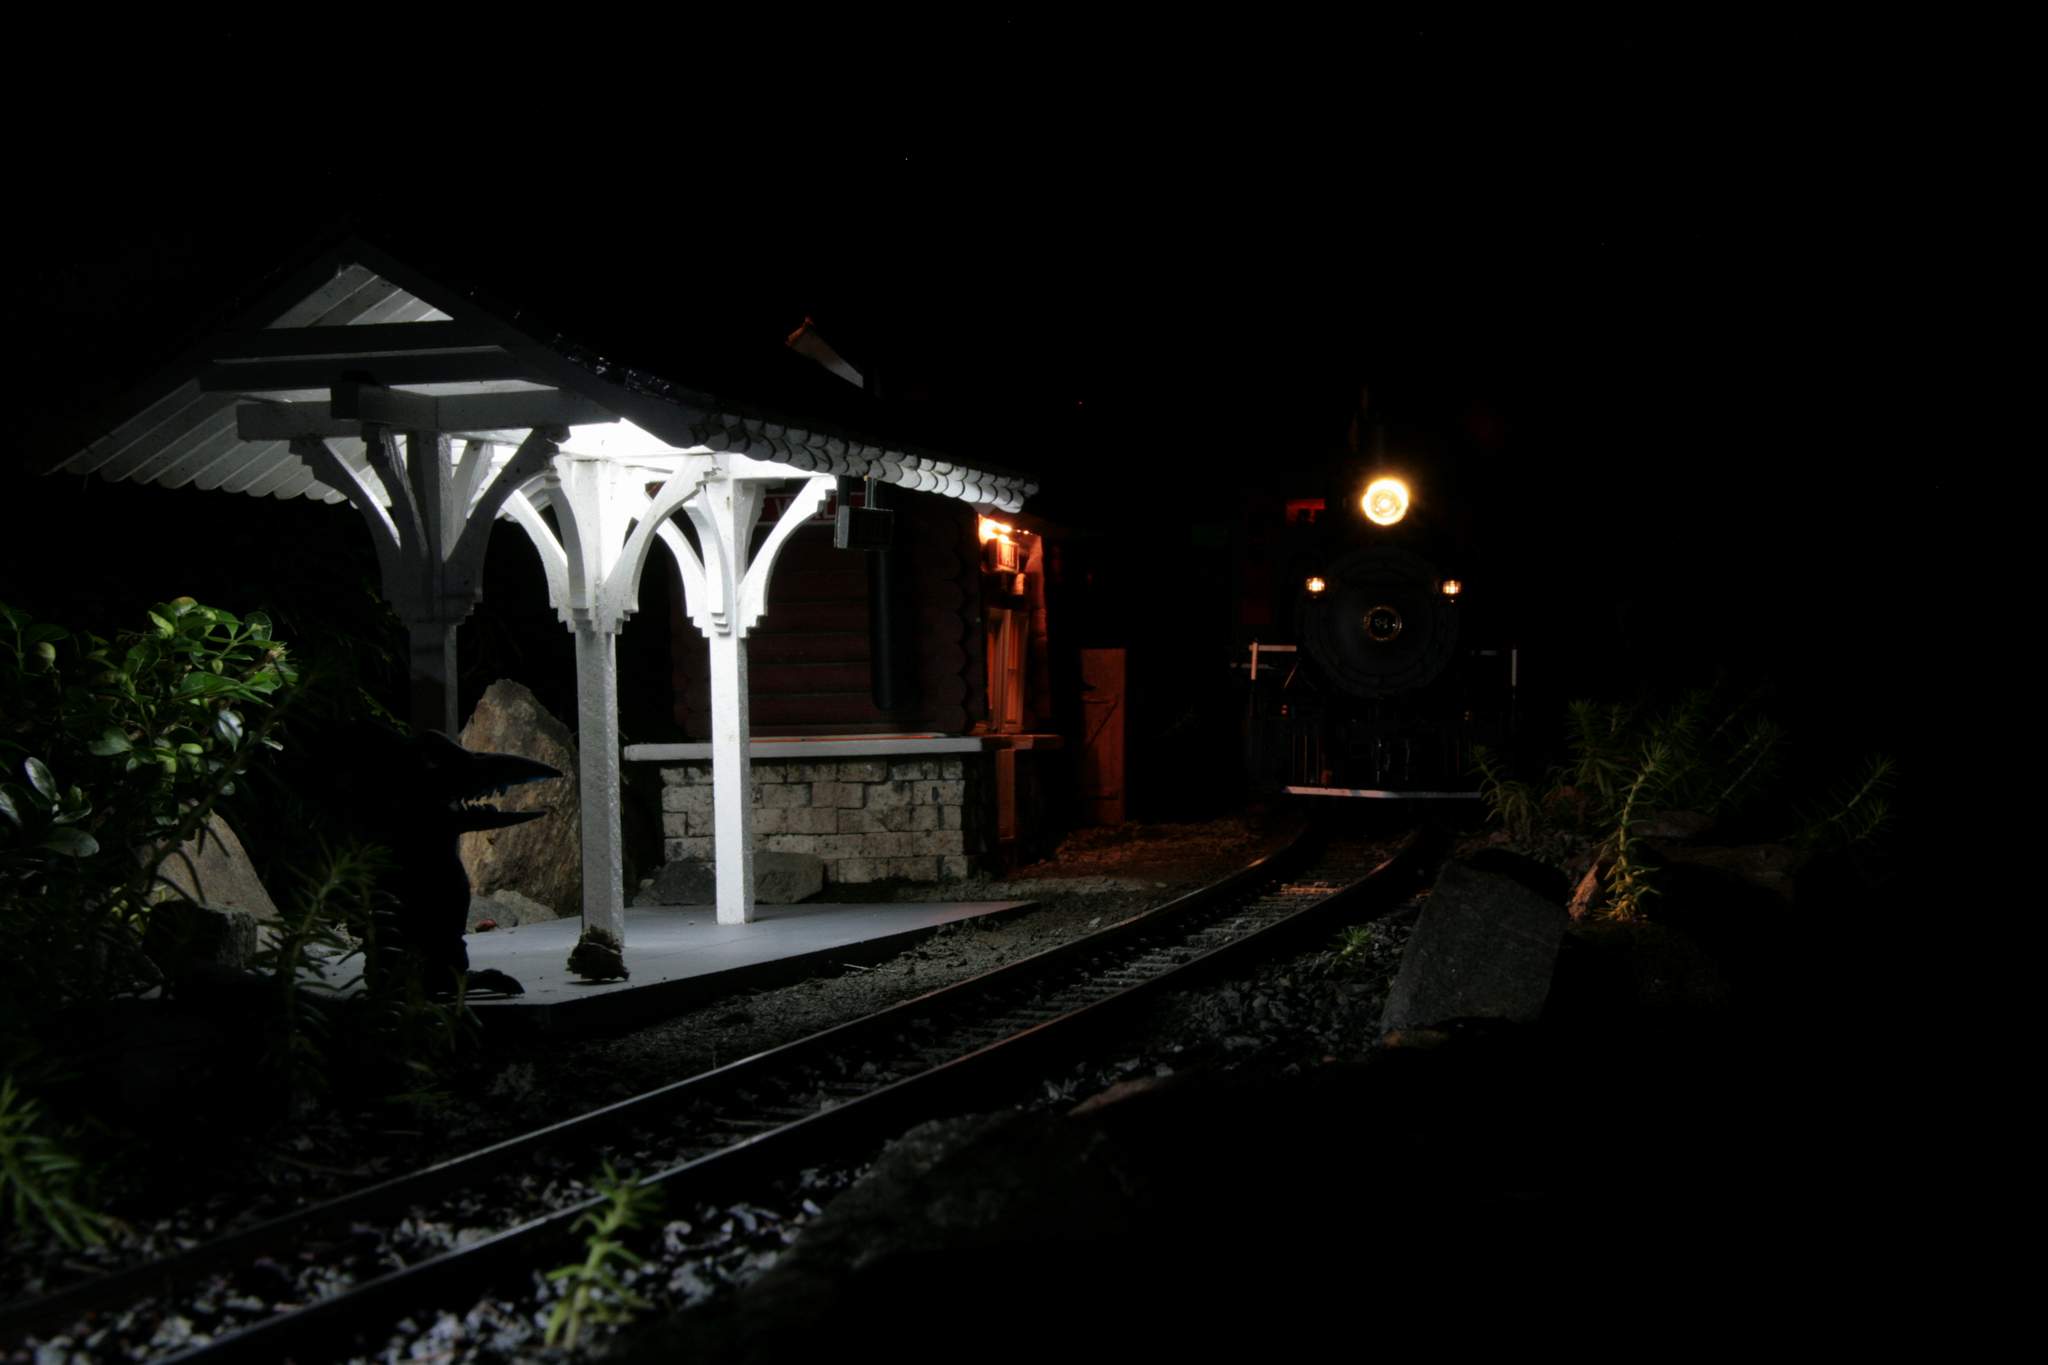
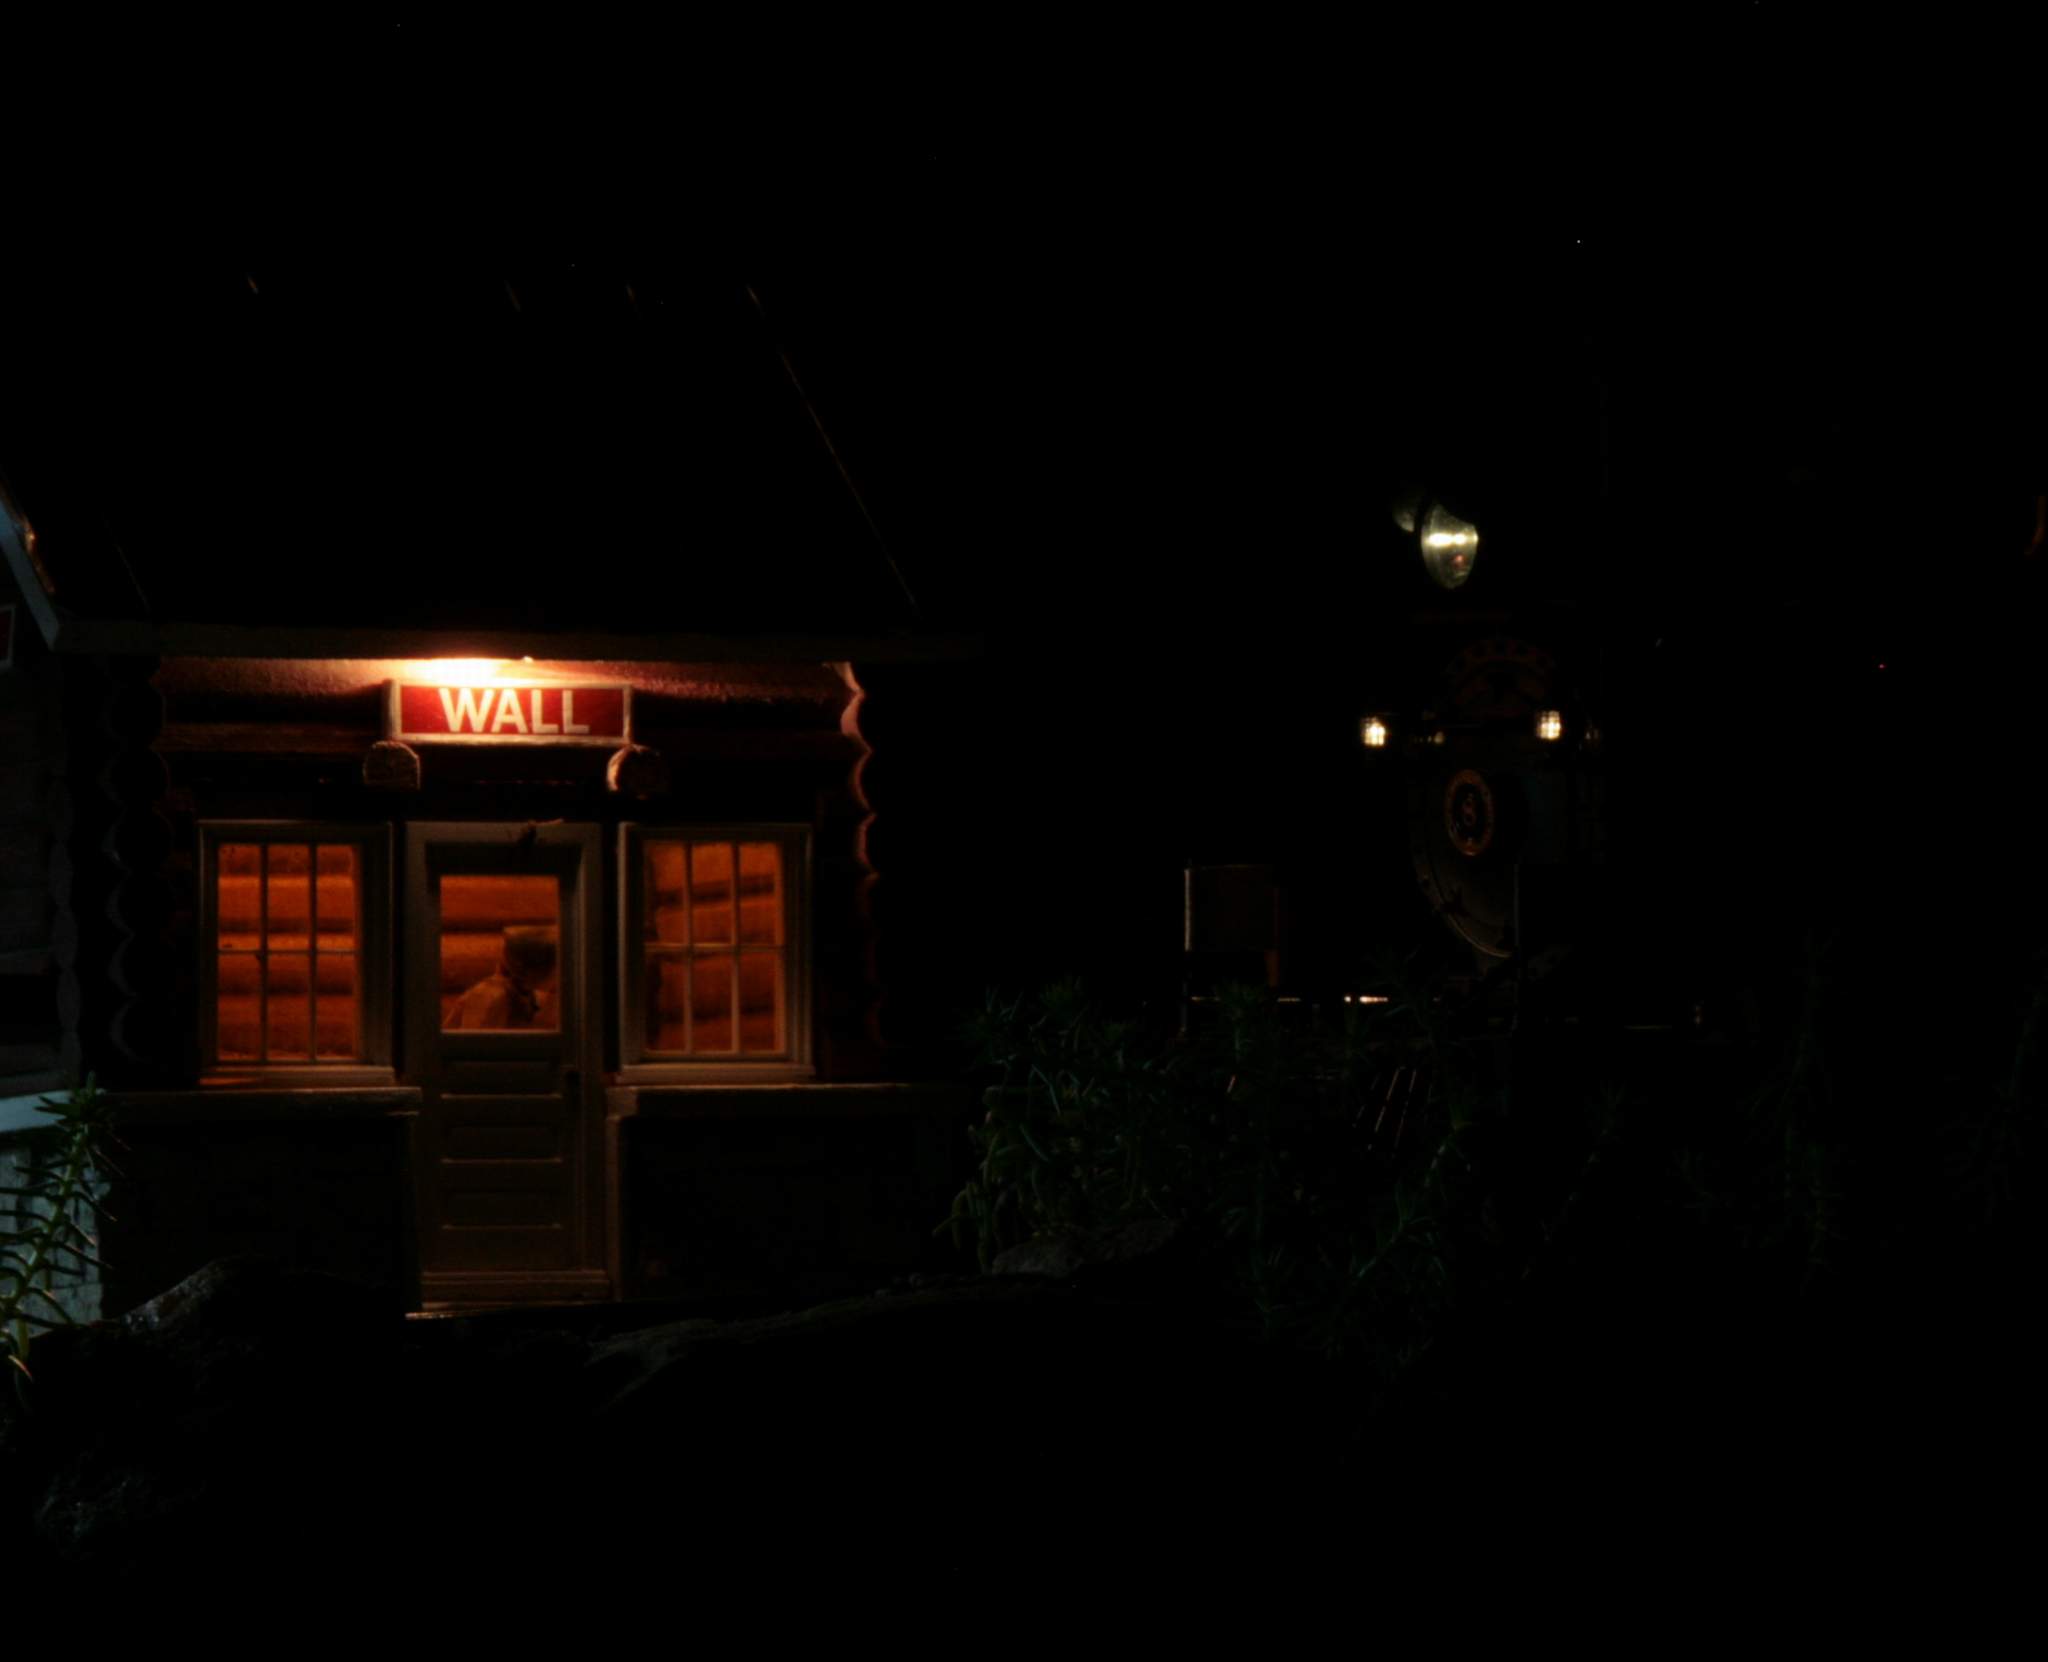
First, light leaks were eliminated using scrap black sign vinyl. Orange vinyl was placed on the roof to warm up the very cold sign LEDs…

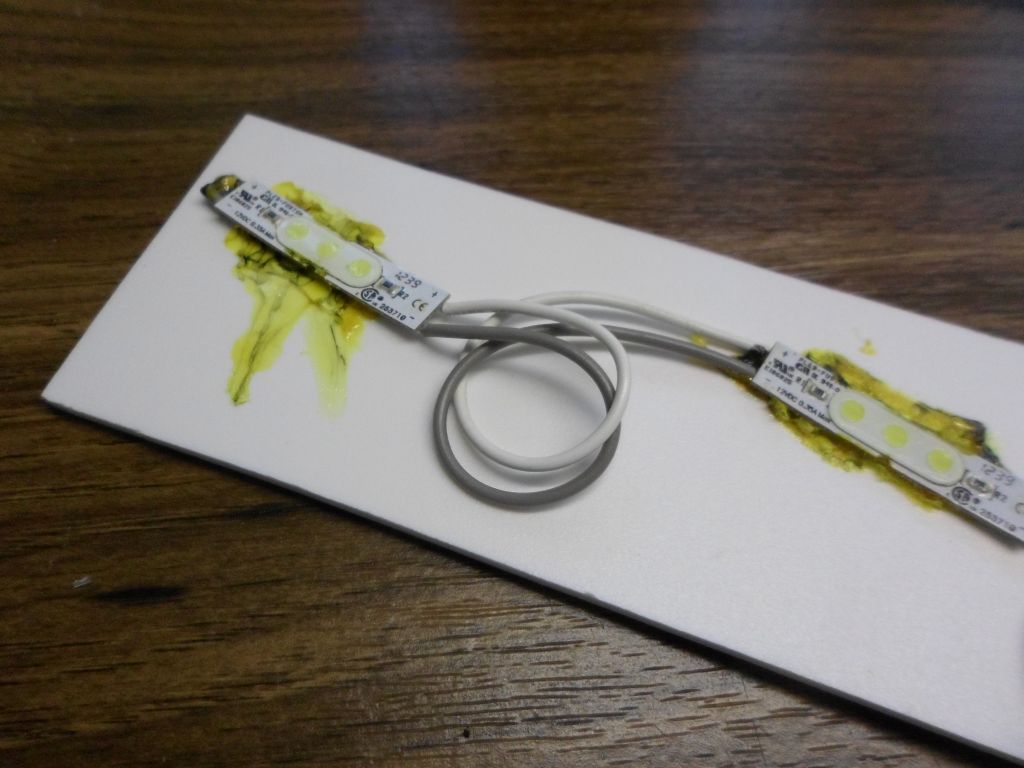
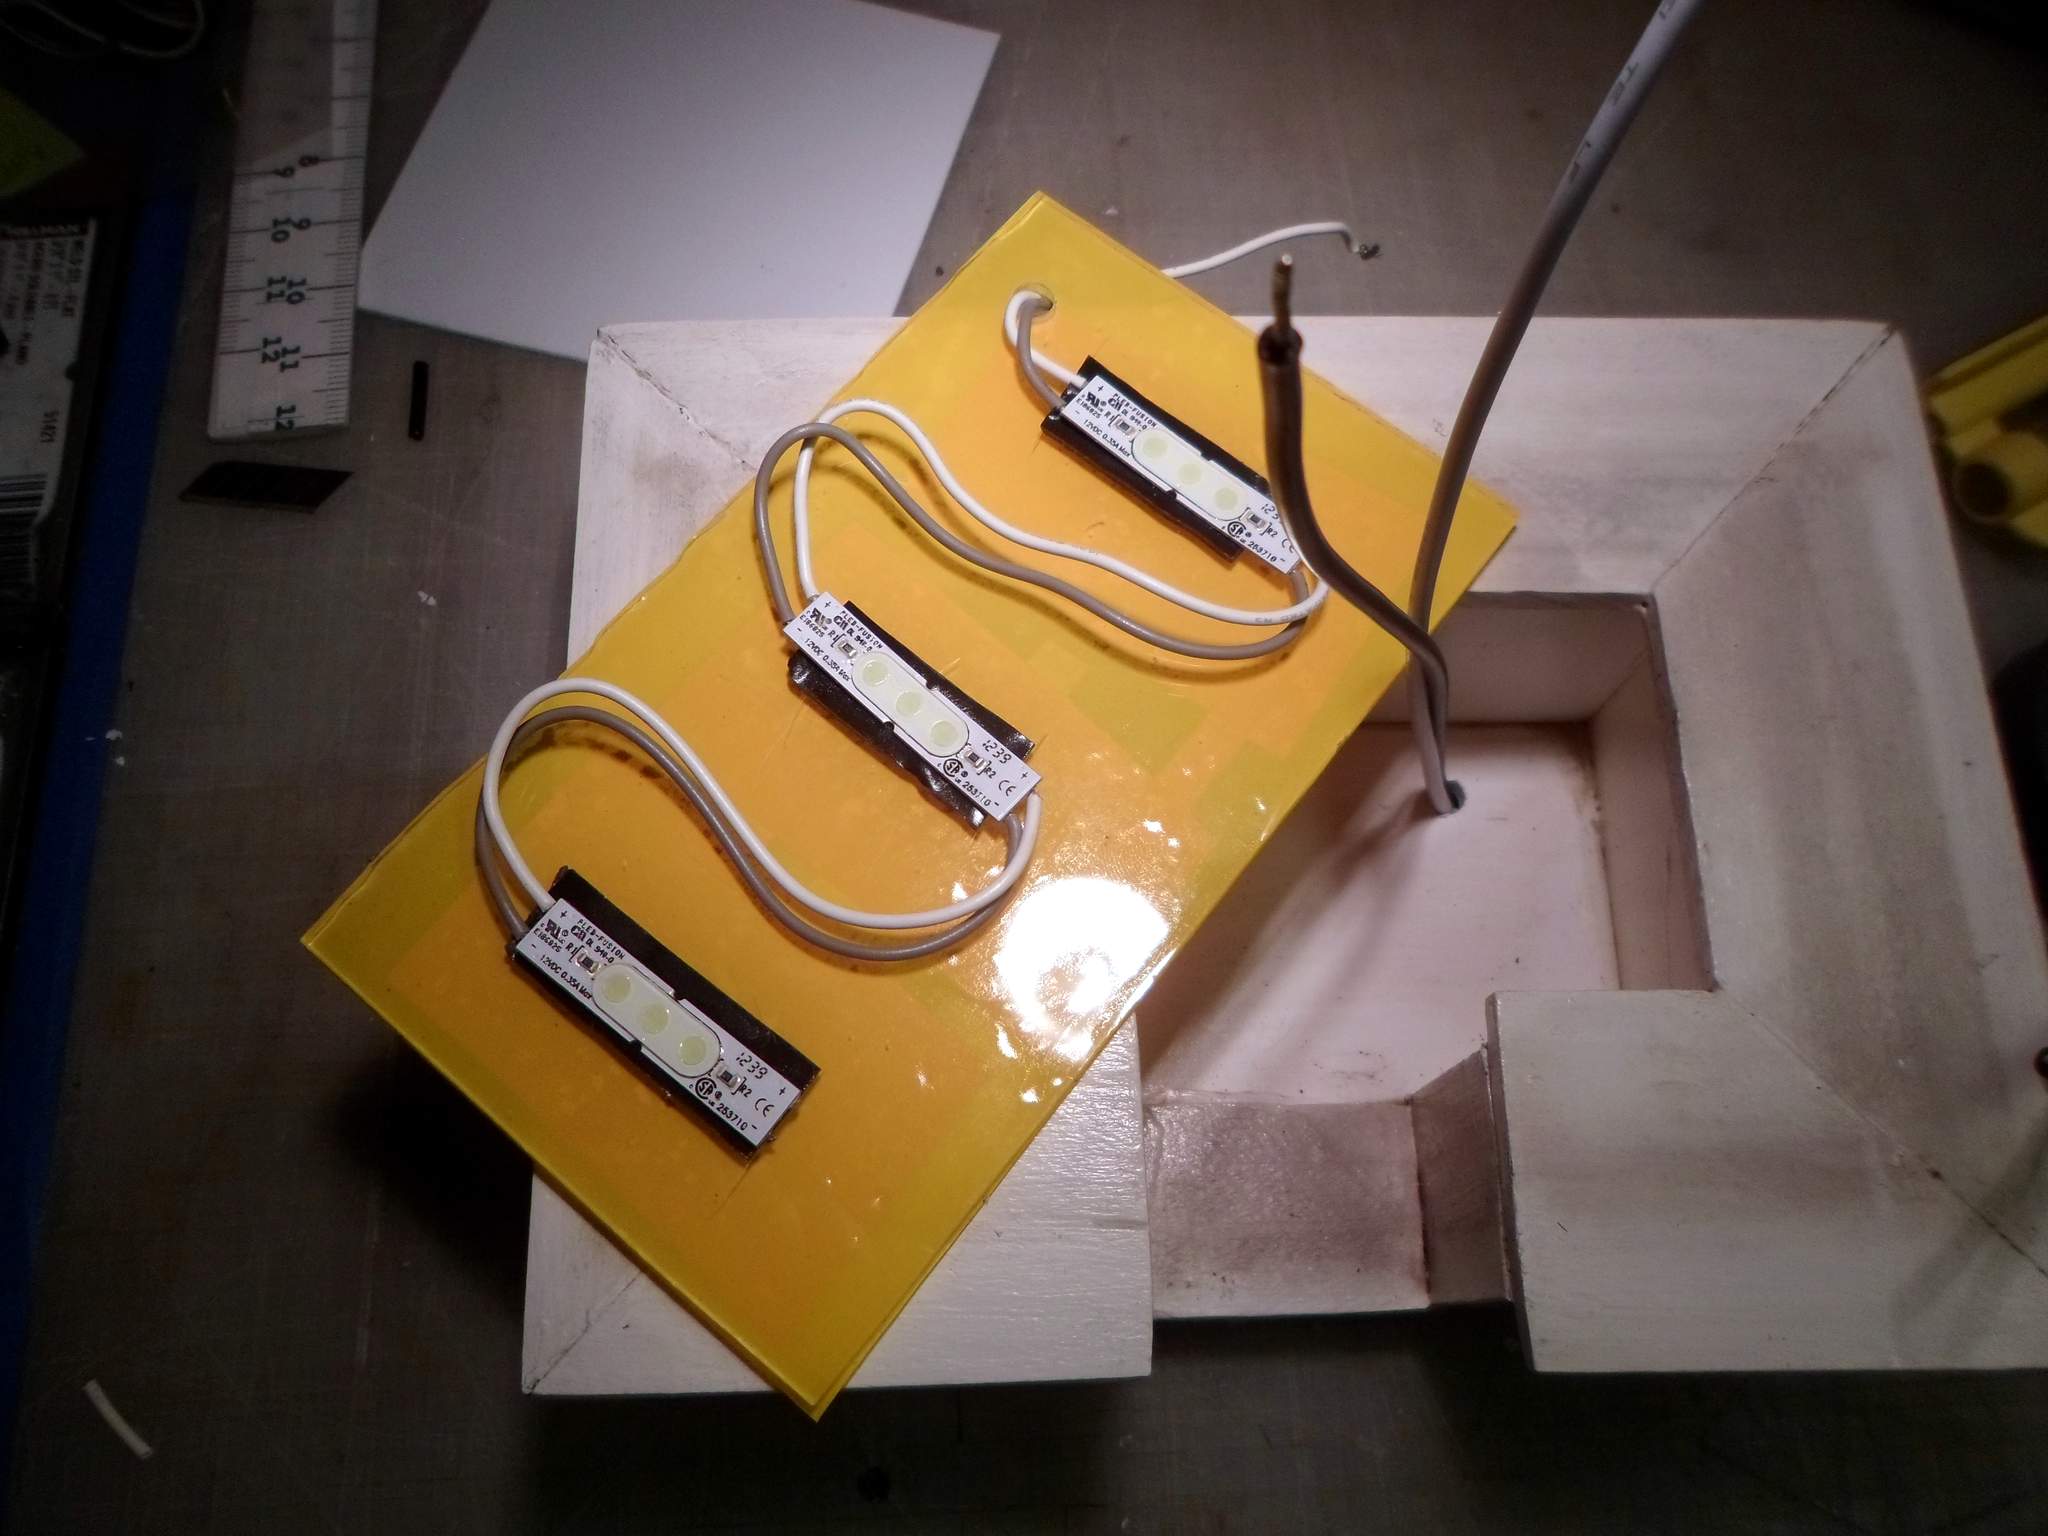
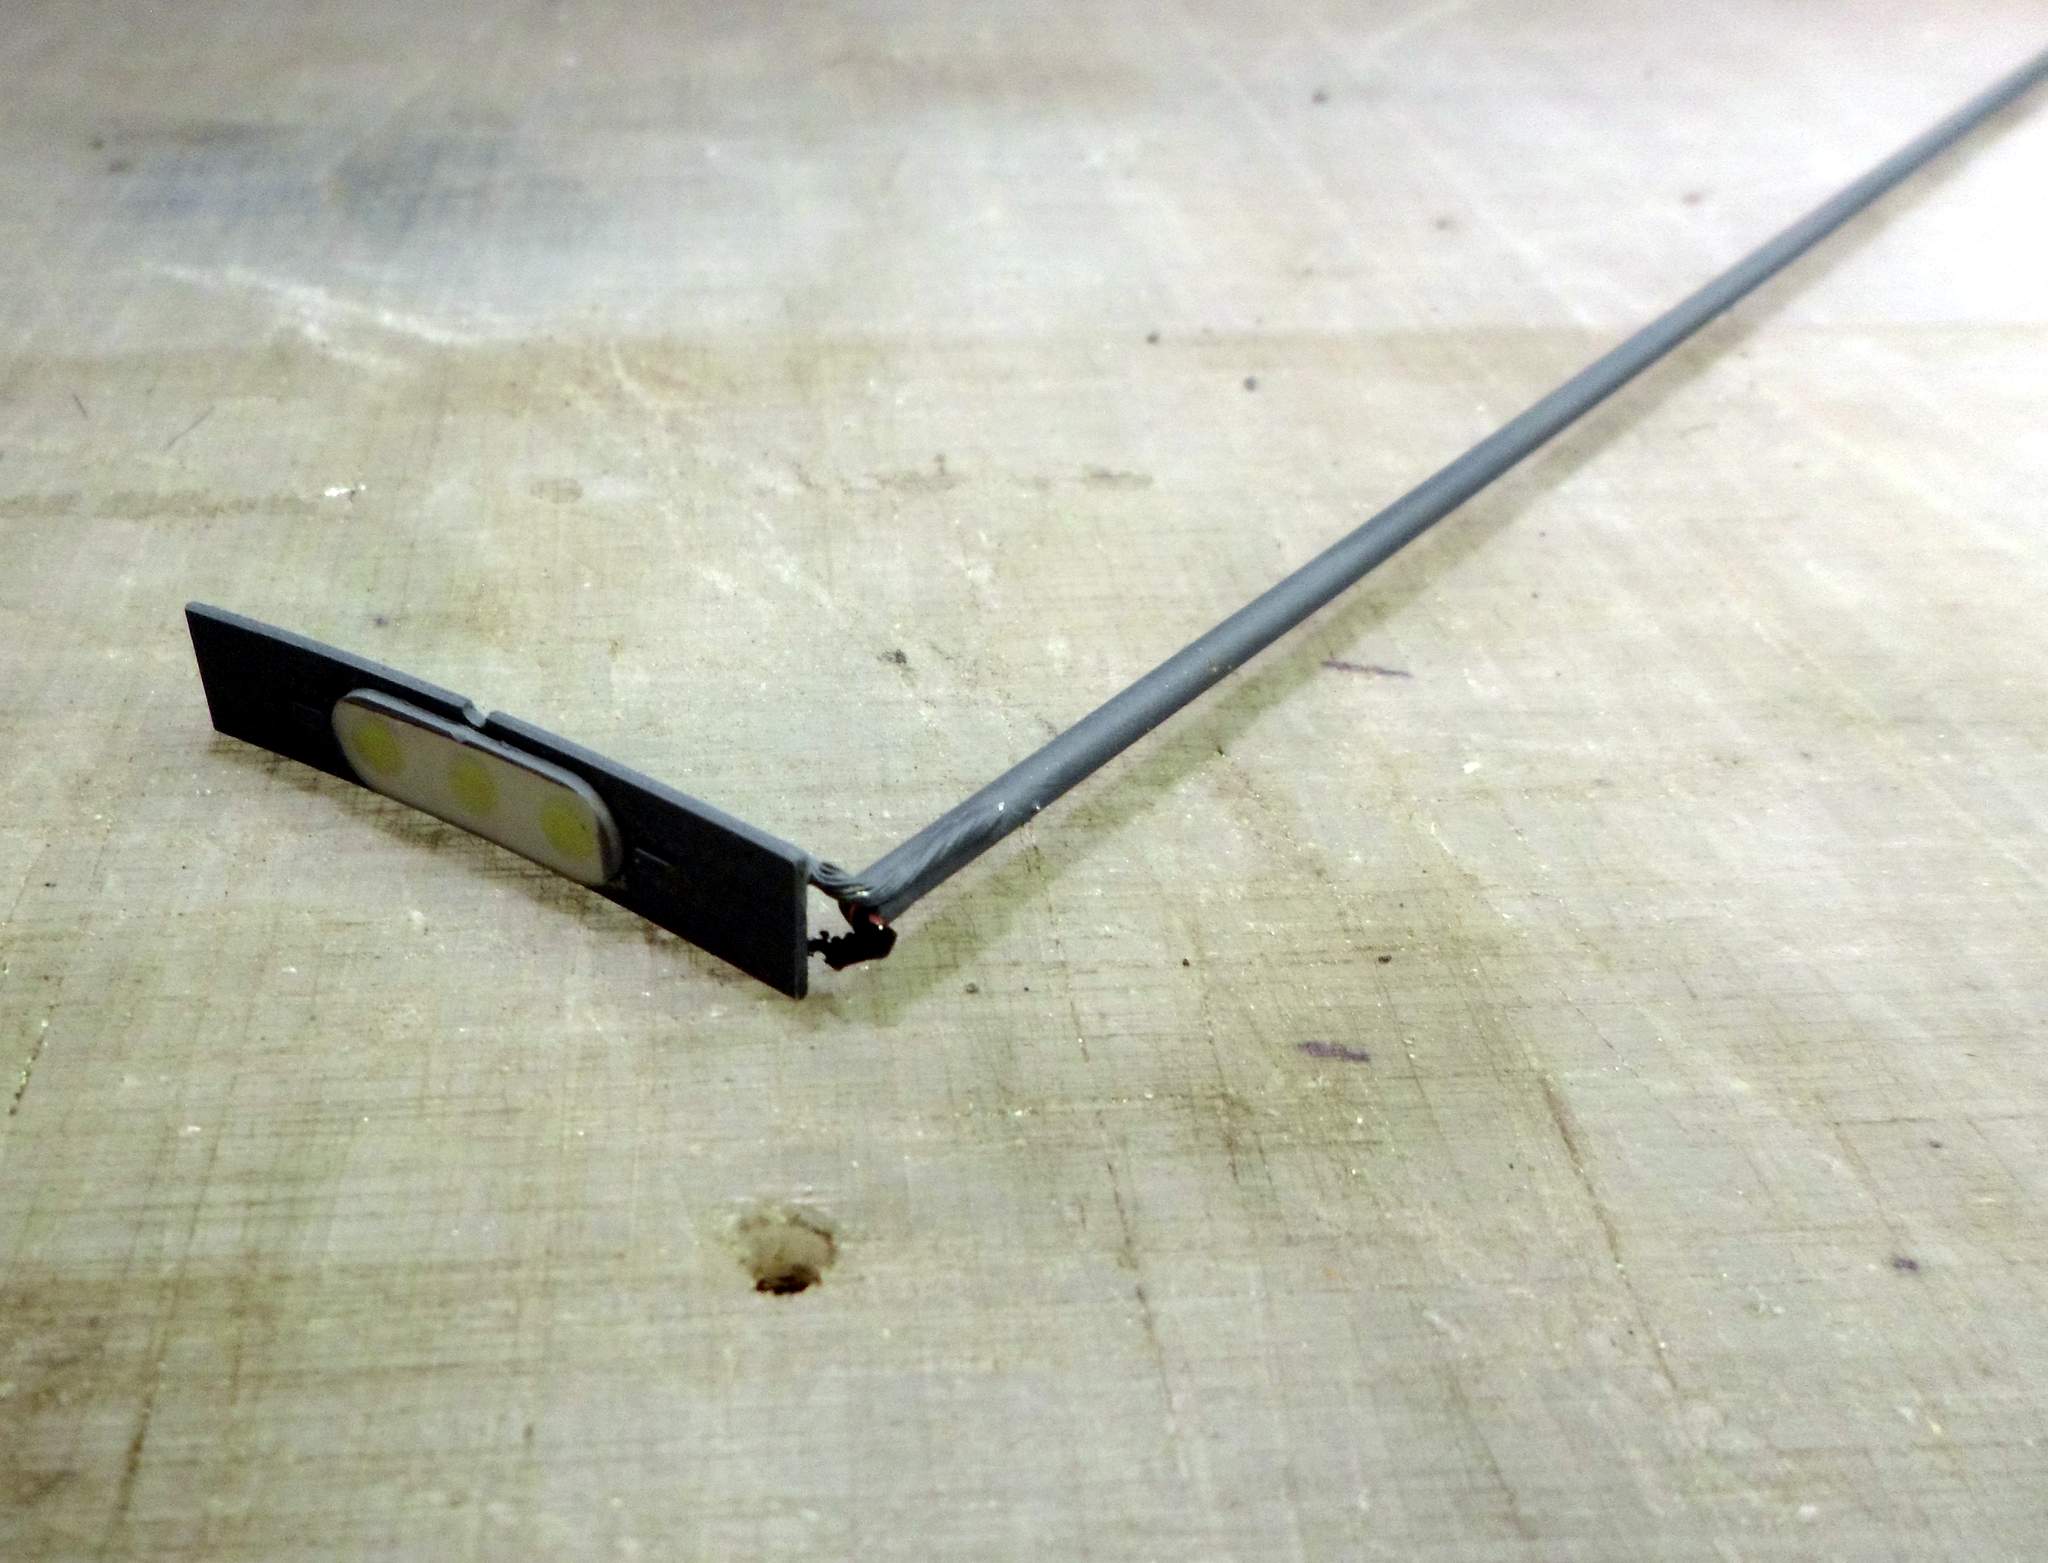
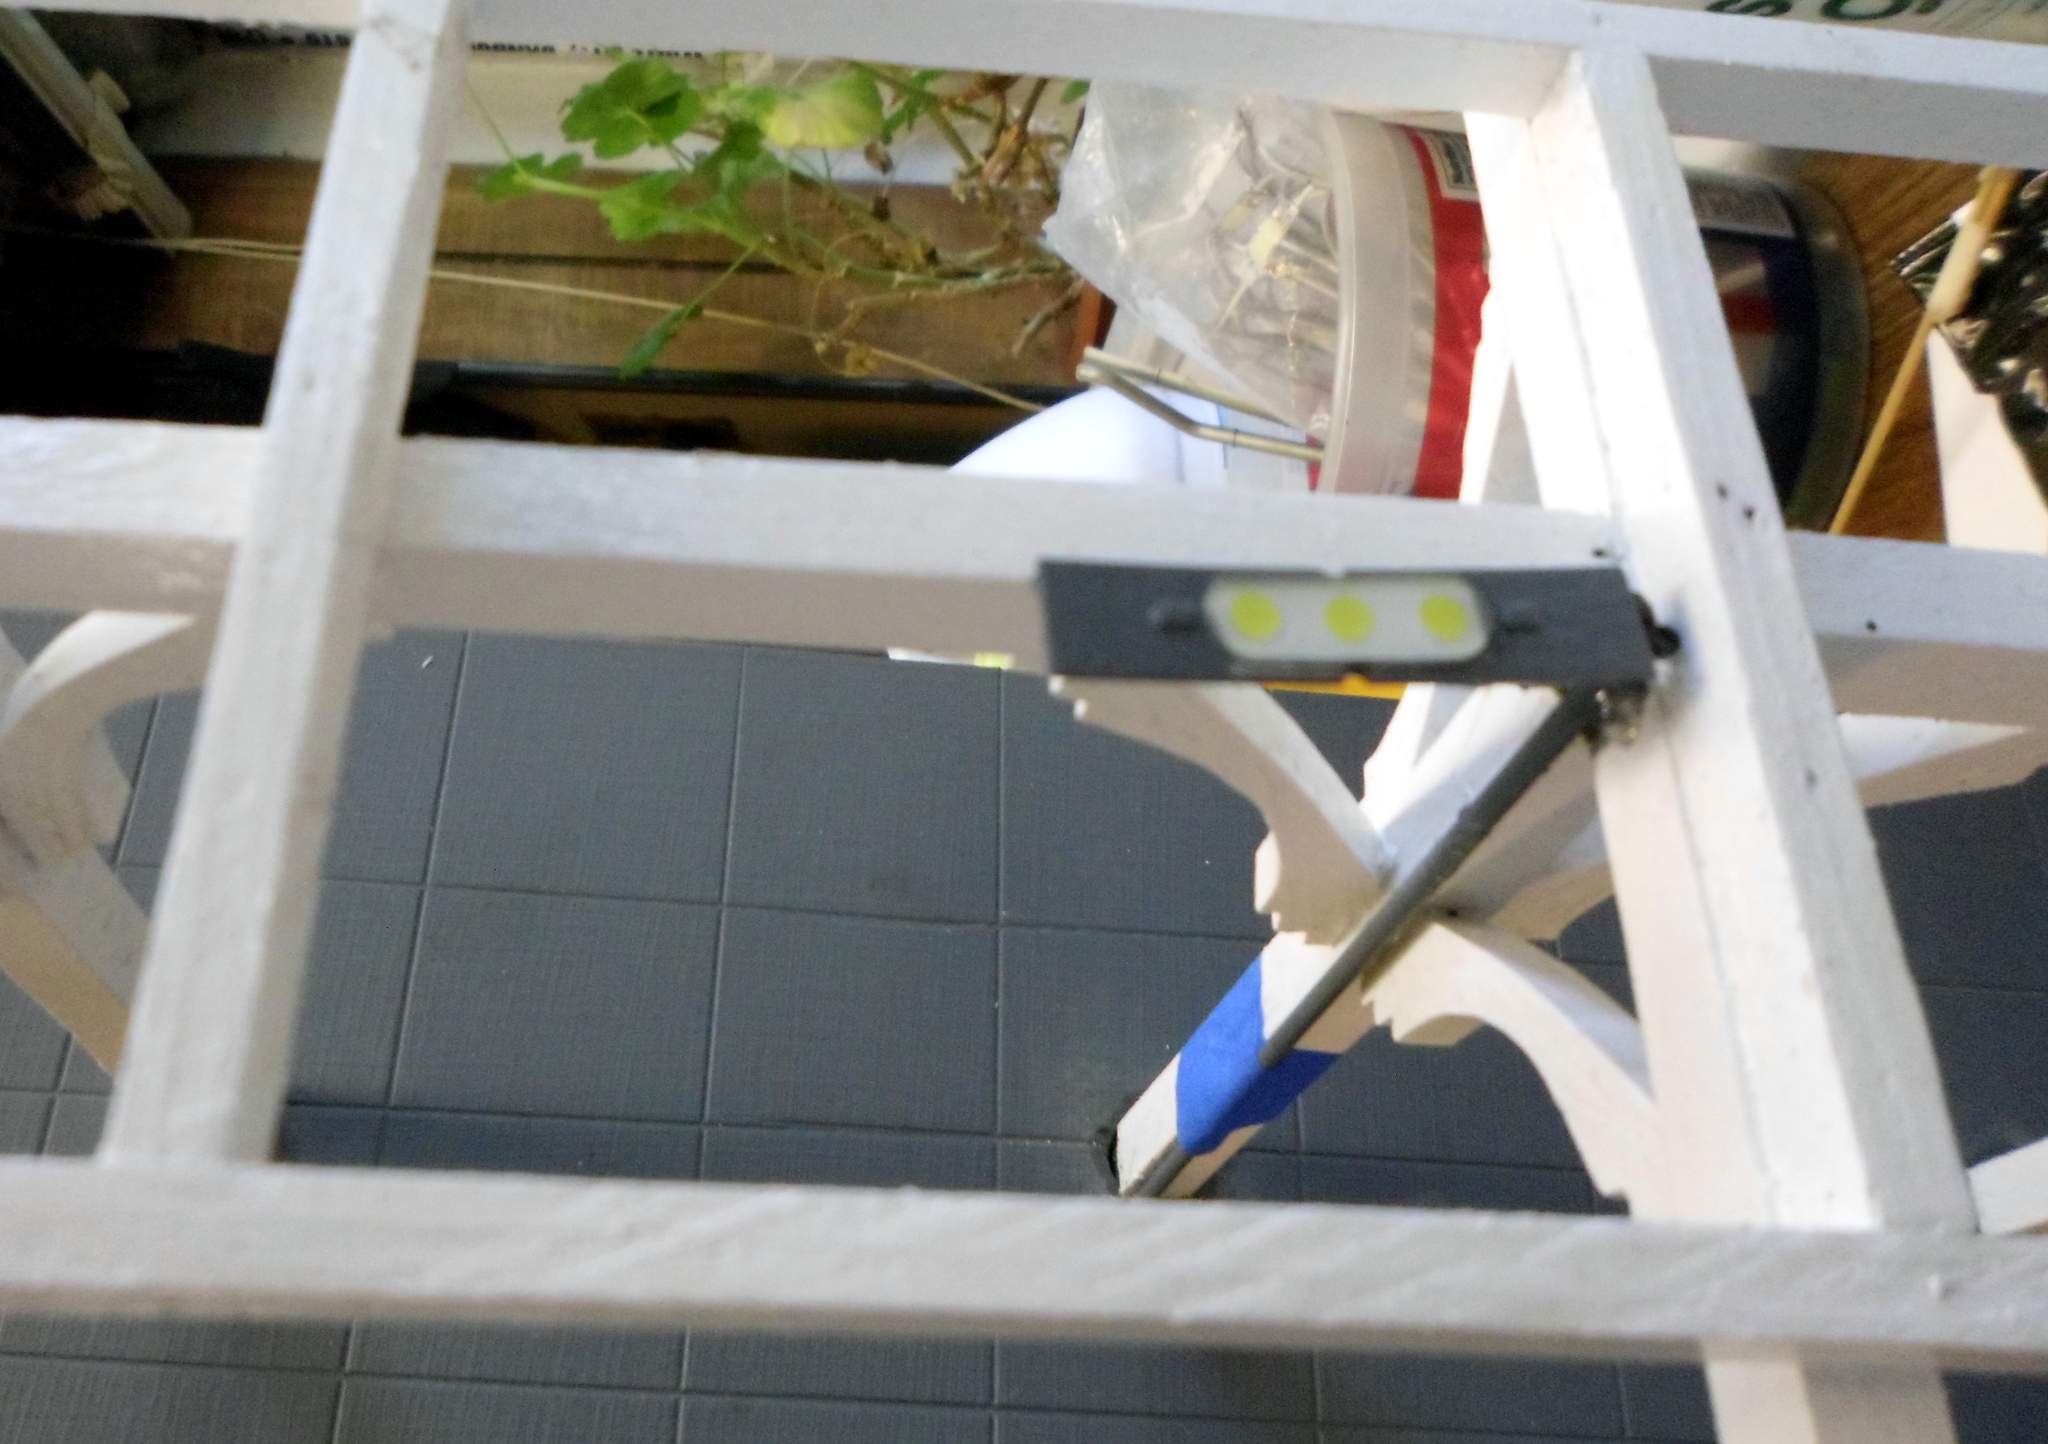
When the LEDs were quickly removed from aluminum panels being recycled, the plastic backs shattered but the circuit boards and wiring stayed intact and 90% of what came out still worked. To make mounting easy I just glued them to some scrap 3mm PVC board with 3M gasket adhesive. I found a tube of it when I got these Pola buildings used and falling apart. It works great on the Pola plastic as well as the PVC and circuit boards…

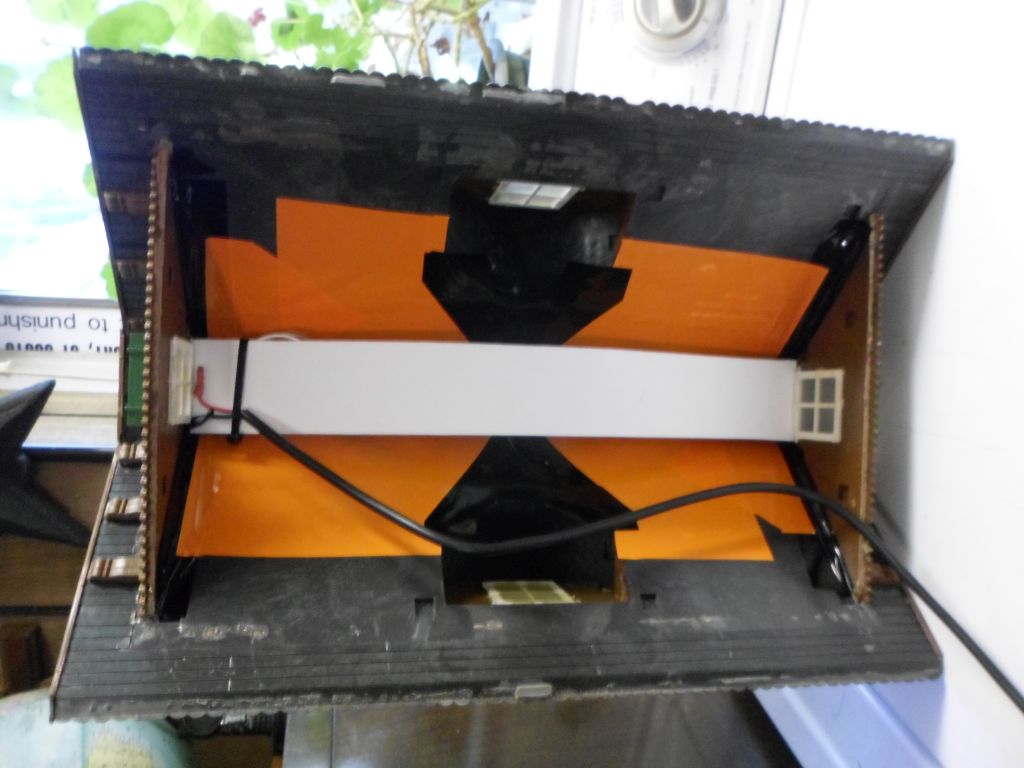
The PVC board is cut just a bit long so it force-fits between the walls held up by the upper windows. LEDs on top bounce off the orange vinyl…

More light leak stop using black vinyl and PVC board…

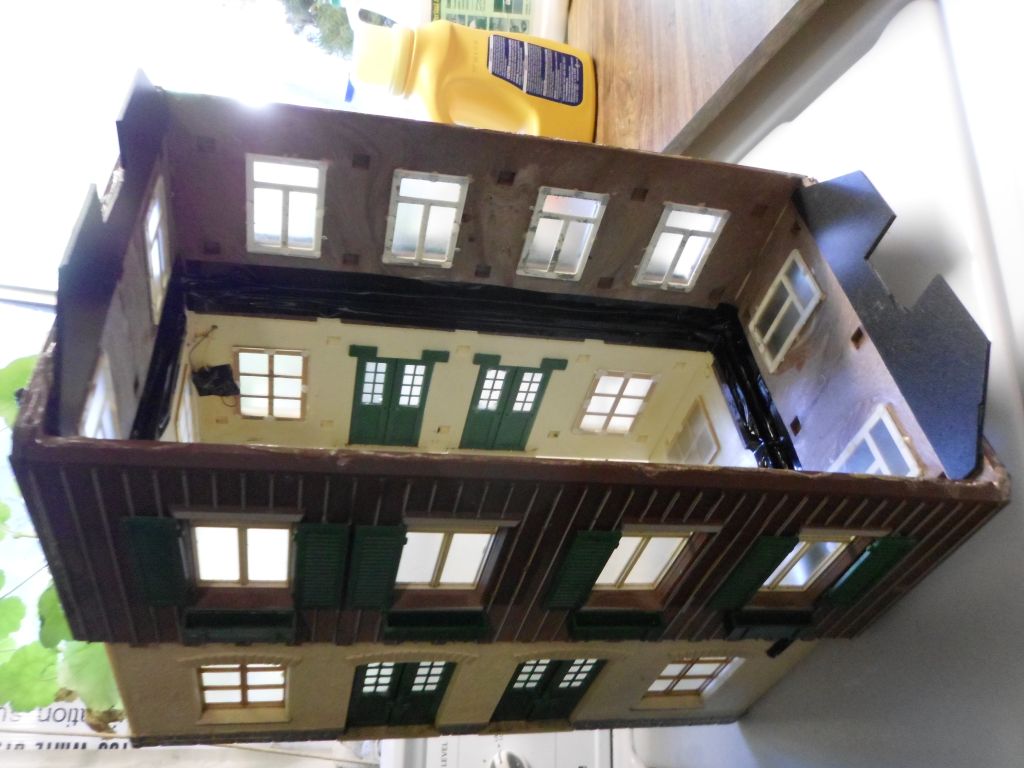
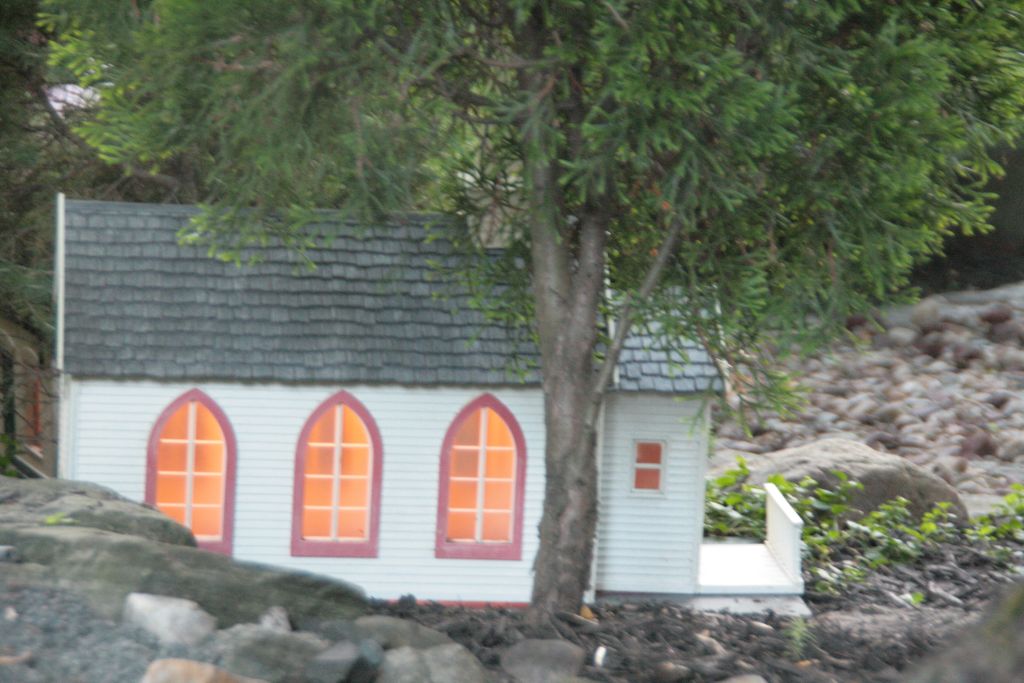
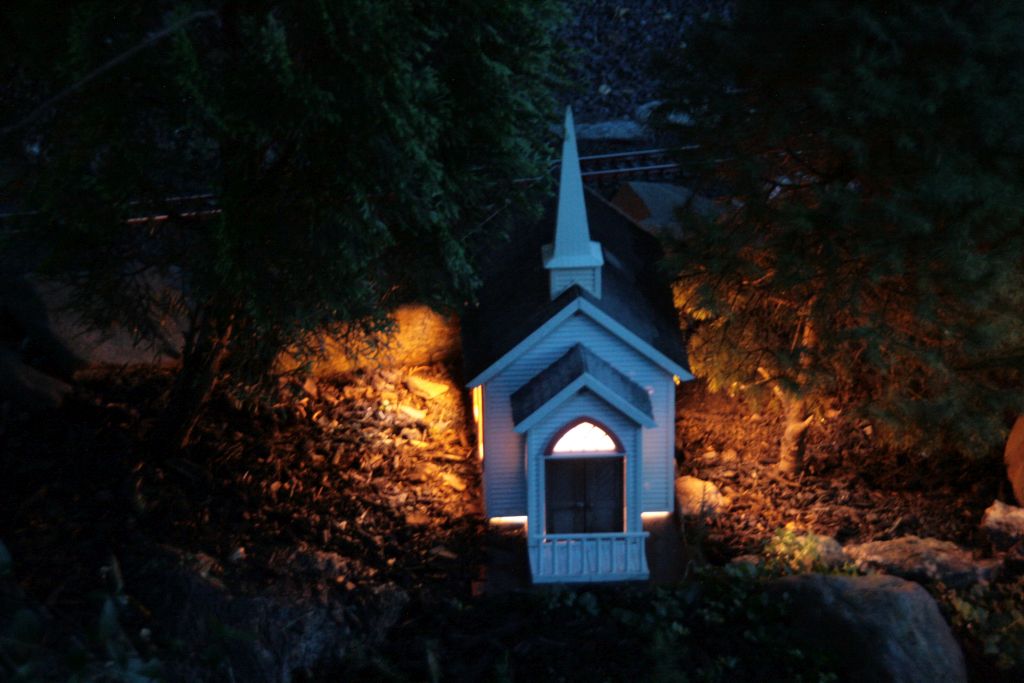
Next - The church gets the same treatment. Stay tuned.

I’m hoping you can stay up late enough to get some pictures when it’s dark out!

The church got the same treatment with one less LED module. Lots of orange here. I may need to tone it down a bit…

This was actually the first light board I built. Tried VHB tape, but glue was faster…

Power test…

With both buildings fixed up and lit, it’s out to the garden to get the wiring in. First, a few ties were excavated along with a route for the wire. Paint was scraped off the foot of the rail and the old clamps tightened on along with the wire…

With ballast and rocks replaced you can barely tell the connections exist…

Wires run up through the bases and are covered though the garden. Next time I’ll need to Call Before, You Dig?

Powered up just after sunset you can begin to see the glow. I’m glad Pola uses frosted glazing to hide the vacant interiors…

The big church side widows light up a lot of the garden…

Long shot. This is the garden inside of Coal Dump Curve…

These after dark long exposures are a lot brighter than real life, but shows how nicely the surroundings get illuminated…

I definitely need a light gasket at the bottom and maybe some black vinyl inside the walls.

Today I began work grabbing more power at WALL…

And setting up the passenger shelter with a 2 module test reflected off the white inner roof. I opted for the modern LED or Flourescent color for the platform…

Wall Station itself came in for a quick cleaning and paint touch-up. While it’s in the shop lighting will be installed. I need to make up a conduit to permanently wire the shelter. Brass tube will carry one leg while an insulated wire running inside the tube will carry the other leg. I’ll paint the tube PVC gray and run it up the back of one post.

More when there is progress.

Nice way to brighten the works.(http://largescalecentral.com/externals/tinymce/plugins/emoticons/img/smiley-cool.gif)

Wow, that looks great! Really sheds some light on the subject.

I’ve got the same Pola church, you could make a foundation out of blue/pink insulation board (trace building outline, cut out, carve some stone in it, paint it, etc) for use as a light gasket. Might help hide some of the “Holy glow” of midnight mass.

-Kevin.

Kevin,

Looks just like St. Stan’s

Joe

P.S. I think a model of Wardynski’s would look great. You now, “Don’t give me that baloney…”

Cool! I like the platform. Is that scratchbuilt?

Later,

K

K.

He did it for a Mik Challenge. We got to watch as he gave it life…

John

Kevin Strong said:

Cool! I like the platform. Is that scratchbuilt?

Later,

K

Yes, Thanks!. It was my only ever completed Mik Challenge buld from 2016: http://www.largescalecentral.com/forums/topic/24879/mik-2016-buld-log-daktah-john-cvsry?page=1

David Marconi, FOGWH said:

Nice way to brighten the works.(http://largescalecentral.com/externals/tinymce/plugins/emoticons/img/smiley-cool.gif)

Thanks. A little too bright for my environment with 2 modules (3 high output LEDs each). I’m going to try a single module. Looks like a downtown platform at night.

Love the dragon/sphinx at Wall …If I was a 1:24 scale unmarried guy I would wait there for the next train to bring in a good looking single gal and

This post has been edited by :Rooster

" Rooster " said:

Love the dragon/sphinx at Wall …If I was a 1:24 scale unmarried guy I would wait there for the next train to bring in a good looking single gal and

This post has been edited by :Rooster

Trouble is, there hasn’t been a passenger train by there in years. Management has plans to remedy that this season.

I don’t remember where the dragon came from. He has no name, but he has a rock up his butt to hold him in place. He’s been guarding Wall since it was just an outhouse stop.

Daktah John said:

I don’t remember where the dragon came from. He has no name, but he has a rock up his butt to hold him in place. He’s been guarding Wall since it was just an outhouse stop.

The horror of it ! A dragon with no name!!

I say we name him Rockey or just call him Bill for short.

Home early this evening to thunderstorms, so Wall Station got the lighting treatment. This time I chose to use a clear acrylic diffuser coated with translucent vinyls to modify the bright white LED color. LED’s will point up toward a dark stained roof. I chose to use three modules for my test. I think I will probably remove one. I used tape because I didn’t want to wait for glue…

Here is the bottom which has the vinyl applied. I coated the entire face with yellow then about 75% coverage with an orange…

The diffuser is a snug fit. I added a couple of screws to hold it up but allow removal for service…

Lit up for test…

Indoor test - dark clouds outside. I think I need to find a 12V bulb to tuck in the eves over the sign…

A little fine tuning and it’s ready to go outside, then I’ll make the shelter set-up permanent.

I also wanted to say thank you to Kevin Strong. He didn’t know it, but his recent lighting project post on Facebook inspired me to get this to the finished stage. He had some ideas on creating moonlight that I’m planning on stealing.

1st full day of vacation and it’s rainy and very humid. So down to the shop I go to finish up the station building and start on the platform. I found a 12V grain of rice (that is the bigger one, no?) bulb so it went under the eves to light the sign. The camera over-exposed it - in real life it looks good…

I used the foam double faced tape as a gasket, wrapped the exposed wire in heat shrink and added an old broken figure so the view through the window isn’t to empty space…

Got that buttoned up and moved on to the shelter. I didn’t have any tubing in stock so a road trip two towns north to Hobby Town and I scored a variety of K&S tubing. I settled on the 3/32 as wire I had would fit and it works out to a plausible size in Fn3. The tube acts as one conductor with a wire inside as the other…

I hope to get these planted back in the garden tomorrow morning.

I apologize in advance for the number of pictures in this thread. I have a hard time deciding which ones not to show (http://www.largescalecentral.com/externals/tinymce/plugins/emoticons/img/smiley-innocent.gif)

Sunny and less humid today, but hot. Got started early, but what was supposed to be a morning project turned into most of the day. First up was to excavate for a buried junction box. I bring the WALL structures in for winter so I need an easy way to disconnect the wiring. Rocky looks on as the crew places a buried utility box…

Meanwhile, back in the shop, the conduit and fixture are mounted to the passenger shelter…

The conduit extends below the platform and was sealed up with glue and heat shrink tubing…

Wiring is connected, ready for back-fill. I tested several times along the way but somehow missed that last critical test. As it turns out; I connected the wires backwards but didn’t notice because the incandescent bulb lit up…

Buttoned up with a home made cover and some stainless steel screws…

I changed power supplies to handle the extra load and then noticed the LEDs were not lit. Changing polarity indoors I confirmed that the polarity was backwards. That is the sun illuminating the platform, NOT the LED module…

Put the roof back on just to see how it was going to look…

LED makes a very hot spot in the center of the roof. The reflected light should look good at night…

Close up of the incandescent and a view of the lit ceiling through the windows…

Several other angles…

Excavating the junction box to fix the polarity…

Polarity corrected and the positive feeder marked with a red band…

Parting shot with everything put back together…

Now I just need to run Dizzy by and be sure the shelter roof didn’t creep back into the clearance.

Ats ok, I likes pictures. (http://largescalecentral.com/externals/tinymce/plugins/emoticons/img/smiley-laughing.gif)

Last night the C.V.S.Ry. ran a night photo extra. I need to work on my long exposure technique as most were quite underexposed. These few were either good or tweakable. Here C-19 #8 arrives at Wall Station. 1.5 second exposure with a little moonlight fill from an LED flashlight…

Departing Wall, caboose markers bring up the rear. Same exposure details with a little post processing adjustment…

Long shot. Church and hotel in the background. Foreground lit with flashlight…

After turning on the wye, Extra #8 returns to Wall. Rocky stands guard on the platform in silhouette…

Sean waits inside the station for his orders…

A very dark view of the Hotel and Church at Wall…

Extremely long (5 seconds I think) exposure of the hotel. Fill light provided by white C-7 lamps on my porch…

The test with Dizzy earlier in the day passed with only about 1 scale inch of clearance, so the shelter was pushed back as far as it could go ending up with about 6 scale inches for Dizzy’s cab. The C-19 sits lower and narrower so it passes in comfort. I want to do some more night photo experiments with longer exposures and maybe a manual flash fill. That was, after all, the motivator behind this project. I also really enjoy looking out the window and seeing the buildings lit up at night.

I guess I can declare the Structure portion of this project DONE!!

Lookin’ good, John. I always enjoy night shots.

Great project John. You’ve inspired me to do the same.